
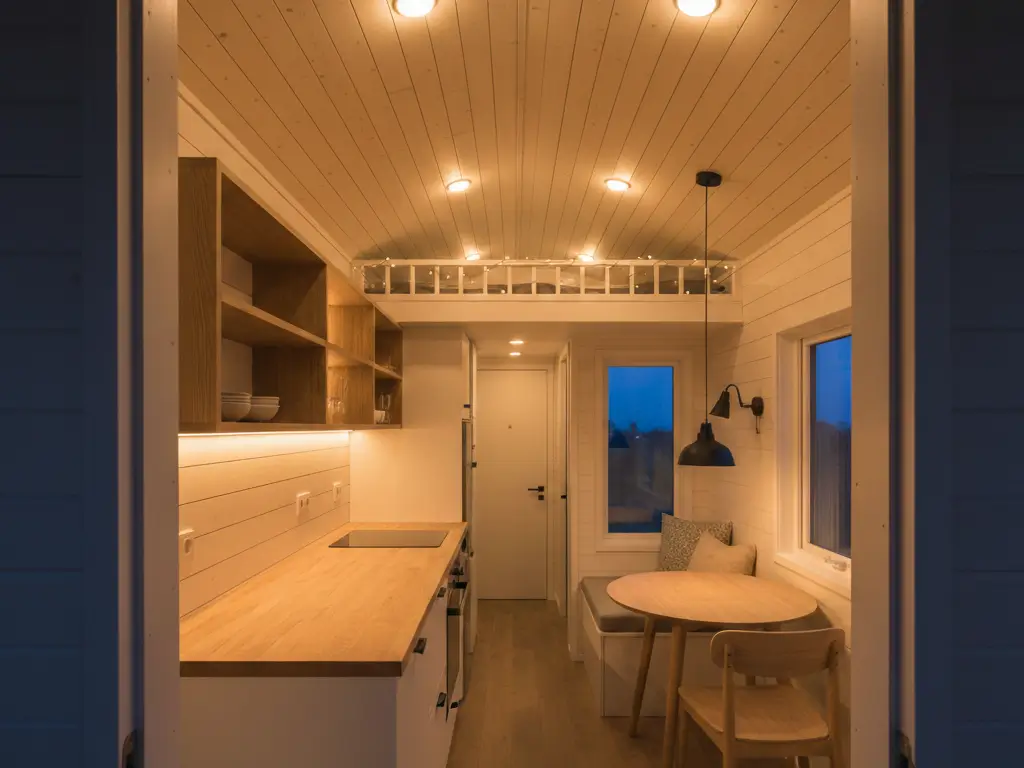
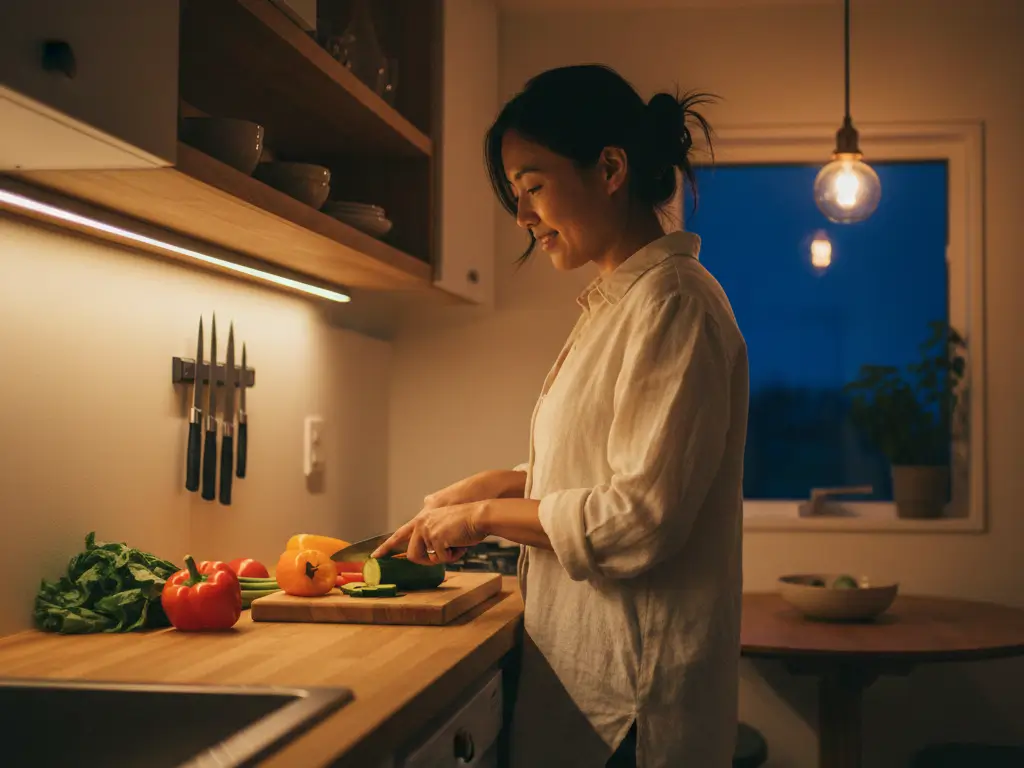
A single poorly placed overhead light can make your 280 sq ft tiny house feel like an interrogation room. I learned this the hard way after installing a too-bright ceiling fixture in my first small space, visitors squinted, shadows swallowed the corners, and the whole place felt clinical rather than cozy.
Layered lighting across three zones (ambient, task, and accent) using fixtures scaled for spaces under 400 square feet, with a target of 20-30 lumens per square foot for living areas.
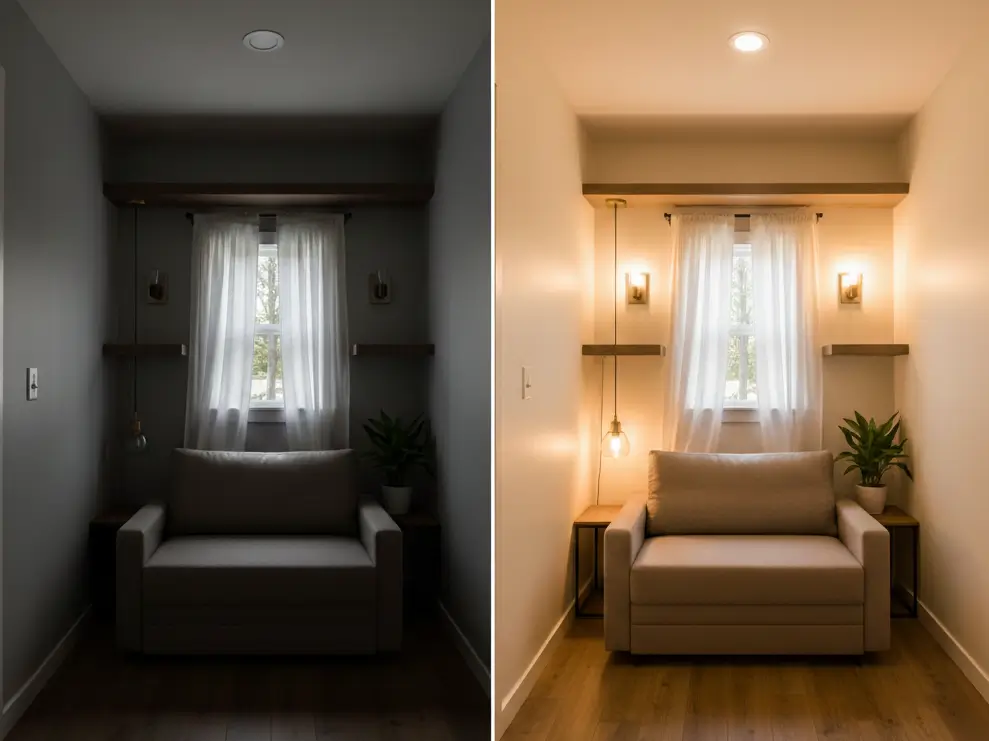
The challenge with tiny house lighting isn’t just picking pretty fixtures. It’s understanding that every light source has roughly 3x the visual impact in a 300 sq ft home compared to a 1,200 sq ft apartment. Get it wrong, and you’re living in either a cave or a fishbowl. Get it right, and your tiny space genuinely feels larger.
This guide covers everything from calculating your exact lighting needs to budget options starting at $15 for LED strip kits. I’ll walk you through what works for on-grid tiny houses, off-grid setups, and rental-friendly solutions you can take with you. Whether you’re building new or retrofitting an existing space, you’ll find measurements, brands, and real cost breakdowns.
How Much Light Does a Tiny House Actually Need?
Most tiny houses under 400 sq ft need 8,000-12,000 total lumens distributed across multiple fixtures. That’s roughly 20-30 lumens per square foot for living areas, 50-75 lumens for task zones like kitchens, and 10-15 lumens for relaxed spaces like sleeping lofts. One ceiling light won’t cut it.
The math sounds complicated, but here’s the simple version: multiply your square footage by 25 for a baseline lumen target. A 320 sq ft tiny house needs approximately 8,000 lumens total, but spread across 5-8 fixtures, not blasting from one source.
Why does distribution matter so much in small spaces? When you’re working with an 8-foot-wide floor plan, a single fixture creates harsh shadows that emphasize boundaries. Multiple smaller light sources blur those edges and trick the eye into perceiving more space.
Understanding Lumens, Watts, and Kelvin
Old-school wattage doesn’t mean much anymore. Here’s what to focus on:
- Lumens measure brightness. More lumens = more light output.
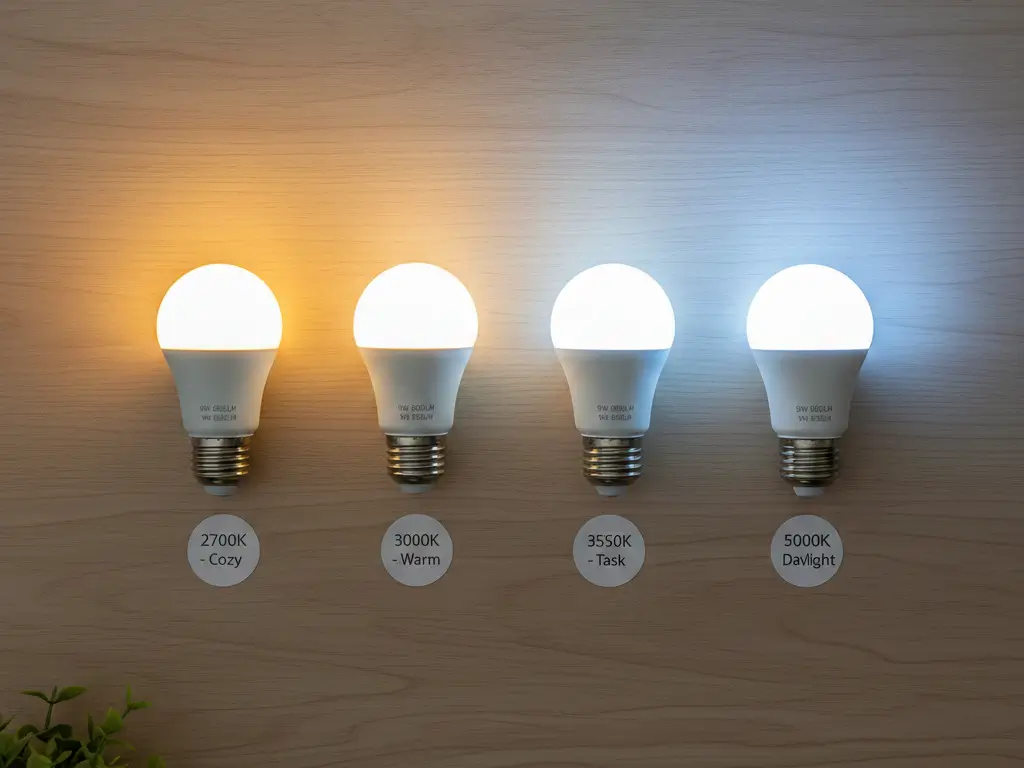
- Kelvin measures color temperature. Lower numbers (2700K-3000K) feel warm and cozy. Higher numbers (4000K-5000K) feel crisp and energizing.
- Watts now just indicate energy use, not brightness.
For tiny houses, I recommend sticking with 2700K-3000K bulbs throughout. Warmer light makes compact spaces feel intimate rather than cramped. The exception? Task lighting over your tiny kitchen counter can go up to 3500K for better visibility while cooking.
The Three-Layer Lighting Rule
Every well-lit tiny house uses three lighting layers:
| Layer | Purpose | Lumens Needed | Best Fixture Types |
| Ambient | General illumination | 15-25 per sq ft | Flush mounts, recessed cans, LED panels |
| Task | Work areas | 50-75 per sq ft | Under-cabinet strips, pendants, desk lamps |
| Accent | Mood and visual interest | 5-15 per sq ft | LED strips, picture lights, shelf lighting |
Missing any layer creates problems. Skip ambient light and you’re straining your eyes. Skip task lighting and your kitchen becomes dangerous. Skip accent lighting and the space feels flat.
What’s the Best Lighting Layout for Spaces Under 400 Square Feet?
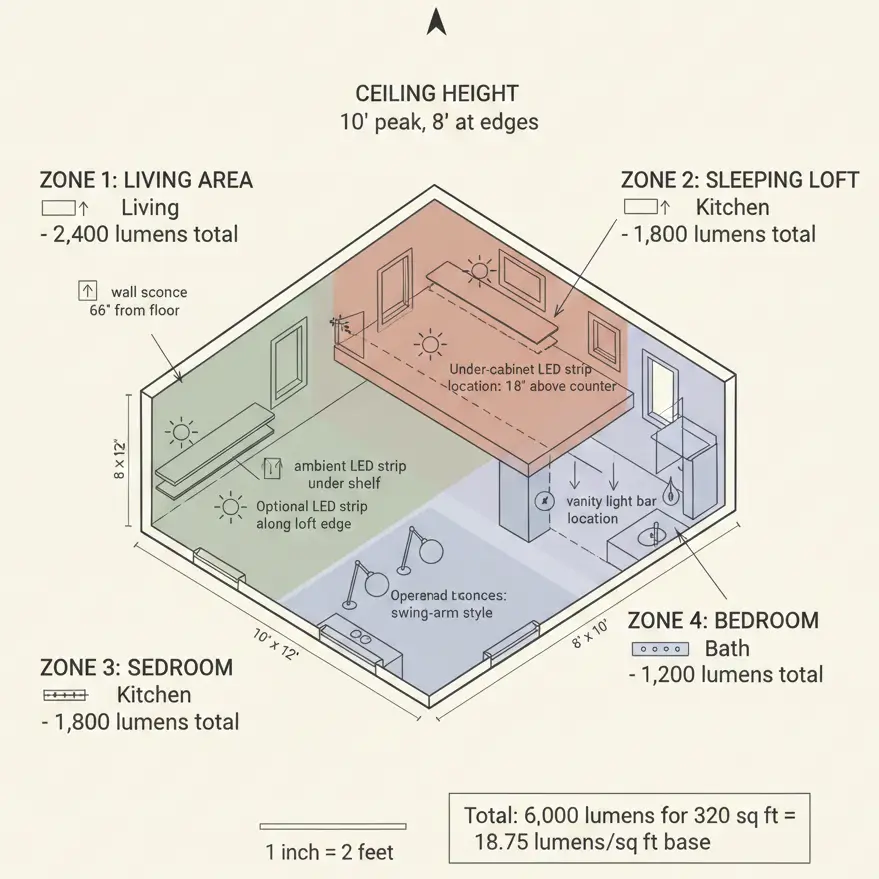
Divide your tiny house into 3-4 lighting zones based on function, not room divisions. Use vertical fixtures (wall sconces, pendant lights) to preserve limited floor and surface space. Plan for 2-3 light sources per zone, controlled by separate switches or dimmers.
The biggest mistake I see? Treating a tiny house like a miniature regular house. In a 1,500 sq ft home, you might have one ceiling light per room. Scale that down to 250 sq ft and you’ve got one light for your entire life. That’s not enough.
Instead, think zones:
- Living/Main Area: 2-3 ambient sources plus accent lighting
- Kitchen: Under-cabinet task lights plus one overhead ambient
- Sleeping Loft or Bedroom Area: Sconces or reading lights plus soft ambient
- Bathroom: Vanity lighting plus one overhead moisture-rated fixture
Vertical Lighting Strategies
Floor lamps eat 2-3 sq ft of precious real estate. Table lamps demand surface space you probably don’t have. This is why vertical lighting matters so much in tiny houses.
Wall-mounted options that work brilliantly:
- Swing-arm sconces ($35-$120): Adjust reach up to 24 inches; perfect beside loft beds
- Plug-in pendants ($25-$80): No hardwiring required; great for renters
- LED strip lighting ($15-$50): Mount under shelves, along ceiling edges, inside storage solutions
- Track lighting ($75-$200): One electrical box powers multiple adjustable heads
I installed a 6-foot track system with three adjustable heads in a 380 sq ft studio. Cost was $145 total (2024 prices from Home Depot). The single ceiling box now lights the kitchen, reading nook, and entryway, each head aimed differently.
Avoiding the Overhead-Only Trap
Here’s what I mean about vertical thinking: if your eyes travel up to find all light sources, the ceiling feels lower and the space shrinks visually. Mix high and low.
A 48-inch pendant hung 30 inches above a table creates an intimate dining zone. Under-cabinet LEDs at counter height provide task lighting at eye level. Wall sconces placed 66 inches from the floor offer ambient glow at human scale. This layering draws the eye around the space naturally.
Budget-Friendly Tiny House Lighting That Looks Custom
You can fully light a tiny house under 400 sq ft for $150-$400 using a mix of LED strips ($15-$40), plug-in pendants ($25-$60), and smart bulbs ($12-$30 each). The trick is choosing cohesive finishes and color temperatures so budget pieces look intentional.
Some of the best tiny house lighting setups I’ve seen cost under $300 total. The owners weren’t lucky, they were strategic.
DIY Budget Breakdown (Under $500)
| Item | Quantity | Cost Each | Total |
| LED strip kit (16 ft, warm white) | 2 | $18 | $36 |
| Plug-in pendant (IKEA HEMMA cord + shade) | 2 | $15 | $30 |
| Smart bulbs (Philips Hue White) | 4 | $15 | $60 |
| Swing-arm wall sconces | 2 | $40 | $80 |
| Under-cabinet LED bar (12 inch) | 2 | $22 | $44 |
| Dimmer switches or smart plugs | 3 | $18 | $54 |
| Total | $304 |
This setup gives you layered lighting across every zone with dimming capability. Compare that to the $800+ cost of hiring an electrician to add one recessed light.
Renter-Friendly Options
If you’re in a rental tiny home or small apartment, you need solutions that don’t require permanent installation.
Plug-in track lighting mounts with adhesive or screws into existing holes. Battery-powered motion sensor lights ($8-$15 each) work perfectly in closets and bathroom vanities. Command hook-mounted string lights create accent lighting without nail holes.
I’m partial to the IKEA SKURUP line for renters, affordable pendant fixtures with plug-in cords that install in minutes.
Where to Splurge vs. Save
Splurge on: Dimmers (better atmosphere control), one statement pendant (visual focal point), quality task lighting over work-from-home areas
Save on: Closet lighting (motion-sensor pucks are fine), ambient strip lighting (all warm-white LEDs look similar), secondary accent lights
Natural Light vs. Artificial Light: What Tiny Houses Need
Prioritize natural light through strategic window placement and reflective surfaces; it makes small spaces feel 30-40% larger subjectively. Supplement with artificial lighting that mimics daylight patterns, bright and cool in mornings, warm and dim in evenings.
Natural light is free, makes colors appear accurate, and psychologically expands small spaces better than any fixture. But most tiny houses have limited window real estate. So how do you maximize what you’ve got?
Amplifying Natural Light
Every tiny house should incorporate these strategies:
- Light-colored walls: Whites and pale neutrals reflect up to 80% of light. See our paint color guide for specific recommendations.
- Strategic mirrors: A 24″ x 36″ mirror opposite a window can effectively double perceived natural light.
- Sheer window treatments: Skip heavy curtains; they block 50% of available light.
- High-gloss or satin paint finishes: Reflect more light than matte surfaces.
For tiny houses on wheels, window placement matters enormously. South-facing windows in northern climates provide consistent daylight. Skylights or solar tubes can transform dark lofts.
Solar Tubes: The Underrated Option
Solar tubes (sometimes called sun tunnels) channel natural light through a reflective tube from roof to ceiling. Brands like Solatube offer 10-inch diameter models starting around $250 plus installation.
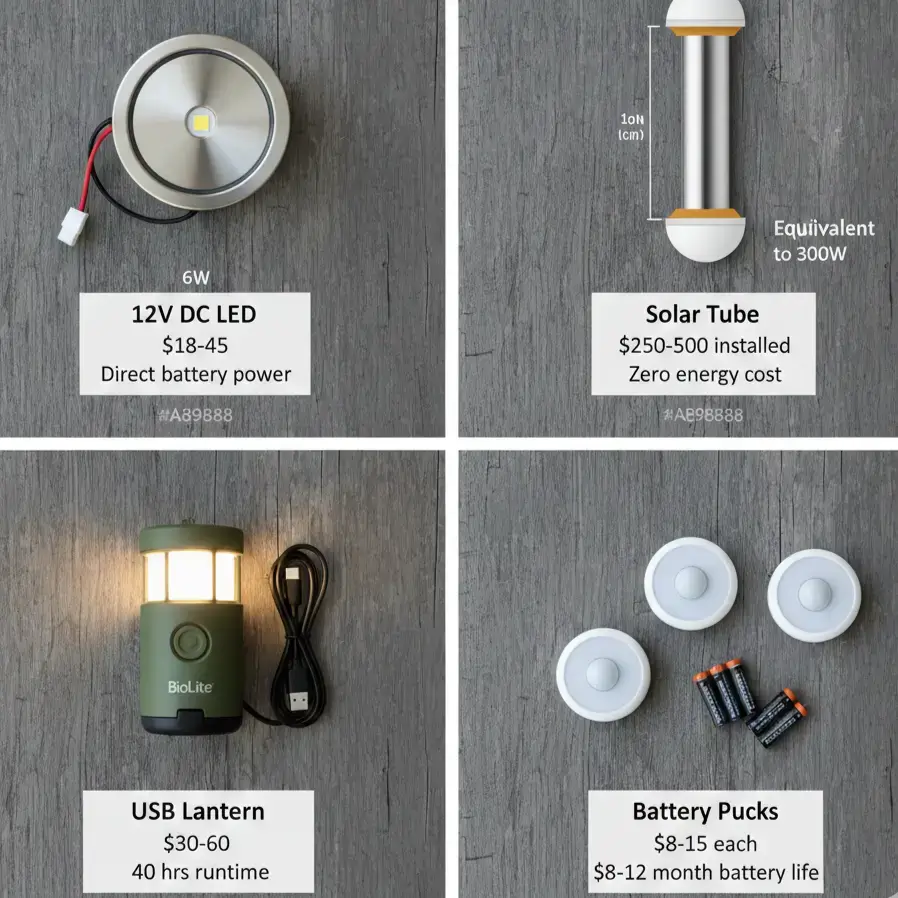
In a 300 sq ft tiny house, one 14-inch solar tube provides equivalent illumination to three 100-watt bulbs during daylight hours, completely free. They’re particularly valuable in sleeping lofts and bathrooms without exterior walls.
Matching Artificial Light to Circadian Rhythms
Here’s something most lighting guides miss: your tiny house lighting should change throughout the day. Bright, slightly cooler light (3500K) in the morning helps you wake up. Warm, dimmed light (2700K) in the evening signals your body to wind down.
Smart bulbs make this automatic. A 4-pack of tunable Philips Hue bulbs runs about $60 (2024) and can shift from 2200K to 6500K on schedule. In 250 sq ft, that’s the difference between a space that fights your biology and one that supports it.
Off-Grid and Solar Lighting Options for Tiny Houses on Wheels
Off-grid tiny houses should use 12V DC LED lighting systems drawing 30-50 watts total for basic needs. A 200-watt solar panel setup with 100Ah battery storage provides roughly 6-8 hours of evening lighting. Budget $400-$800 for a complete DIY system.
If your tiny house runs off-grid, lighting efficiency becomes critical. Every watt matters when you’re generating and storing your own power.
12V DC vs. 120V AC Lighting
Most off-grid tiny houses use 12V DC systems for lighting. Why? Converting solar power to 120V AC wastes 10-15% of your energy through the inverter. 12V DC LED fixtures run directly from your battery bank.
Marine and RV supply stores stock 12V LED fixtures designed for compact spaces. Expect to pay $15-$45 per fixture, comparable to standard household options.
Calculating Your Solar Needs
Here’s a simple calculation for lighting-only loads:
- List all lights with their wattage (e.g., 5 LED bulbs at 6W each = 30W total)
- Multiply by hours of use daily (30W × 5 hours = 150Wh daily)
- Add 25% for system inefficiency (150Wh × 1.25 = 187.5Wh)
- Size your battery for 2 days autonomy (187.5Wh × 2 = 375Wh, so ~31Ah at 12V)
- Size solar panels for your location (1 panel at 100-200W covers most needs)
For a complete off-grid tiny house including heating/cooling and appliances, you’ll need a much larger system. But lighting alone is surprisingly achievable on a modest solar setup.
Battery-Powered and USB-Rechargeable Options
For supplementary lighting or backup, USB-rechargeable lanterns and book lights work well. I keep a BioLite 330-lumen rechargeable lantern ($45) as my backup. It runs 40 hours on low, charges via USB, and doubles as a power bank.
Motion-sensor closet lights running on AAA batteries cost $8-$15 and last 6-12 months per battery set. They’re not glamorous, but they’re practical for spaces without wired connections.
Making Your Tiny House Feel Bigger With Light
The right lighting genuinely changes spatial perception. After testing various setups across three different tiny homes, here’s what I know works:
Prioritize lighting the perimeter and corners. When light reaches the edges of your space, walls visually recede. When light pools only in the center, boundaries close in.
Start simple. This week, add one LED strip along a dark shelf or under a cabinet, most cost under $20 and require no tools beyond scissors and adhesive. Notice how it opens that zone. Then layer from there.
If you’re planning a new build, rough in more electrical boxes than you think you need. Adding a junction box during construction costs $15-$25. Adding one later costs $150+ for an electrician’s minimum visit.
And if you’re still feeling stuck? Revisit your overall tiny house style. Lighting should complement your aesthetic, not compete with it. A Scandinavian minimal space calls for different fixtures than a rustic cabin build.
Your tiny house deserves lighting that makes it feel like exactly enough space, not too small, not overwhelming, just right for the life you’re building inside it.
For more guidance on creating a cohesive tiny home, explore our complete collection of design resources at Veniola.