People often ask me, “Where do the toys go?” But that’s the wrong question. The real question when designing a tiny house with kids is, “Where does the noise go when it’s raining?”
I’ve spent over a decade analyzing small space dynamics, and I’ve learned that raising children in under 600 square feet isn’t just about minimalism; it’s about logistics. It’s about calculating the “Sanity Ratio”, the balance between shared family zones and necessary private retreats.
If you are planning to move a family of three or four into a tiny home, or if you’re currently staring at a mountain of LEGOs in a 400-square-foot rental wondering if you’ve made a mistake, this guide is for you. We aren’t just going to talk about storage bins; we’re going to talk about architectural parenting.
From DIY privacy screens costing under $100 to investing in smart, convertible furniture, here is how to make tiny living work for the whole family.
The “Growth-Zone” Approach to Layouts
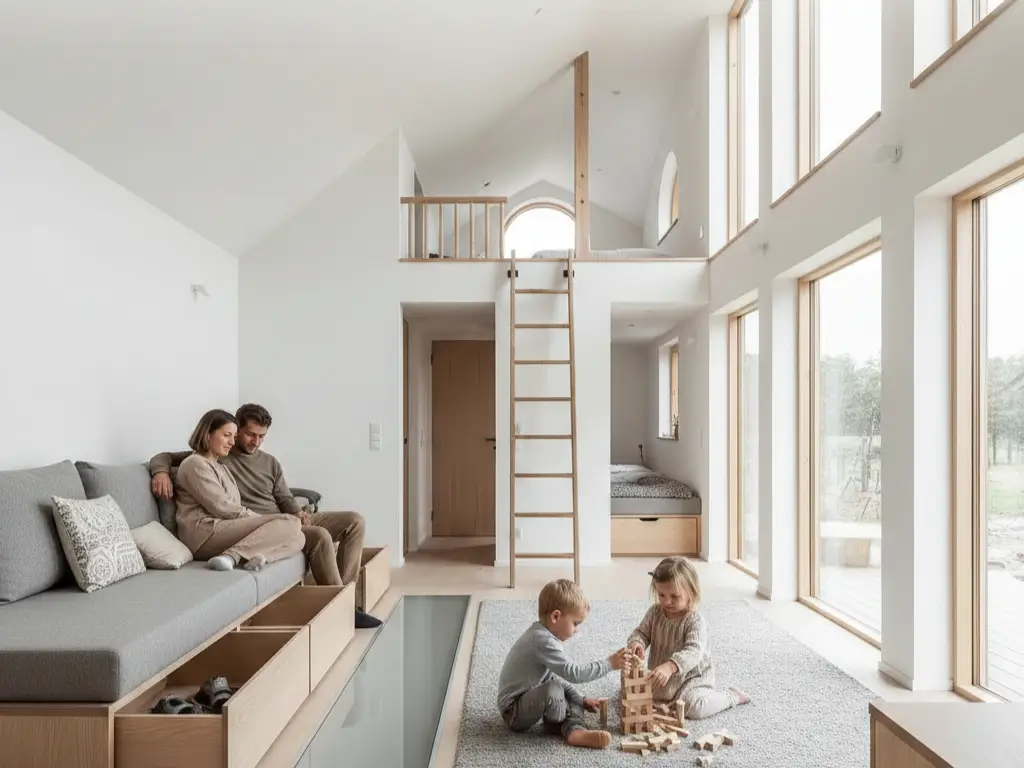
A successful tiny house layout for families requires 40-60 sq ft of dedicated personal space per child. This doesn’t mean a private room, but rather a “zone” defined by verticality. In a 400 sq ft footprint, prioritize a “Great Room” layout (min 12×12 ft) for active play, utilizing loft spaces solely for sleeping and quiet reading.
When you look at standard tiny house layout and floor plans, they often feature a single loft and a small downstairs bedroom. For a solo dweller, that’s fine. For a family? That’s a recipe for conflict.
The Verticality Rule
In my experience, kids don’t need significant floor space for sleeping; they need floor space for doing.
- 0-5 Years: They need ground-floor supervision. A trundle bed or a “play-pen” zone under a loft works best.
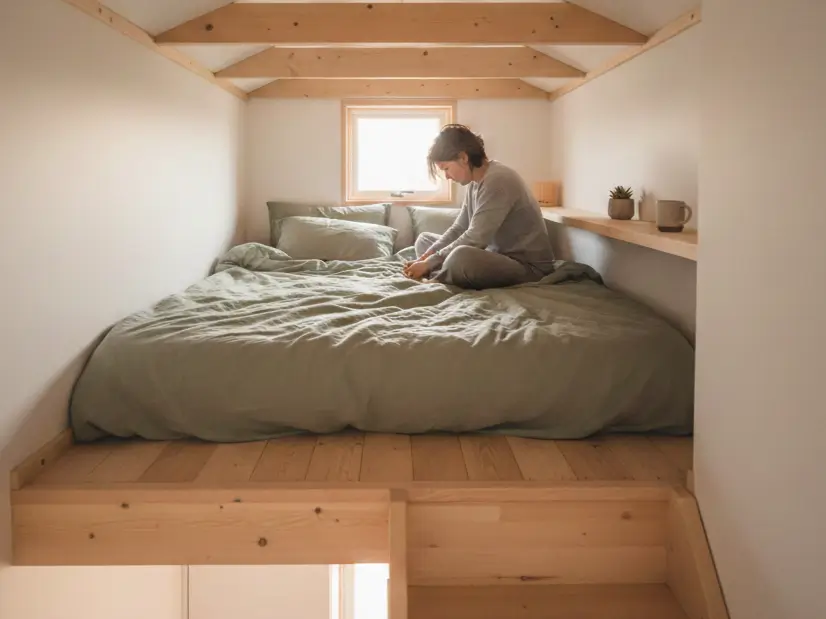
- 6-12 Years: They crave height. Loft spaces are magical here, provided you have at least 36 inches of head clearance to sit up and read.
- Teens: They need acoustic separation. This is the hardest phase in a tiny house.
If you are building from scratch, consider a “Gooseneck” trailer design or a split-level foundation. These allow for a stand-up bedroom over the hitch/foundation, giving a teenager or parents actual privacy without a ladder.
Traffic Flow and “Pinch Points”
In a standard home, a hallway is just a connector. In a tiny house, a hallway is wasted space. However, you need to avoid “pinch points.” If one person is cooking in the tiny house kitchen design, can a child run past them to get to the bathroom without a collision?
- Minimum Aisle Width: aim for 36 inches (standard is 30-32 in tiny homes, but adding 4 inches saves relationships).
- The “Runway” Effect: Keep the central corridor clear of permanent furniture. Use folding tables to maintain a clear line of sight from one end of the house to the other.
Privacy Solutions: Visual vs. Acoustic
Privacy isn’t just about doors; it’s about sound dampening. For budgets under $500, install heavy velvet curtains (absorb up to 10dB) on ceiling tracks. For permanent builds, use solid-core pocket doors rather than hollow core, and insulate interior partition walls with rock wool to dampen high-frequency noise (screams/laughter).
A client once told me her biggest regret was the “open concept” bathroom door, a sliding barn door with inch-wide gaps. When living in 350 sq ft, bathroom privacy is non-negotiable.
The Barn Door Fallacy
Sliding barn doors are popular in tiny homes because they save swing space. However, they are terrible for sound.
- The Fix: If you use a slider for a kid’s room or bathroom, build out the door jamb so the door slides into a U-channel, sealing the gap.
- Alternative: Bi-fold doors take up 50% less swing space than standard doors but seal tighter than sliders.
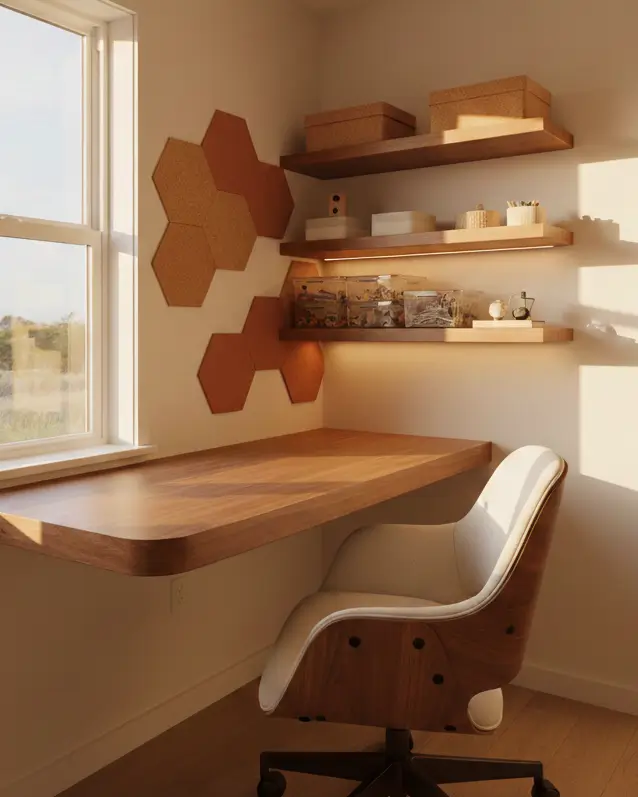
Creating “Micro-Retreats”
Children need a place to hide. Not from danger, but from you.
- The Reading Nook: Convert a closet floor or a window seat into a dedicated nook.
- Bunk Bed Curtains: Simple tension rods with thick fabric inside a bunk bed create a private world.
- Headphone Stations: Install dedicated hooks and charging ports for noise-cancelling headphones in the main living area. This is a vital tiny house electrical system consideration, plan your outlets for where people will sit to “zone out.”
Toy Storage: The “Floor is Lava” Strategy
In small spaces, floor space is premium real estate. The most effective storage strategy for kids is vertical rotation. Keep 20% of toys accessible on low shelves (under 24″ height) and 80% stored in high cabinets or outdoor sheds, rotating them weekly. This reduces visual clutter and keeps toys “fresh.”
Vertical Storage Systems
You cannot afford deep toy chests; they become black holes that eat floor space. Instead, look at tiny house storage solutions that utilize wall depth.
- Between the Studs: If you are building, leave the wall cavities open between studs (typically 14.5 inches wide by 3.5 inches deep). This is perfect for books, action figures, or craft supplies.
- Magnetic Walls: Paint a section of the wall with magnetic primer. It turns the wall into a play surface for magnetic tiles, keeping them off the floor.
The “One-Touch” Rule
We implemented this rule in a 500 sq ft layout: Every item must be retrievable with one hand motion. If a child has to unstack three boxes to get a truck, they won’t put it back.
- Open Bins: Use angled bins (like produce displays) anchored to the wall.
- Under-Floor Storage: If you build on a trailer, utilize the toe-kick space under cabinets (approx. 4 inches high) for flat drawers holding puzzles or art paper.
Safety Considerations: Loft Living with Little Ones
Standard ladders are dangerous for kids under 6. Storage stairs (stairs with built-in drawers) are the gold standard but require approx. 15-20 sq ft of floor space. If space is too tight for stairs, consider an alternating tread ladder (Jefferson stairs), which offers stair-like stability at a ladder’s steep angle.
Loft Safety Specifications
If your tiny house bedroom design involves a loft for children, you need to exceed standard building codes for safety.
- Railing Height: Standard is 36 inches. For lofts where kids play (and might jump), I recommend 42 inches or floor-to-ceiling netting.
- Netting: High-tensile cargo netting is a brilliant solution. It allows light and airflow (preventing the loft from getting stuffy) but provides a physical barrier that kids can’t climb over. Plus, it doubles as a hammock floor for reading.
Egress Windows
Every sleeping zone must have an exit. In a loft, this usually means a skylight or a specialized egress window. Ensure the latch is accessible to a child, and practice “fire drills” regularly.
Finishes: Indestructible Interiors
Tiny houses see 3x the wear and tear of standard homes because you walk on the same patch of floor 50 times a day. Choose High-Pressure Laminate (HPL) or luxury vinyl plank (LVP) for floors. For walls, use eggshell or satin finishes, never flat paint, to ensure scrubbability.
Wall Protection
Kids touch walls. Constantly. In a narrow hallway, their shoulders brush the drywall.
- Wainscoting: Install beadboard or plywood wainscoting up to 48 inches. Paint it with a semi-gloss, durable paint. It’s easier to clean than drywall and protects against dings.
- Low-VOC Options: In a small air volume, off-gassing chemicals are more concentrated. Always opt for low-VOC paint for tiny houses to protect developing lungs.
The Mudroom Factor
You might think you don’t have space for a mudroom. You are wrong. With kids, a “drop zone” is more important than a second nightstand.
- Exterior Hooks: If the climate allows, keep muddy gear outside under an awning.
- Shoe Storage: Use a vertical shoe rack immediately inside the door.
- Wall Protection: Use a scrubbable paint finish for small spaces in the entry zone.
The Outdoor Connection
The secret to surviving a tiny house with kids is to expand the house outwards. A 400 sq ft house with a 200 sq ft covered deck feels like a 600 sq ft home. The deck becomes the “messy play” zone for crafts, sensory bins, and meals.
When properly designed, your outdoor space serves as the second living room.
- Decking: Ensure the transition is seamless. French doors that open out can double your visual space.
- Awning/Coverage: This is critical. If it rains and you can’t go outside, the tiny house shrinks. A translucent polycarbonate roof over a deck allows light in but keeps the rain out.
Comparison: Sleeping Arrangements
Here is how different sleeping setups impact usable square footage and privacy.
| Setup | Floor Space Used | Privacy Level | Age Suitability | Small Space Impact |
| Twin Bunk Beds | 20 sq ft | Medium (with curtains) | Ages 4-16 | Efficient use of vertical space; dominates visual field. |
| Loft Bed (Desk Under) | 20 sq ft | High (visual) | Ages 7+ | Excellent multi-use; creates a “private room” feel. |
| Murphy Bed | 0 sq ft (day) / 30 sq ft (night) | Low | All Ages | Maximizes play space during day; requires daily setup effort. |
| Trundle Bed | 20 sq ft (pull out) | Low | Ages 2-10 | Good for low ceilings; sacrifices under-bed storage. |
For a deeper dive into customized wood solutions for these beds, check our guide on wood furniture for small spaces.
Conclusion
Living in a tiny house with kids isn’t about forcing a traditional lifestyle into a smaller box; it’s about reinventing how you interact. It requires being ruthless about clutter and intentional about design.
The trade-off for the lack of square footage is often financial freedom and more time spent outdoors together. But let’s be honest, it also means you will hear every sneeze and stumble over every misplaced shoe.
- If you haven’t used a toy in 3 months, bin it or donate it.
- Look at your walls. Is there dead space above the door frames? That’s your new storage.
- Design the outdoor deck or the reading nook before you finalize the kitchen counters.
If you are ready to start choosing materials that will survive your toddlers, explore our guide on tiny house wall materials to ensure your walls can take a beating.
For more resources on making small spaces work, visit veniola.com.