When I first tried to wash a 12-quart stockpot in a standard “apartment-sized” sink (15 inches wide), I ended up with more water on the floor than in the drain. It’s a common initiation rite for tiny house dwellers. You assume that because the house is small, the fixtures should be miniature.
Actually, scratch that. In a tiny house kitchen, usually spanning just 40 to 60 square feet, your fixtures need to work twice as hard as standard ones.
If you are building a tiny home on wheels (THOW) or renovating a 400-square-foot studio, the kitchen fixtures you choose will dictate your daily workflow. The wrong faucet splashes water onto your only dry prep zone. The wrong sink eats up precious countertop real estate without giving anything back.
The Golden Rule of Tiny Fixtures: Never install a fixture that performs only one function. Your sink must also be a cutting board. Your faucet must also be a pot-filler.
From $150 DIY upgrades to $600 investment pieces, let’s look at the fixtures that actually fit, function, and last in small spaces.
What Size Sink Fits a Tiny House?
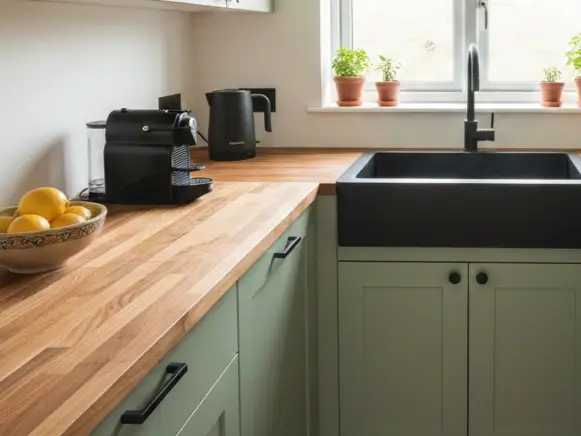
For tiny houses under 400 sq ft, the ideal sink width is 20 to 24 inches. Avoid “bar sinks” (15 inches or less) as they are impractical for washing dishes. A 24-inch workstation sink offers the best utility-to-space ratio, allowing you to cover the basin with a cutting board to reclaim counter space.
The Argument for the “Workstation” Sink
In a standard home, the sink is a hole in the countertop. In a tiny house, that hole represents about 20% of your total counter surface. You can’t afford to lose that space.
I recommend looking for a Workstation Sink in the 21-24 inch range. These sinks have an integrated ledge on the inside rim that supports accessories like:
- Cutting boards (flush with the counter)
- Roll-up drying racks
- Colanders
When the cutting board is in place, your sink becomes a countertop again. If you have a 6-foot galley kitchen, a 24-inch workstation sink effectively gives you 6 feet of counter space when covered, versus 4 feet if you used a standard drop-in sink.
Depth Matters More Than Width
If you are restricted to a narrow cabinet base (say, 18 inches), you might be forced into a narrower sink. To compensate, go deep.
- Standard Depth: 7-8 inches
- Tiny House Recommended Depth: 9-10 inches
That extra 2 inches of depth allows you to stack dishes vertically, keeping them hidden from view in an open-concept layout. Just be careful with under-sink storage; a 10-inch deep sink plus a garbage disposal leaves very little room for plumbing trapwork in a tiny cabinet.
Pro Tip: Check your plumbing rough-in height. If your drain pipe enters the wall too high, a deep sink won’t drain properly. You need gravity on your side.
For more on integrating sinks into your layout, check our guide on tiny house kitchen design.
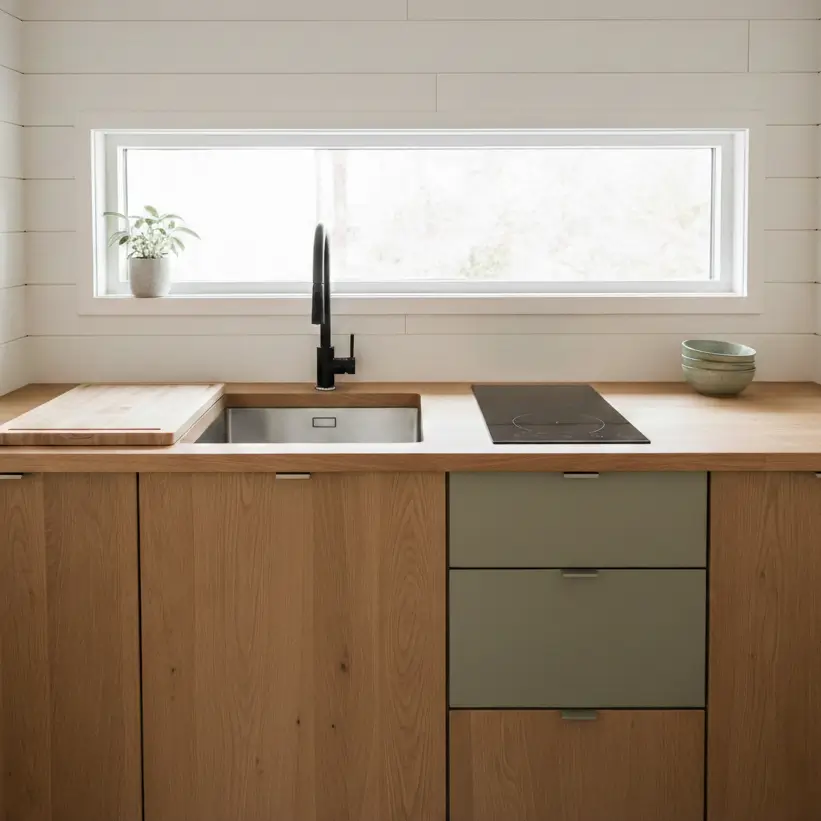
Faucets: High-Arc vs. Pull-Down for Low Clearance
For small kitchens, choose a single-handle pull-down faucet with a height of 15-17 inches. Avoid widespread two-handle faucets (they waste counter space). If you have overhead cabinets or lofts, ensure the faucet lever doesn’t hit the backsplash or upper obstructions when fully open.
The Splash Radius Calculation
One thing people forget: water pressure + shallow sink + high faucet = wet living room.
In a tiny house, your kitchen might be three feet from your sofa. You need a faucet with a switchable spray head. The “stream” function is for filling; the “spray” function is for cleaning.
- Reach: Look for a spout reach of 8-9 inches. If the reach is too short, you’re banging your knuckles against the back of the sink.
- Height: A high-arc (gooseneck) faucet helps you fill tall bottles, but measure your clearance. If you have a storage loft directly above the kitchen, ensure you have at least 20 inches of vertical clearance.
RV vs. Residential Faucets
Are you parking permanently or traveling?
- Residential Fixtures: Heavier, made of brass/metal, better flow rate (2.2 GPM), standard 3/8″ compression fittings. Best for tiny houses on foundations.
- RV Fixtures: Lightweight plastic, lower flow rate, designed for road vibration. Best for strict weight limits.
Honestly, unless you are strictly counting ounces for towing, stick with residential faucets. The plastic internals of RV faucets often crack after a few seasons of hot/cold fluctuations. For specific plumbing connections, review our tiny house plumbing systems guide.
Lighting Fixtures: The Layered Approach
Single overhead fixtures create shadows in small kitchens. Use LED under-cabinet strip lighting (3000K-4000K) as your primary task light. It requires zero footprint and costs under $50. Recessed 4-inch wafer lights work best for general ambient light in ceilings lower than 7 feet.
Task Lighting is Non-Negotiable
In a compact space, you are often standing directly under the main ceiling light, casting a shadow on your work surface.
I tested this in a 160 sq ft build: relying on one central fixture made chopping vegetables dangerous. The solution is linear LED strips.
- Profile: Look for ultra-thin aluminum channels (0.5 inch height).
- Power: 12V DC systems are efficient and can run directly off battery banks in off-grid tiny house systems.
Avoid Pendants in Traffic Zones
Pendants look great on Pinterest, but in a tiny house, they are “head-bangers.” If your ceiling is 7 feet (common under lofts), a pendant hanging down 12 inches puts the bulb at 6 feet, right at eye level for many.
- Alternative: Flush mount or semi-flush fixtures.
- Placement: If you must use pendants, place them strictly over the sink or dining bar where you won’t be walking.
For a broader look at illuminating small spaces, see our article on tiny house lighting solutions.
Comparison: Materials and Weight
Stainless steel is the lightest durable option for sinks (10-15 lbs). Fireclay and cast iron sinks look beautiful but can weigh 80-100+ lbs, requiring reinforced cabinetry framing. Composite granite offers a middle ground for durability and aesthetics without extreme weight.
| Material | Weight (24″ Sink) | Durability | Cost | Best For |
| Stainless Steel (16 gauge) | 12-18 lbs | High | $150-$400 | THOWs, Modern look |
| Granite Composite | 30-40 lbs | Very High | $250-$500 | Stationary Tiny Homes |
| Fireclay/Ceramic | 60-90 lbs | Medium (Can chip) | $400-$900 | Farmhouse Aesthetic |
| Copper | 20-30 lbs | High (Patina) | $600+ | Rustic/Custom builds |
The Weight Debate
If your tiny house is on wheels, every pound counts towards your GVWR (Gross Vehicle Weight Rating). Installing a 90 lb farmhouse sink at the very rear of the trailer can affect tongue weight and towing stability. See tiny house on wheels specifications for more on weight distribution.
However, if you are on a foundation, I love the thermal properties of granite composite. It doesn’t sound “tinny” like stainless steel when you drop a fork, and it holds heat well for soaking dishes.
Specialized Compact Appliances & Fixtures
For dishwashing, an 18-inch drawer dishwasher saves space and water usage. For cooking, consider a 2-burner induction cooktop (drop-in) rather than a full range, which frees up 10-12 inches of counter width.
The 18-Inch Dishwasher
Is a dishwasher a luxury in a tiny house? Not necessarily.
- Water Efficiency: Modern compact dishwashers use 3-4 gallons per load. Hand washing the same amount usually consumes 15-20 gallons. If you are hauling water or have limited tank capacity, the dishwasher is actually the eco-friendly choice.
- Hidden Storage: When clean, the dishwasher acts as a storage rack for your plates.
Pot Fillers in Small Spaces?
You might see pot fillers in luxury mansions, but they make sense in tiny homes too. Why? Because your sink might be small and crowded. A wall-mounted cold water tap over the stove allows you to fill the kettle or pasta pot without clearing the dishes out of the sink first. It separates the “water access” function from the “cleaning” function.
Before cutting holes in your countertop, verify your dimensions with tiny house measurements standards.
Installation Tips for Tight Spaces
When plumbing a tiny house kitchen, access is your enemy. In a standard house, you have a roomy 36-inch cabinet. In a tiny house, your sink plumbing might share space with the wheel well, the water heater, and the trash can.
- Pre-Assemble: Mount the faucet and drain assembly to the sink before you drop the sink into the countertop. Trying to tighten a nut while lying on your back in a 24-inch cabinet is a nightmare.
- PEX Plumbing: Use PEX piping rather than rigid copper. It’s flexible, forgiving, and resistant to freeze damage, essential for thinner walls.
- Shut-Off Valves: Ensure your shut-off valves are accessible. Don’t bury them behind the water heater.
For details on the walls behind your fixtures, check tiny house wall materials.
Synthesizing Your Kitchen Setup
Choosing tiny house kitchen fixtures isn’t just about scaling down; it’s about scaling up utility.
A 24-inch workstation sink with a high-arc pull-down faucet is the MVP of tiny living. It bridges the gap between a kitchenette and a chef’s kitchen. It allows you to prep, wash, and dry in a singular footprint.
- Measure your largest pot. Ensure the sink basin you choose can accommodate it flat.
- Check your weights. If you are on wheels, stick to stainless steel.
- Plan your verticality. Ensure your faucet doesn’t block window openings or hit overhead storage.
Don’t settle for RV plastics if you plan to live in your home full-time. Invest in quality residential brass fixtures; your daily quality of life depends on them.
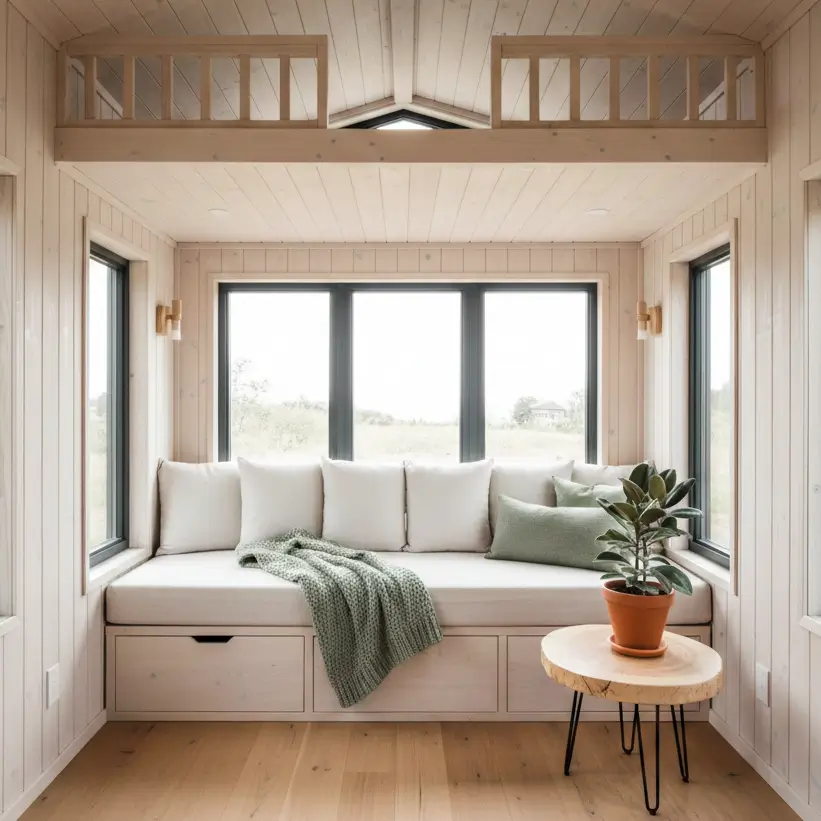
For more inspiration on finishing your space, explore wood interior elements or dive into tiny house interior aesthetic.