When I first moved into a 350-square-foot studio, I decided to refinish a thrifted oak dining table. I used a standard oil-based polyurethane. Big mistake. Within two hours, the fumes were so concentrated in that small air volume that I had to sleep at a friend’s house for three days.
In a large suburban home, off-gassing finishes dissipate into 2,500 square feet of air. In a tiny house or small apartment, that “new paint smell” isn’t just annoying, it’s a concentrated health hazard.
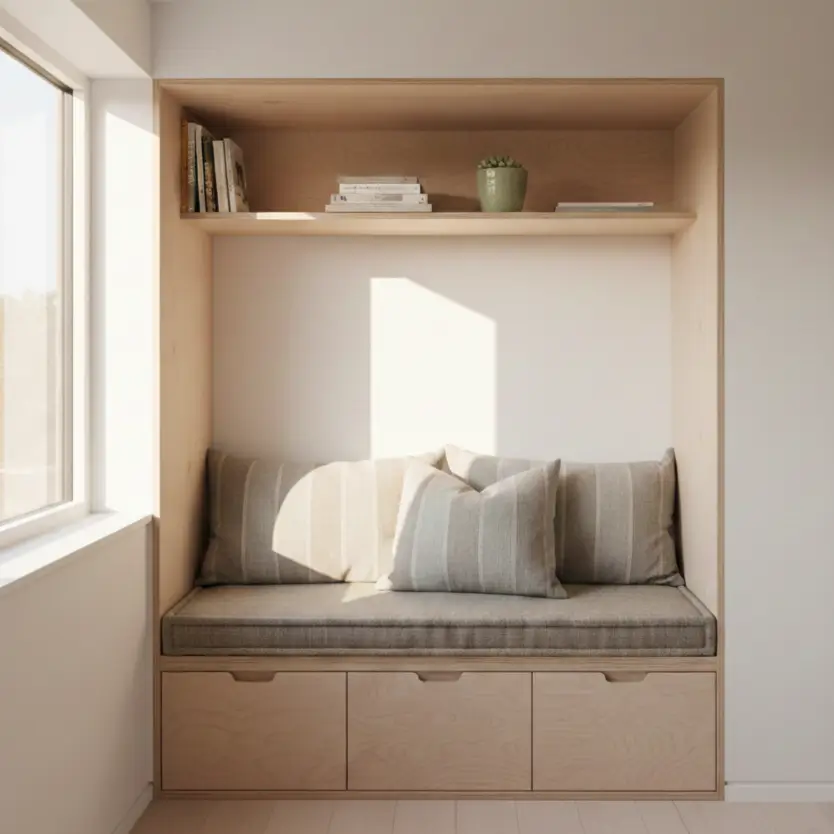
Wood treatment finishing in compact living isn’t just about aesthetics; it’s about air quality, cure times, and extreme durability. In a tiny home, your kitchen counter might double as a desk, a workbench, and a dining table. That surface sees 10x the traffic of a normal countertop.
Here is how to protect your wood surfaces without poisoning your air or breaking the bank.
The Air Volume Problem: Why Standard Finishes Fail
Why Low-VOC Wood Treatment Finishing Matters in <400 Sq Ft? In spaces under 400 sq ft, standard finishes with high Volatile Organic Compounds (VOCs) create dangerous fume concentrations. For tiny homes, always choose finishes with <50g/L VOCs. Water-based polyurethanes and natural hardwax oils are safest, curing faster and off-gassing significantly less than oil-based alternatives.
The Math of Toxicity
The smell of traditional varnish comes from solvents evaporating. In a tiny house with roughly 3,000 to 4,000 cubic feet of air, a quart of high-VOC varnish can spike indoor pollution levels to hazardous heights within minutes.
When selecting materials for your wood interior elements, you must check the Technical Data Sheet (TDS) for the VOC count.
- High VOC: >350 g/L (Avoid in small spaces)
- Low VOC: <50 g/L (Safe with ventilation)
- Zero VOC: 0 g/L (Best for occupied tiny homes)
Light Reflectance and Space Perception
Beyond safety, the finish sheen affects how large your room feels.
- Gloss: Reflects light but highlights imperfections. In a tight space where you are inches away from surfaces, scratches become obvious.
- Matte/Satin: Hides dust and scratches better. This is usually the superior choice for wood furniture in small spaces that see heavy daily use.
Note: Ideally, finish your wood outside before bringing it in. If you must finish inside an occupied apartment, cross-ventilation is non-negotiable, even with low-VOC products.
Hardwax Oil vs. Water-Based Polyurethane for Tiny Homes
Hardwax Oil (e.g., Osmo, Rubio) is best for DIYers; it’s repairable, low-VOC, and costs ~$0.50/sq ft. Water-Based Polyurethane is best for surfaces needing a hard plastic-like shell (floors/cabinets), costing ~$0.30/sq ft. Avoid oil-based poly due to fumes and long cure times.
Option A: Hardwax Oils (The Sustainable Choice)
Hardwax oils are my top recommendation for wood materials in tiny houses. They penetrate the grain rather than sitting on top.
- Pros:
- Zero to Low VOCs: Many are plant-based.
- Spot Repairable: If you scratch your 12 sq ft tiny house floor, you can sand and re-oil just that 2-inch spot. You don’t have to refinish the whole floor.
- Natural Feel: Keeps the wood feeling like wood, not plastic.
- Cons:
- Maintenance: Requires a “refresh” coat every 12-18 months.
- Cost: Expensive upfront ($50+ per can), but coverage is massive (up to 300 sq ft per liter).
Option B: Water-Based Polyurethane (The Durable Shell)
If you are sealing tiny house kitchen fixtures or cabinets that get splashed frequently, water-based poly provides a solid film.
- Pros:
- Fast Dry Time: Dries to touch in 30 minutes; recoat in 2 hours.
- Clear Finish: Doesn’t yellow over time like oil-based poly.
- Cost Effective: Generally cheaper per quart than premium oils.
- Cons:
- Hard to Repair: If it scratches, you generally have to sand the whole surface to fix it seamlessly.
- Raised Grain: The water content can swell wood fibers, requiring sanding between coats.
Option C: Pure Tung Oil (The Patient Approach)
For food-safe surfaces like tiny house countertops, pure Tung oil is the gold standard of safety.
- Warning: It takes 15 to 30 days to fully cure. In a tiny house where you can’t cordon off a counter for a month, this is usually impractical unless applied before moving in.
Application Strategies for Occupied Small Spaces
How to Apply Wood Treatment Finishing in Tight Quarters? Clear a 5×5 ft work zone near a window. Use a dust-free application method (rag or foam brush) to minimize airborne particles. Maintain temperature between 65°F-75°F. For floors, work from the furthest corner toward the exit. Plan for a 24-hour “no-touch” period.
The “Tetris” Method of Finishing
Living in 600 sq ft means you don’t have a workshop. You have to live where you work.
- Vertical Staging: If finishing cabinet doors or shelves, use drying racks to utilize vertical space.
- Dust Control: In a small apartment, dust from your bed or rug settles on wet finish.
- Tip: Vacuum the room 2 hours before starting. Let the dust settle, then wipe surfaces with a tack cloth.
- The “Rag-On” Technique: Instead of brushing, use wiping varnish or oil. It applies thinner layers that dry faster (crucial when you need your table back for dinner).
If you are dealing with moisture-prone areas, review our guide on bathroom paint moisture solutions, as wood in tiny bathrooms requires specific marine-grade or exterior-rated sealers to prevent mold.
Maintaining Wood Finishes in High-Traffic Tiny Homes
Clean surfaces weekly with a pH-neutral cleaner (avoid vinegar on oils). For hardwax oil floors, apply a maintenance oil every 1-2 years. For polyurethane, inspect for cracks annually. Immediate water cleanup is vital for all finishes in small spaces due to high localized wear.
The Multi-Function Wear Factor
In a tiny house, your floor isn’t just a hallway; it’s a gym, a play area, and a workspace. This concentrated foot traffic wears down finishes 3x faster than in a large home.
- Weekly: Dry dust with a microfiber cloth.
- Monthly: Damp mop with a cleaner specific to your finish (e.g., Osmo Wash and Care for oiled floors).
- Annually: Inspect wood joinery techniques for gaps where moisture might penetrate the finish.
If you notice your wood looking gray or dry, it’s time to re-oil. Ignoring this leads to permanent water stains, which might force you to replace the wood entirely, a costly headache.
Also, consider how your indoor plants in small apartments interact with wood. Pot rings are the number one killer of wood finishes. Always use cork or felt coasters under planters to allow airflow and prevent trapped moisture.
Wood Finishing Cost Analysis for a 200 Sq Ft Project
DIY finishes range from $30 to $150 for a typical tiny house project (approx. 200 sq ft of surface). Water-based poly is the budget winner ($40), while premium Hardwax Oil ($120) offers better long-term value through easy repairs.
| Finish Type | Material Cost (Est.) | Coverage (per Qt/L) | VOC Level | Cure Time | Best For |
| Boiled Linseed Oil | $15 – $20 | 100-150 sq ft | Medium | 3-7 days | Low-traffic, rustic look |
| Water-Based Poly | $25 – $40 | 125 sq ft | Low (<100g/L) | 24 hours | Cabinets, shelving |
| Premium Hardwax Oil | $50 – $60 (0.75L) | 250+ sq ft | Very Low/Zero | 24-48 hours | Floors, countertops |
| Shellac Flakes | $30 – $40 | Varies | Medium (Ethanol) | 1-2 hours | Antique repair, sealer |
Note: Prices reflect average US costs as of 2024.
If you are on a tight budget, check our paint budget cost analysis to see where else you can save money to afford a better wood finish. Investing in a quality finish now prevents sanding dust from ruining your life later.
Also, if you are incorporating painted elements alongside your wood, understanding painting over paint and wall treatments ensures your transition lines stay crisp and durable.
Waterproofing Wood in Wet Zones
Use Epoxy or Marine Varnish for sink surrounds. These seal wood completely but look plastic-y. For a natural look, use Pure Tung Oil (6+ coats) or Nano-coating sealers. Never use wax alone in wet zones; it turns white (water spots) and offers zero heat resistance.
The Kitchen Counter Dilemma
In a tiny house kitchen, the counter is the workhorse.
- Butcher Block: Requires monthly oiling with mineral oil (food safe, cheap) or a one-time finish with a food-safe curing oil like Waterlox (higher VOC, apply outside!).
- Epoxy Bar Top: Indestructible and waterproof, but hard to apply in a lived-in space due to messy mixing and curing times.
When planning your tiny house plumbing systems, ensure your sink cutouts are sealed before dropping the sink in. Moisture wicking into the end grain of a countertop is the fastest way to rot your cabinetry.
For bathrooms, wood is risky but beautiful. If you use it, ensure you have excellent ventilation. Refer to our tiny house ventilation guide to ensure humidity doesn’t destroy your hard work.
Final Thoughts
Refinishing wood in a tiny home is a balancing act between durability and toxicity. In my experience, the extra $40 for a premium hardwax oil pays for itself the first time you scratch the floor and fix it in 5 minutes with a rag, rather than renting a sander and moving all your furniture out.
- Calculate total square footage of wood needing coverage.
- Buy a sample pot (usually $5-10) and test the smell and sheen on a scrap piece inside your home.
- Plan your “ventilation strategy” before opening the can.
Choosing the right wood treatment finishing protects your investment and keeps your small space healthy. For more details on building out your space, check our tiny house decorating basics.