
I once spent three days scraping peeling paint off the ceiling of a 35-square-foot bathroom in a vintage Airstream. I thought I had done everything right the first time, I bought the “white paint” from the hardware store and slapped it on. Two months later, the humidity from daily showers in such a confined space turned that paint into confetti.
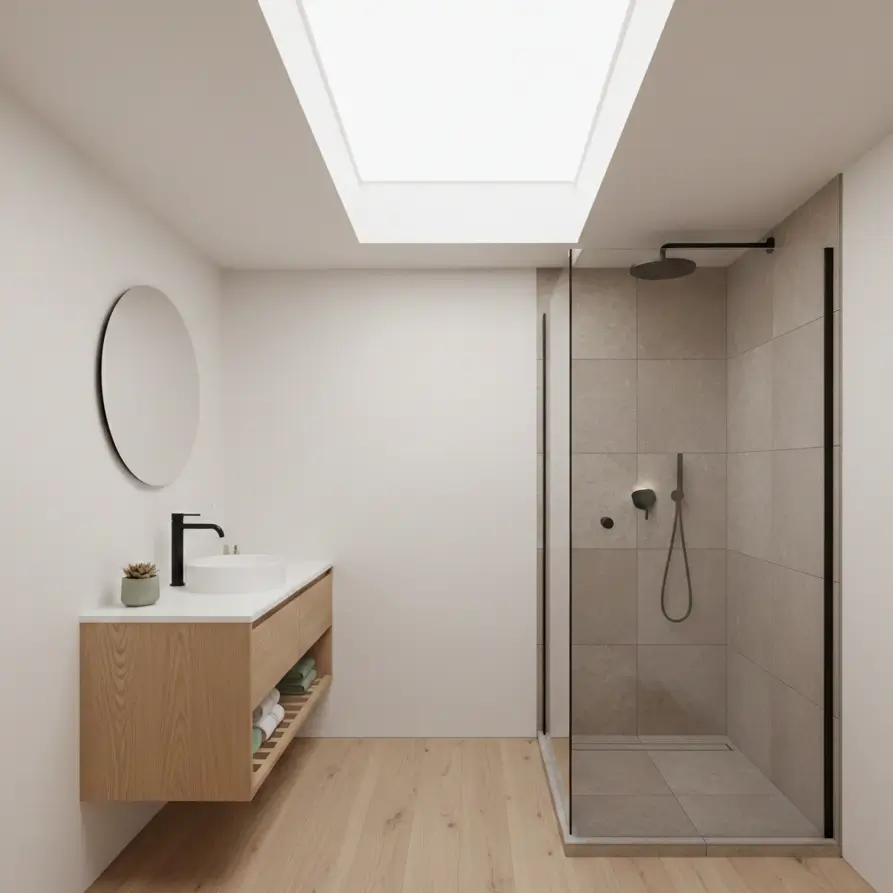
If you live in a tiny house, a studio apartment, or a compact rental, you know the struggle. Your bathroom isn’t just a room; during a hot shower, it becomes a pressurized steam chamber. The standard advice for a 200-square-foot suburban master bath simply doesn’t apply when your walls are 24 inches from the showerhead.
For small space bathroom paint moisture solutions, you need a 100% acrylic latex paint with built-in antimicrobial additives, specifically formulated for high-humidity environments. Do not use standard flat or eggshell paints. In spaces under 50 sq ft, surface preparation (killing existing mold) and ventilation (CFM rating relative to room volume) are just as critical as the paint can itself.
In this guide, we’re moving beyond “open a window.” We are going to engineer your tiny bathroom walls to withstand the unique micro-climate of small-space living, with a budget range of $100 to $300 for a DIY overhaul.
Why Does Paint Peel Faster in Small Bathrooms?
Paint peels faster in small bathrooms because the ratio of steam production to air volume is drastically higher. In a 40 sq ft bathroom, humidity spikes to 100% faster and stays there longer than in larger rooms, forcing moisture behind the paint film. This causes loss of adhesion, bubbling, and eventual peeling.
When you take a shower in a standard home, the steam has roughly 1,000 cubic feet of air to disperse into. In a tiny house bathroom (often roughly 5×7 feet with lower ceilings), you might be working with less than 250 cubic feet of air volume.
That steam has nowhere to go. It condenses on the coldest surfaces, usually your walls and ceiling, instantly. If your paint creates a hard, impermeable shell but has even a microscopic pinhole, water gets behind it. If the paint is too porous, water soaks into the drywall or wood framing.
The Condensation Load
In my experience designing for compact living, I’ve found that the “condensation load” on a tiny house wall is about 3x higher per square inch than in a standard home. This is why you can’t just buy the cheapest gallon on the shelf. You need a coating that acts as a shield.
If you are dealing with a windowless apartment bathroom, this is even more critical. You are relying entirely on mechanical ventilation and the chemical properties of your paint to prevent mold.
Note on Safety: In small spaces, fumes build up fast. Always prioritize Low VOC options when painting confined areas to protect your lung health.
What is the Best Paint Finish for Tiny House Bathrooms?
The best finish for tiny bathrooms is a Satin or Semi-Gloss 100% Acrylic. Satin offers a modern look with decent scrubbability, while Semi-Gloss provides maximum moisture resistance and light reflection. Avoid Flat or Matte finishes unless purchasing specialized “Bath & Spa” lines designed to resist moisture without the shine.
The Gloss vs. Matte Debate
For years, landlords slapped high-gloss white paint on apartment bathrooms. It works for moisture, but it looks like a hospital and highlights every imperfection in your drywall.
In a small space, you want walls that recede visually to make the room feel bigger. High gloss does the opposite, it reflects light aggressively, making walls feel closer.
My recommendation for spaces under 60 sq ft:
- High-Performance Satin: This is the sweet spot. It mimics the soft look of eggshell but has a tighter molecular structure that repels water.
- Specialty Matte: Brands like Benjamin Moore (Aura Bath & Spa) or Zinsser (Perma-White) have engineered matte finishes that actually resist mildew. They are expensive (approx. $70-$90/gallon), but for a tiny bathroom, you only need one gallon. It’s a worthy investment.
Acrylic vs. Oil-Based
In the past, oil-based paints were the gold standard for water resistance. However, for tiny homes and apartments, I rarely recommend them anymore.
- Yellowing: Oil paints yellow over time, especially in rooms with low natural light (like many bathrooms).
- Fumes: The off-gassing in a 400 sq ft home can be overwhelming and linger for weeks.
- Flexibility: Tiny houses on wheels move. Wood expands and contracts with humidity. Acrylic latex remains flexible; oil paint becomes brittle and cracks, inviting moisture intrusion.
For a deeper dive into brands that work in tight quarters, check our guide on paint brands for small spaces.
How to Prep a Moldy Bathroom Wall for Painting
Never paint over mold. First, wash walls with a solution of water and bleach (10:1 ratio) or a dedicated mildew killer. Sand the surface with 120-grit sandpaper to remove gloss and ensure adhesion. Apply a high-quality bonding primer specifically rated for high-humidity areas before applying your topcoat.
If you skip this step in a small bathroom, your new paint will fall off in sheets within six months. I’ve seen it happen. The moisture from your shower will vaporize the mold behind the new paint, pushing the new layer right off the wall.
Step-by-Step Micro-Space Prep:
- The Deep Clean: Scrub walls with TSP (Trisodium Phosphate) or a TSP substitute. This removes soap scum and hairspray residue, which are common in small bathrooms where the vanity is close to the walls.
- Kill the Spores: If you see black specks, that’s mildew. Use a mildewcide. Let it dry completely.
- Sand It Down: In a small room, you’re looking at the walls from 12 inches away. Imperfections are visible. Sanding also creates “tooth” for the primer.
- The Primer is Key: Do not use a “Paint + Primer” in one. Use a dedicated bonding primer. For painting over protective coatings or glossy surfaces, a primer like STIX or Kilz Adhesion is non-negotiable.
Budget Reality:
- Cleaning Supplies: $15
- Sandpaper/Sanding Block: $10
- Premium Primer (Quart): $25
- Total Prep Cost: ~$50
It’s cheap insurance for your paint job.
Ventilation: The Paint’s Best Friend
Do I Need a Fan in a Windowless Bathroom?Yes. In a bathroom under 50 sq ft, a dedicated exhaust fan is mandatory to protect paint integrity. The fan must be rated for at least 50 CFM (Cubic Feet per Minute) to cycle the air effectively. If a fan isn’t possible (rental restrictions), using a dehumidifier immediately after showering is the only viable alternative.
Paint alone cannot handle 100% humidity forever. Eventually, the water wins.
Calculating for Tiny Spaces
The standard rule is 1 CFM per square foot of room area. However, for bathrooms under 50 sq ft, the minimum code requirement is usually 50 CFM regardless of size.
- 35 sq ft bathroom: You still need 50 CFM. This ensures the air in the room is replaced roughly every minute, pulling that destructive steam out before it can condense on your tiny house wall materials.
If you are renting and cannot install a fan:
- The Dehumidifier Hack: Place a small dehumidifier (capable of removing 20+ pints/day) in the doorway during and after showers.
- The Box Fan: It’s low-tech, but putting a box fan in the hallway pointing out of the bathroom door helps pull moisture out.
- Wipe Down: It’s annoying, but using a squeegee on the shower walls and a towel on painted surfaces immediately after showering saves your paint.
Budget vs. Investment: What to Buy
For a 40 sq ft bathroom (approx. 120 sq ft of wall space), a budget DIY job using standard supplies costs around $60 but lasts 1-2 years. An investment approach using premium primer and spa-grade acrylic paint costs around $140 but can last 7-10 years. The ROI on premium materials is significantly higher for small spaces due to lower material volume needs.
Because the square footage is so low, the price difference between “cheap” and “best” is often less than $40 total. This is the place to splurge.
Comparative Breakdown
| Component | Budget Option (Standard) | Investment Option (Premium) | Small Space Impact |
| Primer | Standard Drywall ($15/qt) | High-Adhesion Bonding ($30/qt) | Prevents peeling in high humidity. |
| Paint | Standard Eggshell ($25/gal) | Bath & Spa Matte/Satin ($70/gal) | Contains antimicrobial agents to stop mold. |
| Tools | Economy Rollers ($10) | Microfiber 3/8″ Nap ($20) | Smooth finish looks better at close range. |
| Additives | None | Mildewcide Additive ($5) | Extra layer of defense against spores. |
| Total Cost | ~$50 | ~$125 | Difference of $75 for 5+ years of life. |
If you are planning your overall spending, check our breakdown on paint budget cost analysis to see how this fits into a whole-home project.
Color & Space Perception
Can Dark Paint Work in a Small Bathroom?Yes, dark paint works in small bathrooms by blurring the corners and creating depth, contrary to the belief that it shrinks the space. However, dark colors show condensation streaks (surfactant leaching) more easily than light colors. If choosing dark charcoal or navy, use a higher sheen (Satin/Semi-Gloss) and ensure rigorous ventilation to minimize water streaking.
The “Jewel Box” Effect
In tiny house bathroom design, we often embrace the smallness rather than fighting it. Painting a small powder room or bath a deep forest green or navy blue creates a cozy, “jewel box” feel.
However, lighter colors (whites, creams, soft grays) are more practical for:
- Reflecting Light: Making the space feel airy if you have a low ceiling paint solution to consider.
- Hiding Water Marks: Condensation runs are less visible on white paint than on navy blue.
If you go dark, just know you will need to wipe the walls down more often to prevent those shiny vertical streaks where water dripped down.
Conclusion
The battle against moisture in a tiny bathroom is won in the preparation and the product selection. You aren’t just painting a wall; you are waterproofing a capsule. By spending that extra $40 on a gallon of premium “Bath & Spa” grade acrylic and ensuring your ventilation is moving at least 50 CFM, you can prevent the dreaded peel.
- Tape a plastic bag to your bathroom wall for 24 hours. If it’s wet underneath the next day, you have moisture coming through the wall (a plumbing or exterior issue). If it’s wet on top, it’s condensation (ventilation issue).
- Buy a quart of bonding primer and a gallon of high-quality acrylic satin paint.
- Upgrade your fan or buy a squeegee.
For more details on handling the tricky corners and tight squeezes in your rig or apartment, read up on painting tools for tight spaces next.

