
Professional painters will tell you something that might sting: 80% of a great paint job happens before you open the first can. In my 550 sq ft apartment, I learned this the hard way when my “quick weekend project” turned into a three-week nightmare of peeling edges and visible patches.
Paint preparation in small apartments requires a different approach than larger homes. You can’t simply move all furniture to another room. Ventilation becomes critical when you’re working in 450 sq ft instead of 2,000. And every wall flaw shows more clearly in compact spaces where you’re always within arm’s reach of your walls.
The good news? Proper prep for a small apartment costs between $75 and $200 for supplies. You’ll spend 4-8 hours prepping before painting, about the same time as the actual painting. This guide covers the exact process I’ve refined after prepping over a dozen small spaces, including what most apartment guides get completely wrong.
Whether you’re a renter wanting your security deposit back or an owner updating your compact home, you’ll find every step, measurement, and cost breakdown you need below.
Why Paint Preparation Matters More in Small Spaces
Paint preparation determines 80% of your final results, and small apartments amplify every mistake. With walls just 3-6 feet from your line of sight at all times, unprepared surfaces show roller marks, adhesion failures, and patched areas that larger rooms can hide. Proper prep takes 4-8 hours but prevents costly repainting.
Small apartments typically have 1,400-2,800 sq ft of wall surface (calculated by multiplying floor space by 3.5 for standard 8-foot ceilings). That sounds like a lot, but the visual proximity changes everything.
In a 600 sq ft apartment, your sofa might sit 4 feet from the wall. Your bed probably touches one wall directly. Kitchen cabinets create 18-inch gaps where your eyes naturally focus. Every brush stroke, drip line, and poorly taped edge lives at reading distance.
I’ve found three reasons small spaces demand better prep:
Lighting exposes everything. Compact apartments often have windows on fewer walls, creating raking light that highlights surface imperfections. That hairline crack invisible in a large living room becomes the first thing guests notice in a 350 sq ft studio.
Surfaces accumulate more wear. Smaller spaces mean more contact with walls. Your shoulder brushes past the hallway corner daily. Furniture gets repositioned closer to walls. Kitchen grease travels shorter distances. The resulting grime, scuffs, and damage require thorough cleaning and repair before paint adheres properly.
Paint chemistry needs help. When you’re painting 200 sq ft while living in the remaining 400 sq ft, you work in phases. This means more edge work, more opportunities for lap marks, and more joints where day-one painting meets day-two painting. Proper primer and surface prep helps hide these inevitable seams.
Understanding your wall materials is crucial here. Drywall, plaster, paneling, and textured surfaces each need specific preparation approaches.
Essential Paint Prep Supplies for Apartments Under 800 Sq Ft
A complete prep kit for 400-800 sq ft costs $75-$150 for basic supplies or $150-$250 with premium products. You’ll need painter’s tape (3-4 rolls), drop cloths (two 6×9 ft minimum), spackling compound, sandpaper (120 and 220 grit), TSP cleaner, primer (1-2 gallons), and basic tools like a putty knife and sponge.
Here’s what I keep in my small-space painting kit, with current 2024 prices:
Cleaning Supplies ($15-$30)
- TSP substitute cleaner (Krud Kutter or similar): $8-$12 per quart
- Sponges (large cellulose): $4-$8 for a pack
- Bucket (5-gallon): $4-$6
For bathroom walls with moisture issues, add a mildew-killing cleaner ($10-$15).
Repair Materials ($20-$40)
- Spackling compound (DAP DryDex or similar): $6-$12 for 8 oz
- Lightweight joint compound (for larger repairs): $10-$15 for 3 lb
- Sanding sponge (120 and 220 grit): $6-$10
- Putty knife (2-inch flexible): $4-$8
Protection Supplies ($25-$50)
- Painter’s tape: FrogTape Multi-Surface ($12-$15) or ScotchBlue Original ($8-$12) per 60-yard roll. Buy 3-4 rolls for a 500 sq ft apartment.
- Drop cloths: Canvas (9×12 ft, $25-$40) or plastic (9×12 ft, $5-$10). I prefer one canvas for floors and two plastic sheets for furniture.
Primer ($20-$50)
- Multi-surface primer (Zinsser Bulls Eye 1-2-3): $25-$35 per gallon, covers 300-400 sq ft
- Stain-blocking primer (Kilz Original): $20-$30 per gallon for water stains or smoke damage
The right primer application depends on your wall condition. Spot-prime repairs only to save money, or prime entire walls for consistent coverage.
Cost Per Square Foot Breakdown
| Apartment Size | Wall Surface | Basic Prep Cost | Premium Prep Cost |
| 400 sq ft | ~1,400 sq ft walls | $75-$100 | $150-$180 |
| 600 sq ft | ~2,100 sq ft walls | $90-$130 | $175-$225 |
| 800 sq ft | ~2,800 sq ft walls | $120-$160 | $200-$280 |
This works out to roughly $0.05-$0.10 per square foot of wall surface for prep materials, a worthwhile investment given paint itself costs $0.08-$0.15 per square foot.
Step-by-Step Wall Preparation Process for Small Apartments
Wall prep follows five stages: clear (30-60 min), clean (1-2 hours drying), repair (30 min work + 24 hours drying), sand (30-60 min), and prime (1-2 hours + 4 hours drying). Total active time is 4-6 hours spread across 2 days. Work in phases, completing one room section before moving to the next.
Stage 1: Clear and Cover (30-60 minutes)
In a small apartment, you can’t move everything out. Instead, work in quadrants.
The Shuffle Method:
- Push all furniture to one side of the room, leaving a 4-foot work zone along walls
- Complete those walls entirely (prep through painting)
- Shift furniture to the painted side
- Complete remaining walls
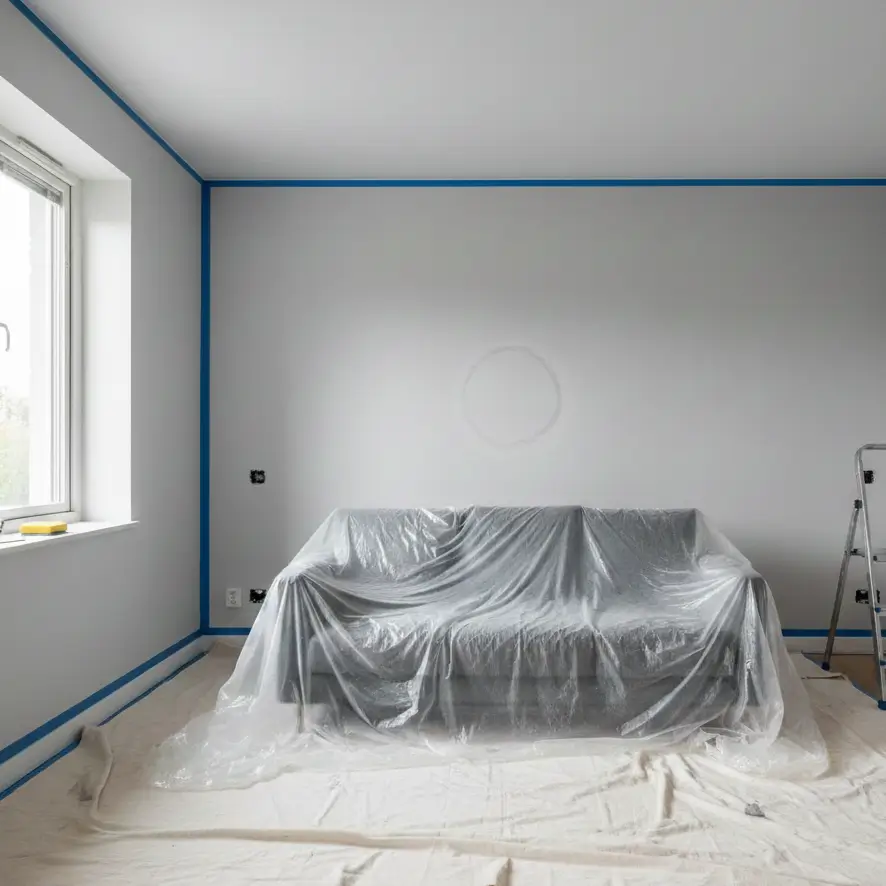
For 400 sq ft studios, I’ve found that covering a bed or sofa in place with plastic drop cloths works better than attempting to move it. Tape plastic to the floor 18 inches from the wall edge.
Remove outlet covers and light switch plates, store screws inside a ziplock bag taped to the plate. This takes 10 minutes and eliminates hours of careful taping around fixtures.
Stage 2: Clean Walls Thoroughly (1-2 hours active, 24 hours drying)
Mix TSP substitute according to package directions (typically 1/4 cup per gallon). Work from bottom to top to prevent drip streaks on dirty walls.
In kitchens, pay extra attention to the 3-foot zone above countertops and stoves. Grease creates an invisible film that prevents paint adhesion.
For bathrooms, check for mildew along ceiling edges and around exhaust fans. Any dark spots need treatment with a mildew killer before painting.
Small-space tip: Open windows on opposite sides of your apartment to create cross-ventilation while cleaning. Damp walls in enclosed spaces encourage mildew growth.
Stage 3: Repair Damage (30-60 minutes + 24 hours drying)
Inspect walls at a 45-degree angle to the main light source. This raking light reveals nail holes, cracks, dents, and imperfections you’d otherwise miss.
For small holes (under 1/4 inch): Apply lightweight spackling with your finger or putty knife. DAP DryDex turns white when dry, usually within 1-2 hours.
For medium holes (1/4 to 1 inch): Use mesh tape and joint compound. Apply thin layers, allowing each to dry fully before adding the next.
For cracks: Run a razor blade along the crack to remove loose material first. Fill with flexible spackling designed for ceiling and wall cracks.
If you’re dealing with older paint or unusual wall treatments, test a small hidden area before committing to repairs.
Stage 4: Sand Surfaces (30-60 minutes)
After repairs dry, sand them flush with the surrounding wall. Start with 120-grit for shaping, then finish with 220-grit for smoothness.
For entire walls with a glossy finish (common in rental apartments), a light scuff-sanding with 220-grit helps new paint grip. You’re not removing paint, just creating tiny scratches called “tooth” for adhesion.
Dust control in small spaces: Hang a damp sheet across doorways to contain sanding dust. Vacuum walls with a brush attachment before moving forward.
Stage 5: Prime (1-2 hours + 4 hours drying)
Prime all repairs with a stain-blocking primer. For patches alone, use a small brush to spot-prime, extending 2 inches beyond the repair edge.
Full-wall priming makes sense when:
- Walls have never been primed before
- You’re making a dramatic color change
- The surface has water stains, smoke damage, or crayon marks
- Previous paint has a sheen higher than satin
One gallon of primer covers approximately 350 sq ft, enough for the wall surface of a 100 sq ft room with 8-foot ceilings.
How to Protect Furniture and Floors When You Can’t Move Everything Out
Use the “island method” by grouping furniture in room centers, covering with plastic sheets ($10-$15), and working around the perimeter. For built-ins and immovable items, tape plastic directly to surfaces with painter’s tape. Allocate 24-36 inches of clearance from walls, enough to operate a roller without bumping covered furniture.
Small apartments create a real challenge: where exactly do you put a bed when you’re painting a studio? The answer is you don’t move it far.
The Island Technique
- Measure 30 inches from all walls (enough for comfortable painting access)
- Slide or group furniture into the room’s center
- Cover completely with plastic drop cloths
- Tape plastic to the floor around the perimeter to prevent paint drips from creeping underneath
For a 12×15 ft living room, this creates a central island of furniture about 8×11 ft, surprisingly workable.
Floor Protection Strategy
Canvas drop cloths absorb drips rather than letting paint pool. Position a 6×9 ft canvas along the wall you’re actively painting, moving it as you progress. Layer plastic underneath the canvas if you’re protecting hardwood or specialty flooring.
For 400-600 sq ft apartments, two 6×9 ft canvas cloths handle an entire project with repositioning.
Tape Like a Professional
Apply painter’s tape to:
- All trim and baseboards
- Window frames (if not painting them)
- Door frames and hinges
- Ceiling edges (unless you’re painting ceilings too)
- Outlet and switch openings (after removing covers)
Press tape firmly with a putty knife or credit card edge. This creates a seal that prevents paint bleeding, the biggest source of small-space frustration.
For the best tape for your project, consider your timeline and surface types. Standard blue tape handles most jobs; green FrogTape works better on textured walls.
Common Paint Prep Mistakes in Small Apartments (And How to Avoid Them)
The five most common mistakes are skipping wall cleaning (causing adhesion failure), insufficient drying time between stages, over-spackled patches that show through paint, poor tape adhesion from rushing application, and inadequate ventilation creating slow-drying, vulnerable surfaces. Each adds 2-4 hours of rework when discovered after painting.
Mistake 1: Skipping or Rushing the Cleaning Stage
What happens: Paint peels within 6-12 months, especially near kitchens and bathrooms.
The fix: Budget 2 hours minimum for cleaning in a 500 sq ft apartment. Test your cleaning by pressing a piece of tape firmly to the wall, then removing it. If residue comes off on the tape, clean again.
This is especially critical if you’re working with budget-conscious paint choices, lower-cost paints have less adhesion tolerance.
Mistake 2: Not Allowing Full Drying Time
What happens: Primer and paint trap moisture, creating bubbles, extended drying times, and a soft film that marks easily.
The fix: In apartments with limited airflow, add 50% to all drying times. If primer says 4 hours, wait 6. Run a fan pointed at walls, not blowing directly on wet surfaces. Check that repairs feel completely dry and match surrounding wall temperature before priming.
Mistake 3: Over-Applying Spackling
What happens: Thick patches shrink as they dry, creating visible depressions. Or they remain as raised areas that catch light differently than surrounding walls.
The fix: Apply spackling in thin layers, slightly overfilling the depression. Sand flush after drying. Two thin coats beat one thick application every time. For problem areas that keep reappearing, investigate the underlying cause before repatching.
Mistake 4: Rushing Tape Application
What happens: Paint bleeds under tape edges, creating ragged lines that require extensive touch-up.
The fix: Apply tape in 2-3 foot sections, pressing each section firmly before moving on. Don’t stretch tape around corners, tear it and start fresh on the adjacent surface. Remove tape while final paint coat is still slightly tacky for cleanest lines.
Mistake 5: Ignoring Ventilation
What happens: Fumes concentrate in small spaces, creating health concerns and preventing proper paint curing.
The fix: Open windows on opposite walls when possible. Run bathroom exhaust fans continuously. If your apartment has only one exterior wall, position a box fan blowing outward in the window and crack the entry door for makeup air. Consider low-VOC paint options for spaces under 500 sq ft.
Your Prep Timeline: Putting It All Together
For a 500 sq ft apartment, here’s a realistic schedule:
Day 1 (2-3 hours active):
- Clear and cover furniture: 45 minutes
- Remove outlet covers and tape perimeter: 30 minutes
- Clean walls: 1 hour
- Let dry overnight
Day 2 (3-4 hours active):
- Make repairs: 45 minutes
- Let dry while you prep other areas
- Sand repairs: 30 minutes
- Vacuum dust: 15 minutes
- Prime: 1.5 hours
- Let dry 4-6 hours before painting
This schedule assumes you’re working in phases. If you can plan your tiny house paint project over a long weekend, you’ll have better results than rushing through in a single day.
The investment pays off. I’ve watched neighbors repaint rooms twice in one year because they skipped prep. Meanwhile, my properly prepared walls still look fresh after four years in a high-traffic 550 sq ft space.
Start with your smallest room, usually the bathroom at 35-50 sq ft, to practice techniques before tackling larger spaces. The confidence you build prepping those 140 sq ft of wall surface translates directly when you’re ready for living rooms and bedrooms.
For complete color selection guidance once your walls are prepped, check our companion guide. And remember: the extra hours you spend preparing are hours you’ll never spend repainting.

