
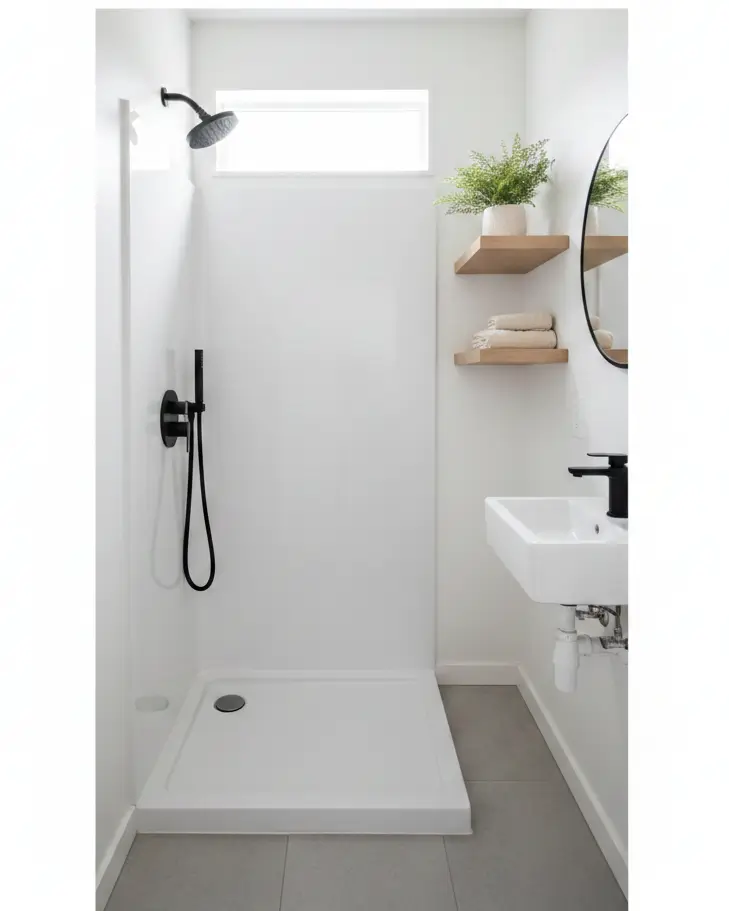
Let’s be honest: nothing makes a tiny bathroom feel smaller than a yellowed, almond-colored fiberglass shower from the 1990s. And in a compact kitchen, a dark, dated glass tile backsplash can suck the light right out of the room.
If you are living in a standard home, you might just rip it out. But in a 300-square-foot tiny house or a rental apartment, demolition is a nightmare. Where do you put the debris? How do you live without a shower for a week?
I’ve been there. You stare at that shiny, slick surface and think, “There is no way paint will stick to that.”
You absolutely can paint glass tile and fiberglass, but you cannot use standard wall paint. You must use a bonding primer or a specialized epoxy-acrylic hybrid system. In a standard 32″ x 32″ tiny house shower, this project costs about $100 and takes a weekend, compared to $2,500+ for a replacement.
This isn’t just about changing a color; it’s about reclaiming your space. When I finally painted the dark glass backsplash in a client’s 60-square-foot kitchen, the room didn’t just look newer, it actually felt physically larger because the light bounced differently.
However, painting these slick surfaces is unforgiving. If you skip the prep in a small, humid bathroom, that paint will peel in sheets within months. Here is exactly how to do it right, keeping the fumes and budget in check.
Can You Really Paint Slick Surfaces?
Yes, but adhesion is your main battle. Glass, ceramic tile, and fiberglass are non-porous, meaning standard paint has nothing to “grab.” You need to create a mechanical bond (sanding) and a chemical bond (primer). For high-moisture areas like tiny house showers, a two-part epoxy kit is mandatory.
The Small Space Reality
In a large home, if your guest bathroom paint peels, you just close the door. In a tiny house, your shower is likely three feet from your kitchen and your bed. You see it every day.
The stakes are higher here because tiny homes experience more humidity fluctuations than standard houses. A 5×8 bathroom steams up faster and stays wet longer. This means your paint job needs to be armor-plated.
If you are worried about the basics of handling paint in tight quarters, check out our guide on painting tools for tight spaces before you buy your rollers.
The Fiberglass Shower Surround
Use a Tub & Tile Refinishing Kit (Epoxy-Acrylic).
- Cost: $45 – $60 per kit.
- Time: 2-3 days (mostly drying time).
- Smell: Intense (requires serious ventilation).
- Durability: 3-5 years with care.
Why Fiberglass is Tricky
Most tiny houses and RVs come with lightweight fiberglass shower inserts. They are great for weight distribution but terrible for aesthetics as they age. They yellow. They scratch.
I tried using standard high-gloss enamel on a shower pan once. It looked great for two weeks until the standing water caused it to bubble. Don’t make my mistake. You need an epoxy system designed for water immersion.
The Step-by-Step for Tiny Baths
- Scrub Like Crazy: Body oils and soap scum are the enemies. Use an abrasive cleaner (like Comet) and a heavy-duty scouring pad. Then, clean it again with a TSP substitute.
- The Sanding Phase: You need to dull the shine. Use 400-grit wet/dry sandpaper. You aren’t trying to sand it down to the raw material; you just want to create microscopic scratches for the epoxy to grip.
- Tape Everything: In a tiny bathroom, you don’t have room for error. Tape off the drain, the faucet, and the walls.
- Ventilation is Critical: This is the most dangerous part of painting glass tile fiberglass in a small space. Epoxy fumes are heavy. Open all windows and set up a box fan pushing air out. If you have a bathroom exhaust fan, run it. Read more about paint safety regulations to protect your lungs.
- Apply the Epoxy: These kits usually come in two cans that you mix. Once mixed, you have a limited window (usually 6 hours) to use it. Roll it on with a high-density foam roller. Do not use a nap roller, or you’ll leave fuzz in your shower finish.
Warning: Epoxy is self-leveling, which is great, but it runs easily. Apply thin coats. Three thin coats are better than one thick, runny coat.
The Glass Tile Backsplash
High-adhesion Bonding Primer + Urethane Alkyd Enamel.
- Cost: ~$80 total.
- Time: 2 days.
- Smell: Moderate (use Low-VOC if possible).
- Durability: Excellent (scrubbable).
The Kitchen Challenge
Glass tile backsplashes were huge in the 2000s, but those dark mosaics can make a small kitchenette feel like a cave. Painting over them creates a clean, solid texture that looks like modern subway tile from a distance.
Since a backsplash doesn’t face constant standing water like a shower, you don’t need the harsh epoxy. You need a bonding primer.
How to Paint Glass Tile
- Degrease: In a tiny house, the backsplash is often inches from the stove. Grease buildup is inevitable. Wash the tile with hot water and a strong degreaser. If you skip this, the primer will separate, creating “fish eyes” in the paint.
- Prime with Purpose: You cannot use standard drywall primer. You need a shellac-based primer (like BIN) or a high-bond water-based primer (like STIX).
- Pro Tip: I prefer STIX for tiny homes because the fumes are lower than shellac.
- Paint: Apply two coats of a high-quality cabinet or trim paint. I recommend a semi-gloss finish. It reflects light, which helps brighten dark apartment paint schemes, and it wipes clean easily.
If you are struggling to choose a color that opens up the space, look into neutral paint colors for small apartments. A soft white or light greige over busy tile can visually expand your kitchen counter depth.
Benefits vs. Risks for Small Spaces
Painting fixtures saves thousands of dollars and avoids landfill waste, but it is a temporary surface coating, not a factory finish. It requires gentle cleaning maintenance.
| Feature | Replacement (Retiling/New Insert) | Painting (Refinishing) | Small Space Impact |
| Cost | $1,500 – $4,000 | $80 – $150 | Frees up budget for storage solutions. |
| Time | 1-2 Weeks | 2-3 Days | Minimal disruption to daily living. |
| Mess | High (Demolition dust) | Low (Taping/Sanding) | Crucial: Dust ruins air quality in tiny homes. |
| Lifespan | 15-20 Years | 3-5 Years | Good for renters or interim fixes. |
| Weight | Heavy (Tile adds lbs) | Negligible | Vital for Tiny Houses on Wheels (THOWs). |
The “Weight” Factor
If you live in a Tiny House on Wheels (THOW), weight is everything. Ripping out a lightweight fiberglass shower to install heavy cement board and ceramic tile can add 200-400 lbs to your trailer tongue weight. Painting the existing fiberglass adds virtually zero weight.
Check out our tiny house on wheels specifications to understand why keeping your renovation lightweight is critical for towing safety.
Essential Tools & Materials List
- Respirator: Not a dust mask. A mask rated for organic vapors.
- High-Density Foam Rollers: 4-inch size is perfect for tight corners.
- Painter’s Tape: High adhesion (green or blue).
- Drop Cloths: Protect your tiny house flooring options.
- Abrasive Cleaners: TSP Substitute and scouring pads.
Primer Selection Guide
Not all primers are equal.
- For Glass/Tile: Look for “Bonding” on the label. Brands like Zinsser 1-2-3 or INSL-X STIX.
- For Fiberglass Showers: Do not use separate primer. Use the all-in-one Epoxy kit.
Troubleshooting Common Issues
- Drips: Sand them down after drying, then recoat.
- Peeling: Usually means the surface wasn’t clean or dry.
- Texture: Use a foam roller, not a nap roller.
The Moisture Problem
In a tiny house bathroom, humidity is the enemy of curing paint. If you paint your shower and then take a steamy shower in the same room 12 hours later, the steam can soften the uncured epoxy.
My Advice: If you have a gym membership or a generous neighbor, shower there for 3 days. Let the bathroom bone dry. If that’s not possible, run a dehumidifier inside the bathroom during the cure time. For more on managing dampness, read our guide on bathroom paint moisture solutions.
Special Consideration: Rental Apartments
If you are renting, painting tile or a tub is technically a “modification.” However, many landlords prefer a clean white shower over a stained beige one. Always ask first. If you need reversible options, check out rental apartment painting for less permanent ideas.
A Note on Application Methods: Brush vs. Spray
In a large empty house, spray painting a tub gives a porcelain-like finish. But in a furnished tiny house or apartment? The overspray is unmanageable. The atomized epoxy particles will land on your kitchen counters, your sofa, and your dog.
Unless you can completely seal off the bathroom (which is hard when the door has a 1-inch gap for airflow), stick to rolling. For a deeper dive on this, look at spray vs brush vs roller for tiny houses.
Is It Worth It?
Painting glass tile and fiberglass is one of the highest ROI (Return on Investment) projects you can do in a small space. For under $100, you strip away the visual clutter of dated patterns and yellowed plastic, leaving a clean, bright canvas that makes your 40-square-foot bathroom feel like a spa.
Just remember: Preparation is 80% of the work. Painting is the easy part. If you spend 4 hours cleaning and sanding, and 1 hour painting, you are doing it right.
- Buy your kit and deep clean the surface.
- Sand, tape, and apply the first coat.
- Apply the second coat and remove tape carefully while wet.
- First shower!
Ready to tackle more difficult surfaces? Once you master tile, you might want to look into painting metal surfaces or even refreshing your cabinets with our painting wood guide.
Good luck, and keep those windows open!

