
When you paint a standard 12×12 bedroom in a 2,500 square foot suburban home, the fumes have an entire house to drift into and dilute. But when I first painted the interior of a 280-square-foot tiny house on wheels (THOW), I learned a hard lesson about physics: The Concentration Effect.
With only about 2,200 cubic feet of total air volume, the solvents and humidity from the drying paint didn’t just drift away, they saturated the space within 20 minutes. The humidity spiked to 85%, preventing the paint from curing, and despite using “low odor” paint, the air became unbreathable.
Most painting guides assume you have hallways, spare rooms, and central HVAC. They don’t account for the reality of painting where you sleep, eat, and work, all within a few paces.
This guide covers the specific painting conditions, safety best practices, and ventilation strategies required when your floor plan is smaller than a standard two-car garage. Whether you are doing a $200 DIY refresh or a full interior finish, the rules change when the walls close in.
The Air Volume Equation: Why Small Spaces Are Different
The Ventilation Ratio
In spaces under 600 sq ft, paint fumes concentrate 4x–10x faster than in standard homes. Best Practice: You need to exchange the total air volume of your tiny house every 15–20 minutes. For a 20×8.5 tiny house (approx. 1,500 cubic feet), this requires a fan rating of at least 100 CFM (Cubic Feet per Minute) actively pushing air out, not just moving it around.
Calculating Your Danger Zone
In a tight apartment or tiny house, safety is a math problem. Volatile Organic Compounds (VOCs) off-gas as paint dries. In a large house, these PPM (parts per million) levels stay relatively low because of the massive volume of air.
In a tiny house, that same gallon of paint releases the same amount of gas into a fraction of the space.
The “Sleep-Safe” Window:
If you live in a studio apartment or a tiny house, you likely don’t have a “spare wing” to sleep in while the paint dries.
- Traditional advice: Wait 4 hours before sleeping in the room.
- Small space reality: You typically need 24 hours of active ventilation before it is safe to sleep in a <500 sq ft space, even with low-VOC products.
If you are currently selecting your materials, prioritize health over color. Using low VOC paint in tiny houses isn’t just an eco-choice; it’s a necessary safety precaution for your immediate respiratory health.
Note: Ideally, plan your painting project for a season where you can keep windows open for 48 hours straight. If you’re painting in winter, you face a difficult battle between heat retention and air safety.
Temperature and Humidity Control
The Goldilocks Zone
Paint fails if it’s too hot, too cold, or too damp.
- Ideal Temp: 50°F – 85°F (10°C – 29°C).
- Ideal Humidity: 40% – 70%.
Small Space Risk: Tiny homes heat up rapidly. Painting in direct sunlight in a small metal-roofed structure can flash-dry paint (causing cracks), while high humidity from a bathroom without a door can prevent curing entirely.
Managing Micro-Climates
In a large house, the temperature is relatively stable. In a tiny house, the loft might be 15 degrees hotter than the floor. This creates uneven drying conditions.
- The Heat Spike: If you are painting a lofted sleeping area, do it in the early morning. Heat rises. If it’s 75°F on the ground floor, it could be 90°F in the loft. Paint applied at 90°F dries too fast, leaving brush marks and poor adhesion.
- The Moisture Trap: Paint releases water as it dries. In a sealed 300 sq ft unit, painting the walls can raise relative humidity by 30% in an hour. If humidity tops 85%, water-based latex paint stops curing. It stays “gummy.”
The Fix: Run a dehumidifier alongside your fans. If you don’t own one, crank the AC (which removes moisture) rather than just using a fan. If you are dealing with specific moisture-prone zones, check our guide on bathroom paint moisture solutions before you start.
Essential Safety Gear for Confined Spaces
PPE Checklist
Standard dust masks offer zero protection against paint fumes.
- Respiratory: Half-face respirator with Organic Vapor (OV) cartridges (P100 or N95 pre-filters are for dust, OV is for fumes).
- Eye Protection: Safety goggles (splatter is inevitable in tight quarters).
- Skin: Long sleeves/Tyvek suit. In narrow hallways, you will brush against wet walls.
- Budget: Approx. $40-$60 for a proper respirator setup.
Why the Mask Matters More Here
I once tried painting a small bathroom with just a window open and a standard N95 dust mask. Within 30 minutes, I was dizzy. The concentration of solvents in that 35 sq ft room overwhelmed the passive ventilation.
When you look at painting tools for tight spaces, the respirator is often overlooked in favor of short-handled brushes. But in a tiny home, you are essentially painting inside a box.
Respirator Chart for Small Spaces:
| Mask Type | Protects Against | Small Space Verdict |
| N95 / KN95 | Dust, sawdust, sanding particles | ❌ Unsafe for fumes. Does not stop VOCs. |
| R95 | Oil-based particles | ❌ Unsafe for solvent vapors. |
| Half-Face w/ P100 | Particulates + Lead dust | ⚠️ Good for prep/sanding, not painting. |
| Half-Face w/ Organic Vapor (OV) | Solvents, fumes, VOCs | ✅ REQUIRED for small space painting. |
If you are sanding before painting, which you should be, especially on wood paneling common in THOWs, switch to P100 filters for the dust, then swap to OV cartridges for the liquid paint application. See our guide on paint preparation for small apartments for the sanding specifics.
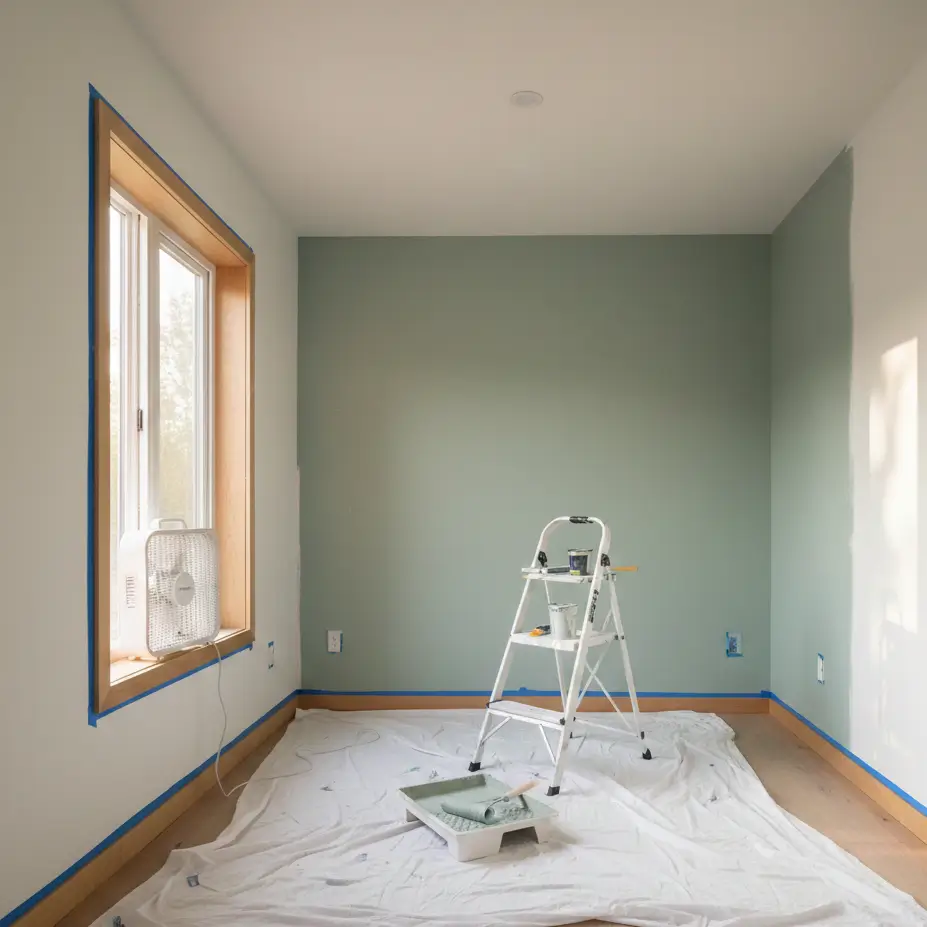
Airflow Strategy: Creating Negative Pressure
The Push-Pull Method
Don’t just open a window. Create a wind tunnel.
- Intake: Open a window on one end of the tiny house (clean air in).
- Exhaust: Place a box fan in a window at the opposite end, facing OUT.
- Seal: Tape around the box fan so air must be pulled from the room, not recirculated from the window edge.
- Result: Negative pressure pulls fumes away from you and out of the house immediately.
Why Passive Ventilation Fails
In a tiny house layout or floor plan, air tends to stagnate in corners, specifically in lofts or under-stair storage areas. Passive ventilation (just opening windows) relies on a breeze. If there is no breeze, the fumes sit heavy in the air.
The Box Fan Trick:
I recommend a 20-inch box fan (usually under $30). Set it to high speed facing outward. If you have a skylight, open it, warm fumes rise. If you are painting a bathroom with an exhaust fan, turn it on, but verify it actually vents to the exterior (some apartment fans just recirculate through a carbon filter, useless for paint).
Important: If you are using oil-based paints or spray equipment, you need explosion-proof fans or careful monitoring, as these fumes are flammable. For most DIYers using water-based acrylics, standard fans are acceptable. However, if you are considering spraying for a smoother finish, read about the spray vs brush vs roller debate to understand the massive masking requirements involved.
Fire Safety and Chemical Storage
Flammability Risks
Small spaces mean storage is usually near heat sources.
- Rule 1: Never store paint/solvents in the utility closet with your water heater or furnace.
- Rule 2: Rags soaked in stain/oil can spontaneously combust.
- Disposal: Dry rags flat outdoors, then dispose of in a metal can with water.
- Storage: Keep leftover paint in a cool, dry place, ideally an external storage shed, not under your bed.
The Utility Closet Danger
In 400 sq ft, your tiny house heating and cooling systems are often tucked into tight closets. It is tempting to store leftover paint cans there. Do not do this. The pilot lights or heating elements combined with solvent fumes in a sealed closet create a genuine fire hazard.
For proper long-term keeping of your expensive leftovers, check our guide on paint storage conditions.
Painting with Pets and Kids in 400 Sq Ft
Total Evacuation
There is no “safe zone” for pets in a studio apartment during painting.
- Birds: Extremely sensitive to fumes; can be fatal instantly. Move them out 24 hours prior.
- Dogs/Cats: Move them to a friend’s house for 24-48 hours.
- Kids: Cannot sleep in the unit the same night.
The Reality of Renovation While Living Tiny
If you are reading this, you might be trying to renovate while living in the unit. I have done this, and it is difficult.
You cannot simply “close the door” to keep the cat away from the wet wall because there often is no door. Furthermore, the floor space is so limited that a dog tail will find the fresh paint.
Strategy for Occupied Renovations:
- Sectioning: Use “zip poles” and plastic sheeting to create a quarantine bubble around the area you are painting. This minimizes fume spread but does not eliminate it.
- Vertical Escape: If you have a cat, they will climb the ladder. You must remove the ladder when you take breaks.
- The “Boarding” Budget: Include the cost of a hotel or pet boarding in your paint budget cost analysis. It is not an optional luxury; it is a safety requirement for tiny living renovations.
For more on managing life with animals in small spaces, see tiny house with pets.
Low-VOC vs. Zero-VOC for Small Spaces
Read the Label
- Low-VOC: Usually <50g/L. Still smells.
- Zero-VOC: Usually <5g/L. Very little smell, safer for sleeping studios.
- Natural/Clay Paints: Zero off-gassing, breathable. Best for tiny homes with moisture concerns.
- Recommendation: Spend the extra $15/gallon for Zero-VOC in any space under 500 sq ft.
The “Fresh Paint” Smell Myth
We associate the smell of paint with “cleanliness.” In a tiny house, that smell is a warning sign. Brands like Benjamin Moore Eco Spec, Sherwin-Williams Harmony, or Clare Paint offer Zero-VOC options that are color-rich and durable.
However, be aware that adding colorants (the tint) can add VOCs back into a Zero-VOC base. Ask for “low-VOC colorants” at the mixing counter.
If you are painting specific materials like tiny house wall materials (shiplap, plywood), ensure your primer is also Low/Zero VOC. A zero-VOC topcoat over a high-VOC oil primer defeats the purpose. See our detailed breakdown of paint brands for small spaces to choose the right product.
Summary Checklist
Before you crack that lid, verify you have addressed the unique constraints of your square footage:
- Do you have active exhaust (fan facing out) rated for your cubic footage?
- Do you have an Organic Vapor respirator? (Not just a dust mask).
- Is the humidity under 70%? Is the temp under 85°F?
- Where will you (and your pets) sleep for the next 24 hours?
- Are rags being handled correctly and away from the tiny house heater?
Painting a small space is rewarding, a single gallon can transform your entire home. But because the space is small, the margin for error with air quality is razor-thin. Treat the ventilation setup as seriously as the color selection, and you’ll enjoy a fresh, healthy home without the headache.
For more specific applications, such as painting cabinetry or built-ins, continue reading about painting furniture and home decor.

