
Hosting a creative party in a 350-square-foot tiny house usually sounds like a recipe for disaster, specifically, a disaster involving stained upholstery and zero elbow room. When I first tried to set up a face painting station for my niece in my studio apartment, I made the classic mistake of spreading out. Within ten minutes, I had lost my brushes under the sofa, spilled water on my only rug, and realized I had nowhere to actually put the painted child.
But living small doesn’t mean you have to skip the messy fun. You just need to change your geometry.
Instead of a sprawling artist’s studio, you need a “Shoebox Studio”, a high-efficiency, collapsible kit that unpacks into a fully functional 24-inch workstation and packs away into a standard 6-quart storage bin. Whether you are entertaining guests in a tiny house or just looking for a rainy day activity that doesn’t dominate your limited floor plan, this guide focuses on verticality, density, and mess containment.
From a $50 DIY starter set to a $150 pro-level kit, we can build a station that respects your square footage.
The ‘Pop-Up’ Philosophy: Adapting Art to Tight Quarters
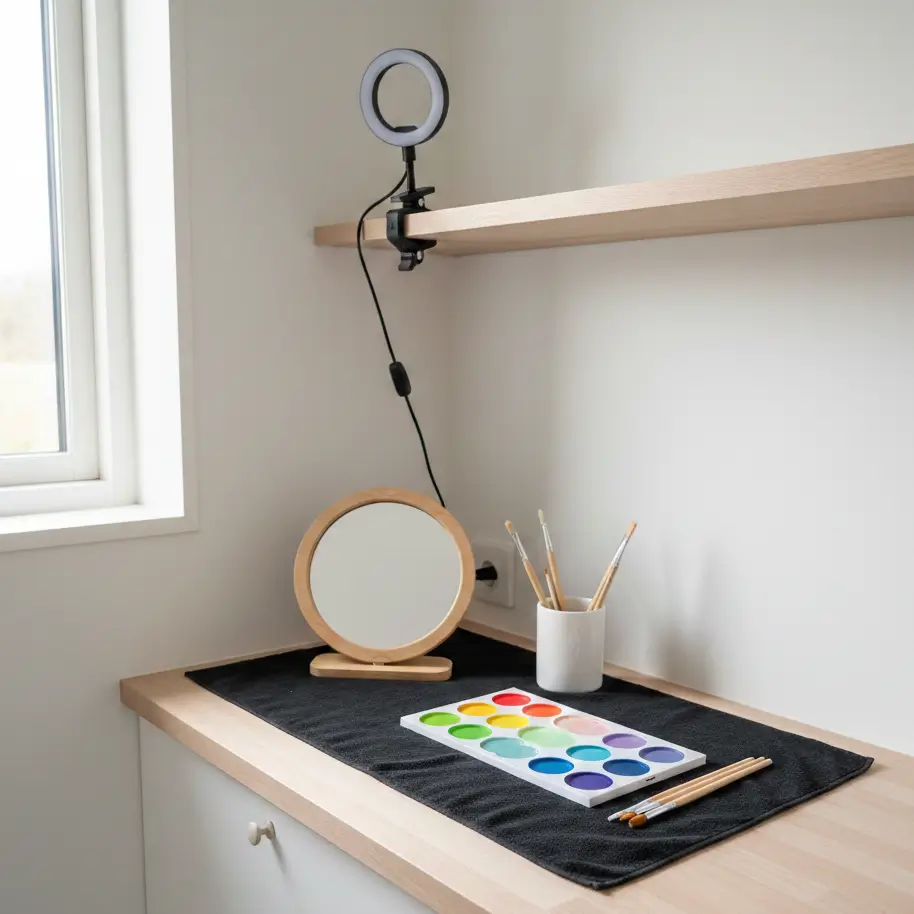
To adapt face painting for a small space (under 600 sq ft), utilize a vertical “mise en place” system. Use a collapsible 12×12 inch standing mirror, stackable split-cake palettes (approx. 8×4 inches), and a weighted, spill-proof water pot. Total surface area required should not exceed 24 inches wide by 18 inches deep.
Why Standard Kits Fail in Tiny Homes
Most art guides assume you have a dedicated craft room or a massive dining table. In a tiny house, your dining table might also be your desk, prep counter, and laundry folding station. Standard setups are horizontal; they spread out.
In a small space, horizontal spread is the enemy.
I found that by switching to a vertical tiered organizer (like a small acrylic makeup stand or a hung-over-cabinet organizer), I reduced the footprint of my paints by 60%. When you are working with entertaining guests in a tiny house, traffic flow is critical. You cannot block the walkway to the bathroom with a bulky easel.
The 24-Inch Linear Rule
Through trial and error, I established the “24-Inch Rule.” Your entire active workspace, paints, water, brushes, and mirror, must fit within a 24-inch linear strip of counter space. This allows you to use a standard tiny house kitchen counter, a fold-down table, or even a sturdy TV tray, leaving the rest of the room open for your “clients” (the kids) to line up without bottlenecks.
Building Your Compact Kit: Essential Gear
- Palette: Fusion or split-cake palettes (high pigment, small footprint) – approx. $30.
- Brushes: Short-handled synthetic set (fits in pencil case) – approx. $15.
- Sponges: High-density petals (cut in half to save space) – approx. $5.
- Water: Collapsible silicone cup with magnetic clip – approx. $8.
- Lighting: USB-charged clip-on ring light – approx. $20.
- Storage: 6-quart clear latching bin – approx. $6.
The Paint: Density Over Quantity
In a large home, you might buy a massive 50-color palette. In a tiny home, storage is currency. I recommend “split-cakes” or “rainbow cakes.” These are rectangular blocks of paint with multiple colored stripes. One swipe of a sponge gives you a full rainbow, eliminating the need for 10 separate pots of color.
A single palette measuring 8.5″ x 4″ can hold enough pigment for 500 faces. This compact efficiency is similar to how we approach tiny house kitchen design, we want tools that do double or triple duty.
Brushes and Tools
Stick to short-handled brushes. Not only are they easier to control in tight quarters (you won’t accidentally elbow a wall or a lamp), but they also fit into standard pencil cases. Long-handled artist brushes often require specialized tall containers that are prone to tipping over, a major risk when your “studio” is a temporary setup on a coffee table.
Tip: Use a magnetic strip inside your storage bin lid to hold bobby pins or metal brush ferrules, keeping them organized without taking up cubic inches.
Lighting Solutions for Dim Corners
Tiny homes often rely on warm, ambient lighting, which is terrible for detailed painting. You don’t need a massive tripod softbox. I use a 6-inch USB-powered ring light that clips directly onto my mirror or a nearby shelf.
Proper lighting prevents eye strain and ensures you aren’t applying clown makeup when you aimed for a tiger. If you are struggling with dark spots in your apartment generally, check out our guide on lighting solutions for more permanent ideas.
The Setup: Transforming Your Multi-Use Surface
To set up, lay down a microfiber towel (16×24 inches) to define the “wet zone.” Place the mirror at the back center. Arrange paints on the left (if right-handed) and water on the right to prevent crossing over the work. Clip a trash bag to the table edge for immediate waste disposal. Setup time: < 3 minutes.
Defining the “Wet Zone”
In my 450 sq ft apartment, I use a specific black microfiber towel as my base. This serves two purposes:
- Visual Boundary: It tells kids (and me) “keep the paint on the towel.”
- Surface Protection: Face paint is water-activated. Drops happen. A towel catches them; a plastic placemat lets them roll onto your floor.
This is a temporary version of the zoning concepts we use in tiny house layout planning. You define the function of the space by the texture you lay down.
Vertical Water Management
Water cups are the most dangerous item on your table. In a tight space, an elbow bump is inevitable.
- Do Not Use: Tapered disposable cups. They fly.
- Do Use: A heavy-bottomed whiskey glass (if you trust yourself) or a collapsible silicone dog bowl with a carabiner.
- Pro Hack: Use a “brush tub” with ridges on the bottom for cleaning, but fill it only 1 inch deep. It’s safer to refill often than to clean a 16oz spill off your laminate flooring.
The “Client” Chair
Positioning is everything. Place your subject’s chair (a folding stool works best) at a 45-degree angle to your station. This allows you to step in toward the station and back to look at the face without stepping left or right, saving you about 3 feet of lateral movement space.
Mess Management & Cleanup in Tight Quarters
Use unscented baby wipes for 90% of cleanup. Dedicate one “dirty bag” (a gallon Ziploc) for used sponges to prevent cross-contamination and smears. Never wash heavy paint down a tiny house sink drain; wipe brushes on a paper towel first to protect tiny house plumbing systems.
The Dirty Sponge Dilemma
Used sponges are messy. If you set them on the table, they stain the table. If you stack them, the colors muddy.
I use a mesh lingerie laundry bag hung on a Command hook nearby. Used sponges go in the bag. At the end of the party, the whole bag goes into the wash (if using high-quality face paints) or rinsed in a bucket. This keeps the wet, messy items completely off your limited counter space.
Protecting the Plumbing
If you live in a tiny house on wheels (THOW) or use a gray water system, you must be careful about what goes down the drain. While face paints are generally non-toxic (look for FDA compliant brands like Snazaroo or Mehron), the binders and pigments can build up in narrow P-traps or gray water tanks.
The Protocol:
- Wipe excess paint off brushes onto a paper towel.
- Rinse in your dirty water cup.
- Dump dirty water outside (if eco-friendly) or into a toilet, not the kitchen sink.
- Final rinse with soap in the sink.
This aligns with best practices for paint safety and disposal, ensuring you don’t clog your sensitive systems.
Budget Breakdown: DIY vs. Pro Kit
A DIY Starter Kit ($45) uses craft store brushes and basic palettes, good for casual play. A Pro Compact Kit ($135) invests in split-cakes and professional brushes, offering faster application and better results. For small spaces, the Pro Kit is actually superior because high-pigment paints require less layering and fewer tools.
| Item | DIY Budget Option | Pro/Investment Option | Small Space Impact |
| Paints | Basic 6-color palette ($15) | 2x Split-cake palettes ($50) | Split-cakes replace 12 bottles |
| Brushes | Multi-pack synthetic ($8) | 3 specialized round/flat ($35) | Fewer brushes needed with Pro |
| Sponges | Makeup wedges ($5) | High-density petal sponges ($10) | Petals offer better control |
| Mirror | Dollar store hand mirror ($2) | Lighted folding mirror ($25) | Folding mirror saves hands |
| Storage | Shoe box (Free) | Latching compartmentalized bin ($15) | Latching bin stacks vertically |
| Total | ~$30 – $45 | ~$135 – $150 | Pro Kit saves ~30% volume |
Why “Pro” Saves Space
It seems counterintuitive, but higher-quality supplies usually take up less room. Cheap paints require multiple layers to get opacity, meaning you are scrubbing and reloading constantly. Professional paints (water-activated cake makeup) are opaque in one stroke.
One stroke means faster painting, less water usage, less mess, and happier kids. If you are planning a budget, consider the “cost per face” and the “cost of frustration.”
Safety and Sustainability
Since we are often discussing low-VOC paints for tiny houses for walls, we should apply the same standard to skin.
Safety Checks:
- FDA Compliance: Ensure the packaging says “FDA Compliant” for cosmetic use. “Non-toxic” acrylic craft paint is NOT for skin.
- Hygiene: Use “one sponge per child” or sanitize with alcohol sprays between uses if you are painting many kids.
- Ventilation: While face paints don’t off-gas like wall paint, having a crowd in a small apartment raises CO2 levels rapidly. Crack a window or run your ventilation system.
Storage: The “Tetris” Finish
When the party is over, the breakdown must be swift. The goal is to return your tiny home to its neutral state immediately.
- Dry Everything: Leave lids off the paints for 1 hour to let moisture evaporate. Storing wet paint leads to mold.
- Stacking: My recommended 6-quart bin fits the split-cakes flat on the bottom. The folded towel goes on top as a buffer. Brushes go in a pencil case alongside the towel.
- Location: This kit is small enough to fit under a sofa, in a toe-kick drawer, or on a high shelf in your tiny house storage loft.
Final Thoughts
You don’t need a dedicated art studio to create magic. By respecting the constraints of your square footage, focusing on vertical storage, defining your wet zones, and choosing high-density pigments, you can host a face painting party in even the smallest micro-apartment.
The “Shoebox Studio” proves that living small isn’t about doing less; it’s about organizing better.
- Before buying a bin, find out exactly where it will live (measure height, width, depth).
- Start with one small split-cake palette and a good brush to test the workflow.
- Set it up on your designated surface to ensure you have that 24-inch clearance.
For more ideas on maximizing fun in minimum square footage, explore our guide on living with kids in a tiny house.

