
To calculate paint coverage for a small room, measure the perimeter (total width of all walls) multiplied by the height. Subtract 20 sq ft for each door and 15 sq ft for average windows. However, in tiny homes, you must also subtract built-in cabinetry and lofts. A standard gallon covers 350-400 sq ft, while a quart covers 90-100 sq ft. For spaces under 100 sq ft, two quarts often cost less and save storage space compared to one gallon.
In a sprawling suburban home, buying an extra gallon of paint “just in case” is standard procedure. You toss it in the garage and forget about it. But when you live in a 600-square-foot apartment or a tiny house on wheels, that extra gallon is a liability. It’s a heavy, chemical-filled cylinder taking up precious cubic feet of storage that should belong to your shoes or pantry items.
I’ve made this mistake. I once bought two gallons for a small studio renovation, thinking I was being safe. I ended up painting the walls, the trim, and touch-ups, and still had 1.2 gallons left. That paint sat under my sink for three years, gathering dust.
This guide isn’t just about saving $40 at the hardware store; it’s about precision. We are going to look at paint coverage calculation through the lens of the “Space Optimizer”, ensuring you buy exactly what you need, apply it efficiently, and end up with zero waste and zero storage headaches.
From $50 DIY refreshes to $800 full tiny house interior coats, here is how to do the math correctly.
The “Swiss Cheese” Effect: Why Standard Calculators Fail Small Spaces
Standard paint calculators assume empty, square rooms. Small spaces suffer from the “Swiss Cheese” effect: a high density of windows, doors, and built-ins relative to wall space. In a tiny house, up to 40% of the wall surface might be covered by cabinetry or openings, meaning standard calculators will cause you to overbuy by nearly double.
The Density Problem
If you use a generic online calculator for a 10×10 room, it sees 400 square feet of wall. But in a tiny house, that 10×10 space might include:
- A kitchenette (upper and lower cabinets)
- Two large windows
- A built-in wardrobe
- A sleeping loft ladder
When you subtract these elements, your actual paintable surface might only be 220 square feet. If you buy paint for 400 square feet, you are buying almost double what you need.
The Quart vs. Gallon Debate
In the US market (2024 pricing), a high-quality gallon of low-VOC paint costs between $45 and $70. A quart of the same paint costs $22 to $30.
Math suggests the gallon is a better value per ounce. However, if you only need 1.5 quarts to cover a bathroom and hallway, buying the gallon wastes money and forces you to store the remainder. If you are working with tiny house measurements and standards, precision buying beats bulk buying every time.
Step-by-Step Calculation for Irregular Spaces
To get an accurate number, measure each wall’s Length x Height to get gross square footage. Then, strictly measure every “obstruction” (cabinets, windows, doors) and subtract their total area. Divide the final net square footage by 375 (the average coverage of a gallon) or 95 (average coverage of a quart) to determine containers needed.
1. Measure the Gross Surface Area
Don’t just measure the floor! We need the walls.
- Formula: (Wall A Length + Wall B Length + Wall C Length + Wall D Length) x Ceiling Height.
- Example: A 12×10 tiny house living area with 8ft ceilings.
- Perimeter = 12+12+10+10 = 44 ft.
- Gross Area = 44 ft x 8 ft = 352 sq ft.
2. The Subtraction Phase (Crucial for Small Spaces)
This is where you save money. Measure every item that will NOT be painted or is already finished material.
| Item | Standard Deduction | Tiny House Reality |
| Door | 20 sq ft | 20 sq ft (often sliding/pocket) |
| Window | 15 sq ft | Variable (measure exactly) |
| Kitchen Cabinets | N/A | Measure Width x Height of uppers/lowers |
| Built-in Wardrobe | N/A | Subtract full back wall area |
| Loft Opening | N/A | Subtract the open air space |
Real Scenario: In our 352 sq ft example, let’s subtract:
- 2 Windows (3×4 ft each) = 24 sq ft
- 1 Front Door (3×7 ft) = 21 sq ft
- Kitchen Cabinetry (8 ft width x 2.5 ft uppers + 3 ft lowers) = ~44 sq ft
- Total Deductions: 89 sq ft
3. Calculate Net Paintable Area
- 352 sq ft (Gross) – 89 sq ft (Deductions) = 263 sq ft.
If you had bought paint for 352 sq ft, you’d be dangerously close to needing a second gallon. At 263 sq ft, one gallon is plenty, with a safe buffer for touch-ups.
For more on planning your budget around these numbers, check our guide on paint budget cost analysis.
Coverage Rates by Paint Type and Surface
Not all liquids cover the same area. Primers generally cover less (200-300 sq ft/gal) because they soak into fresh drywall or wood. High-quality topcoats cover more (350-400 sq ft/gal). Texture matters: painting rough wood siding requires 20% more paint than smooth drywall.
Surface Texture Impact
In many tiny homes, walls aren’t just drywall. You might be dealing with shiplap, tongue-and-groove, or plywood.
- Smooth Drywall: 1 gallon = 400 sq ft.
- Raw Wood/Shiplap: 1 gallon = 275-300 sq ft (first coat soaks in).
- Textured Plaster: 1 gallon = 300-325 sq ft.
If you are painting wood interiors, assume the first coat will be thirsty. Always buy 15% more for the first coat on raw materials.
The “Color Change” Factor
Are you trying to brighten a dark apartment? Going from a dark navy to a bright white will require more coats.
- Same color refresh: 1 coat (maybe spot priming).
- Light over light: 2 coats.
- Light over dark: 3 coats (or 1 coat high-hiding primer + 2 topcoats).
Calculation Tip: Multiply your Net Paintable Area by the number of coats needed before dividing by 375.
- 263 sq ft x 2 coats = 526 sq ft total needed.
- 526 / 375 = 1.4 gallons.
- Purchase: 1 Gallon + 2 Quarts (or 2 Gallons if cheaper, but consider storage).
The “Quart Strategy” for Accent Walls and Zones
For areas under 100 square feet, such as accent walls or bathrooms, buying quarts is often smarter than gallons, even if the price per ounce is higher. This minimizes leftover chemical storage in tight living quarters.
When to Buy Quarts
In a standard home, you buy gallons. In a 300 sq ft studio, you might paint the bathroom one color, the kitchen backsplash area another, and the main wall a third.
- Bathroom (40 sq ft of wall): 1 Quart (covers ~100 sq ft single coat). Two coats = 80 sq ft usage. Perfect fit.
- Accent Wall (8×10): 80 sq ft. 1 Quart covers one coat. You need 2 Quarts.
Cost Analysis:
- 2 Quarts = ~$50.
- 1 Gallon = ~$55.
- Verdict: The gallon is only $5 more. However, you will have half a gallon (64 oz) of wet paint left over. In a van life setup or tiny house, where do you put that?
If you have zero storage, paying the “convenience tax” for quarts is actually a space-saving strategy. If you must store it, ensure you follow proper paint storage conditions to prevent it from going bad or releasing fumes in a small area.
Measuring for Trim, Doors, and Ceilings
Trim paint (semi-gloss) covers differently than wall paint. Calculate trim linearly. A standard gallon covers roughly 800 linear feet of 4-inch trim. For ceilings, calculate exactly like walls but with fewer obstructions (usually just light fixtures).
The Linear Foot Method for Trim
Don’t calculate square footage for baseboards. It’s too tedious.
- Measure the perimeter of the floor (baseboards).
- Measure the perimeter of doors/windows (casing).
- Rule of Thumb: 1 Quart of trim paint covers roughly 200-225 linear feet of standard 4-inch trim (one coat).
For a tiny house with 44 linear feet of perimeter, 1 door, and 2 windows, you have roughly 80-100 linear feet of trim. One quart of semi-gloss is plenty for two coats.
Ceiling Math
Don’t forget the “fifth wall.” In lofts, the ceiling is often much closer to you, making the finish quality critical.
- Ceiling Area = Floor Area (mostly).
- Subtract skylights or loft openings.
- Check our guide on low ceiling paint solutions to choose the right finish that expands the space.
The Primer Variable
Never skip the primer calculation if you are working with fresh materials or drastic color changes. Primer is cheaper than topcoat ($20-$30/gal vs $60/gal). Using primer to build up opacity saves you from using expensive topcoat for coverage.
If you are painting over wood materials in tiny houses or fresh drywall, the surface is porous.
- Calculate Net Area.
- Buy enough primer for one solid coat.
- Sand lightly.
- Then apply your topcoat.
This ensures your neutral paint colors look true to their swatch and don’t look patchy, which would force a third coat of expensive paint.
Tools That Save Paint (and Space)
The tool you use affects coverage. High-nap rollers (1/2 inch) absorb more paint and put more on the wall (good for texture). Low-nap rollers (1/4 inch) use less paint but require smooth walls. For tiny spaces, mini-rollers (4-inch) are superior to standard 9-inch rollers for control and waste reduction.
The Mini-Roller Advantage
In a tiny house kitchen, a standard 9-inch roller is clumsy. It hits cabinets and ceilings.
- 4-inch or 6-inch “Hot Dog” Rollers: These fit into quart cans (eliminating the need for a large roller tray).
- Less Waste: A large roller holds about 6-8 ounces of paint inside the nap that gets washed down the drain. A mini roller holds 2 ounces. That’s a cup of paint saved per coat.
For a full list of gear, see our breakdown of painting tools for tight spaces.
What to Do with the Leftovers?
Even with perfect paint coverage calculation, you will have a little left. You need some for touch-ups, but not a whole can.
- The Mason Jar Method: Pour the last 10-15 ounces into a glass jar with a tight seal. Label it with the Brand, Color Name, Sheen, and Date. This takes up 90% less space than a gallon can.
- The “High-Traffic” Coat: If you have half a quart left, put a third coat on the hallway or entry area where scuffs happen most. Use it up rather than storing it.
- Proper Disposal: Never pour paint down the drain, especially if you are on a septic tank or off-grid system common in tiny house plumbing. Dry it out with cat litter and trash it, or take it to a recycling center.
The Space Optimizer’s Checklist
- Measure Gross Area: (Perimeter x Height).
- Aggressive Subtraction: Remove windows, doors, cabinets, and built-ins.
- Assess Texture: Add 15% for raw wood or texture.
- Determine Coats: 2 coats is standard. 3 for drastic color changes.
- Calculate Volume: (Net Area x Coats) / 375 = Gallons needed.
- Check Quart Viability: If result is < 0.5 gallons, buy 2 quarts to save storage.
- Choose Tools: Use mini-rollers to reduce paint waste in the tray.
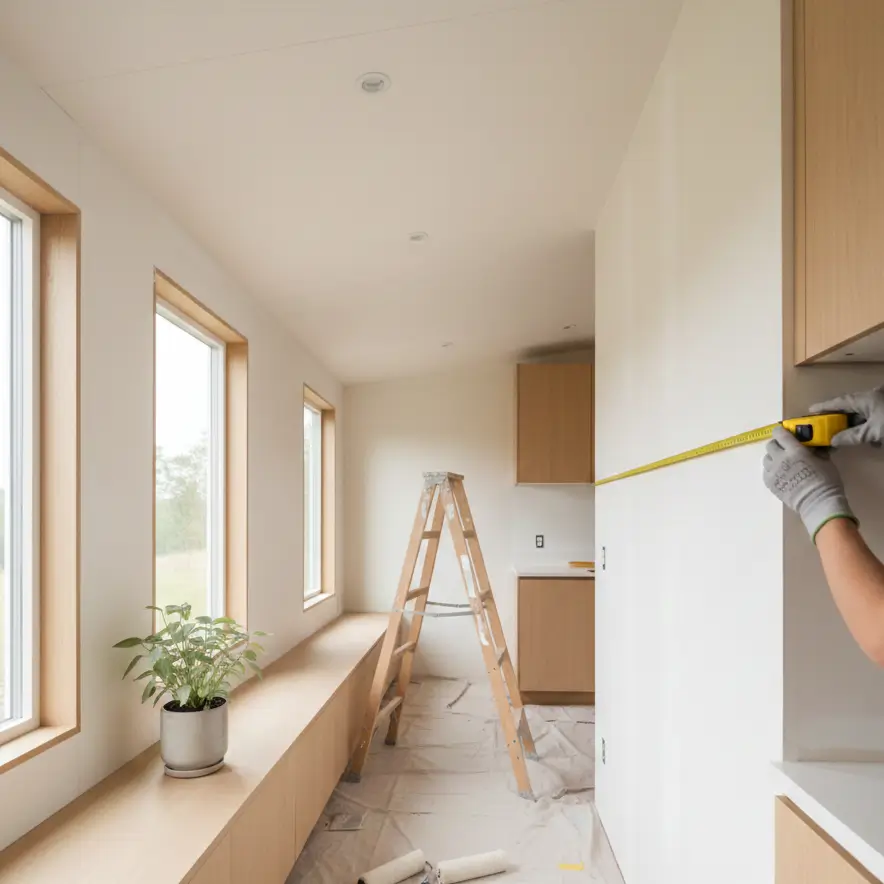
Precision is the key to comfortable small-space living. By calculating exactly what you need, you keep your budget tight and your storage closets usable.
Grab your tape measure and a notebook. Sketch out your “obstructions” first, that’s where the real math happens. If you’re ready to pick your palette, head over to tiny house color selection to find shades that make your space feel larger.
For more tips on optimizing every inch of your home, visit veniola.com.

