
Car painting techniques are essential for mobile dwellings like VanLife conversions and Tiny House on Wheels (THOW) trailer frames. Unlike standard house paint, automotive finishes (urethanes and bed liners) withstand road debris, vibration, and 65+ MPH winds. For a standard 170″ wheelbase van, budget $600-$1,200 for DIY materials, requiring a dust-free environment, 60°F+ temperatures, and rigorous safety gear including organic vapor respirators.
The average house sits still. Your tiny house on wheels (THOW) or adventure van does not. When you tow a tiny home down the highway, you are subjecting it to the equivalent of a Category 1 hurricane (74+ mph winds), flying gravel, and constant vibration.
This is where standard exterior latex paint fails.
While I usually advocate for simple, eco-friendly chalk or milk paints for interiors, the exterior of a mobile habitat requires a different beast entirely. It requires car painting logic. Whether you are restoring a Sprinter van for full-time living or protecting the custom steel trailer your tiny house sits on, understanding automotive finishes is the difference between a sleek, 10-year finish and a rusting peeling mess within six months.
I’ve seen DIYers roll latex paint onto a van, only to have it flake off in sheets after one trip through the Arizona desert. Let’s look at how to do this right, even if you’re working in a driveway or a rented garage.
Why Use Automotive Paint on a Home?
Automotive paint offers superior hardness, UV resistance, and flexibility compared to architectural coatings. It is designed to bond to metal and fiberglass, the primary materials of vans and trailer chassises. While house paint costs $0.05/sq ft, automotive finishes cost $1.50+/sq ft but prevent structural rust on assets worth $50,000+.
The Durability Factor
In a small space, every layer matters. A standard 24-foot tiny house trailer frame exposes about 120 square feet of surface area to the road. If you treat this metal with standard enamel, rock chips will lead to rust. Rust leads to structural failure.
Car painting systems use a chemical hardener (catalyst) that creates a cross-linked shell. This isn’t just “drying” like wall paint; it’s curing into a plastic-like shield.
The “Look” and Resale Value
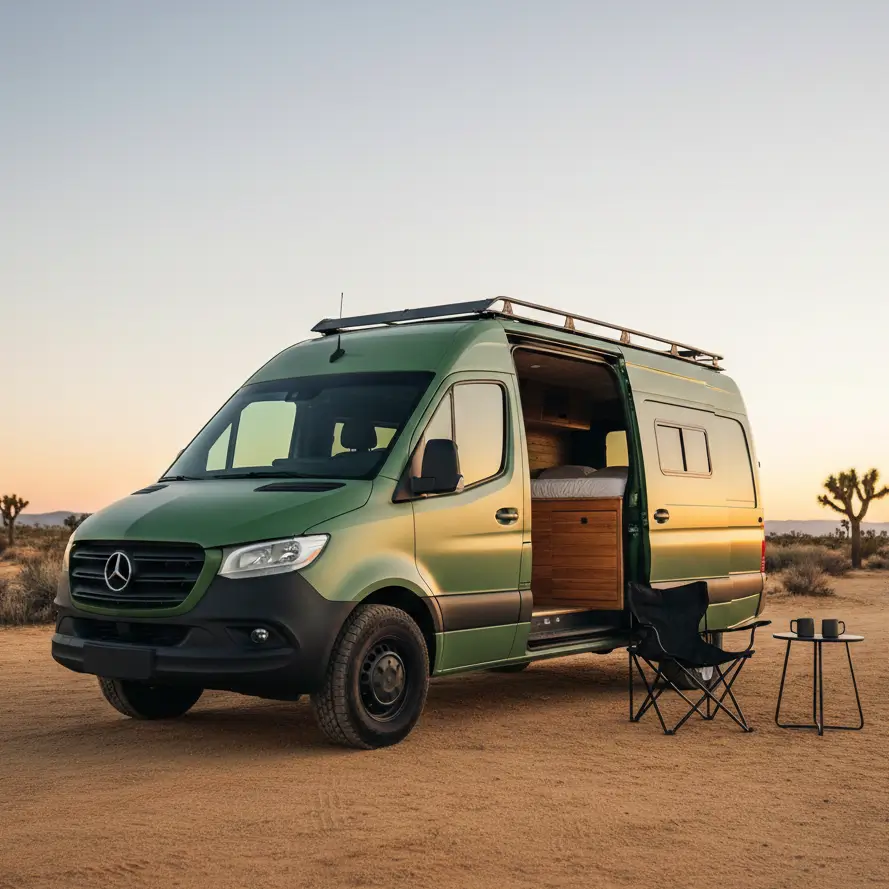
If you are building a van conversion, the exterior condition is 40% of the vehicle’s resale value. A “rattle can” paint job signals a cheap build. A proper automotive finish signals a professional restoration.
- Van Conversion: 60-80 sq ft of living space.
- Tiny House Trailer: The foundation of your 200-400 sq ft home.
For more on the base structures, check our guide on tiny house on wheels specifications.
Types of Paint: What to Buy
For DIY mobile habitats, avoid basecoat/clearcoat systems (too complex). Instead, use Single Stage Urethane (glossy, durable, mixes 4:1 with hardener) or Urethane Bed Liner (textured, bomb-proof, hides dents). Budget roughly $200 per gallon for Urethane or $150 per kit for quality liner.
1. Single Stage Urethane
This is the gold standard for DIYers wanting a glossy finish on a van or metal siding.
- Pros: UV stable, very shiny, durable.
- Cons: Contains Isocyanates (toxic), requires a compressor and spray gun.
- Coverage: 1 gallon covers a small car; 2 gallons for a high-roof van.
2. Bed Liner (The “Adventure” Look)
Brands like Raptor Liner or Monstaliner are popular in the “Overland” community. This is thick, textured paint often used on the bottom 12 inches of a tiny house (the rocker panels) to prevent rock chips.
- Pros: Easy to spray, requires less prep, incredibly tough.
- Cons: Hard to clean mud out of the texture, adds weight.
- Application: Can be rolled or sprayed.
If you are painting specific materials like trim or non-metal parts, refer to our guide on painting plastic, foam, and rubber.
Preparation: The 90% Rule
90% of a good paint job is prep work. For a standard van, expect 40 hours of sanding and masking for 2 hours of spraying. You must degrease surfaces, sand with 320-400 grit paper, and use a self-etching primer on bare metal to ensure adhesion.
Step 1: Disassembly
Don’t tape over tail lights or door handles if you can remove them. In a small space or driveway, overspray goes everywhere. Removing parts is safer than masking them.
Step 2: Sanding and Body Work
You aren’t just scuffing the surface; you are creating a mechanical “tooth” for the paint to grip.
- Metal: Use 80 grit for rust, 180 to smooth feather-edges.
- Old Paint: Scuff with 320-400 grit.
- Plastic Bumpers: require an adhesion promoter.
Step 3: Cleaning
Use a dedicated wax and grease remover. Do not use dish soap (it leaves residue) or standard mineral spirits. Even the oils from your fingerprints can cause “fish eyes” (craters) in the paint.
For broader context on preparing small environments for work, read about paint preparation in small apartments.
Spray vs. Roll: The Small Space Dilemma
Spraying (HVLP gun) gives a factory finish but requires a large compressor (20+ gallon tank), a makeshift booth, and respirator. Rolling (using the “Roll and Tip” method) is quieter, requires no compressor, and creates less mess, making it ideal for driveway renovations in dense neighborhoods.
The “Roll and Tip” Method
If you don’t have space for a compressor:
- Thin your oil-based enamel or marine paint heavily (mineral spirits).
- Use a high-density foam roller to apply paint.
- Immediately drag a dry, high-quality brush tip over the wet paint to pop bubbles and smooth ridges.
- Repeat for 3-4 coats, sanding in between.
This is a favorite technique for budget-conscious tiny house builders. It takes longer but costs $300 less in equipment. See more on spray vs brush vs roller.
Safety: The Isocyanate Danger
Modern 2K (two-part) automotive paints contain Isocyanates, which are potent sensitizers. They have no smell but can cause permanent asthma or lung damage. Standard dust masks do NOT work. You must use a fresh-air supply system or a high-quality dual-cartridge organic vapor respirator changed frequently.
When working in a confined space, like inside a garage with a van, ventilation is life or death.
- Ventilation: You need an explosion-proof fan pushing air OUT.
- Skin: Isocyanates can absorb through the skin and eyes. Wear a full Tyvek suit ($15).
- Neighbors: Overspray travels. Do not spray 2K paint within 50 feet of neighbors’ cars or open windows.
For a full breakdown of regulations, please review paint safety regulations.
Budget Breakdown: DIY Van Paint Job
A DIY paint job typically costs between $500 and $1,500. A cheap shop (Maaco level) might charge $1,000 but does little prep. A professional restoration shop charges $5,000+. Doing it yourself saves labor costs but requires tool investment.
| Item | Budget Tier ($) | Mid-Range Tier ($) | Pro Tier ($) |
| Paint & Primer | $150 (Rustoleum/Tractor Paint) | $400 (Single Stage Urethane) | $800+ (Base/Clear) |
| Sandpaper/Masking | $50 | $150 | $250 |
| Spray Gun | $20 (Harbor Freight) | $150 (Devilbiss StartingLine) | $500+ (Sata/Iwata) |
| Safety Gear | $40 | $100 | $300 (Fresh Air System) |
| TOTAL | $260 | $800 | $1,850+ |
Note: This assumes you already own or can borrow an air compressor.
Check our paint budget cost analysis for more details on calculating coverage.
Painting Specific Parts of a Tiny House
The Trailer Frame
The steel trailer is the spine of your house. It is often delivered with a cheap black coating that fails quickly.
- Recommendation: Use a chassis saver paint (like POR-15) or a 2-part epoxy primer followed by a Urethane topcoat.
- Why: These paints chemically bond to rust (after prep) and seal the metal from moisture.
- Focus Areas: Pay attention to the tongue (where the hitch is) and the wheel wells. These see the most abuse.
- Measurement: A 24′ trailer frame has roughly 150 linear feet of steel tubing. You will need roughly 2 quarts of paint.
For more on dealing with steel structures, read painting metal surfaces.
The Roof (Metal)
If you are restoring a vintage Airstream or painting a galvanized roof:
- Galvanized Metal: Must be etched with vinegar or an acidic cleaner before painting, or the paint will peel like a sunburn.
- Heat: Use white or light colors to reflect heat. A black roof can raise interior temperatures by 20°F in a tiny space.
For cooling strategies, look at tiny house heating and cooling.
Common Mistakes in DIY Car Painting
- Painting in Humidity: If it’s above 60% humidity, moisture gets trapped in the paint, causing a cloudy finish (blushing).
- Rushing the Cure: Just because it’s dry to the touch doesn’t mean it’s cured. Do not drive the van or tow the house for at least 48 hours after painting.
- Ignoring Temperature: Paint flows differently at 50°F vs 80°F. Most specialized paints require 65°F-75°F to lay flat.
If you mess up, don’t panic. Consult our guide on paint problems and solutions.
Synthesis
Applying car painting principles to your tiny house or van build is an investment in longevity. While the learning curve is steeper than rolling a wall in a bedroom, the protection it offers your mobile asset is unmatched.
- Is your project a cosmetic refresh (VanLife) or structural protection (Trailer Frame)?
- Can you afford the $400 for proper Urethane safety gear and materials?
- Do you have a place to spray where overspray won’t ruin your neighbor’s day?
If you decide the equipment investment is too high, consider doing the heavy prep work yourself (sanding/disassembly) and hiring a pro just for the spraying. It’s a hybrid approach that saves money and guarantees a smooth finish.
Visit veniola.com for more guides on building and maintaining your compact life.

