
Here is a number that used to drive me crazy: 350 square feet.
That is the standard coverage for a gallon of paint. But when I was renovating my first 280 sq ft tiny house on wheels, I realized something frustrating. I didn’t need a gallon. For my bathroom accent wall, I needed exactly a quart. For my kitchen cabinets, I needed a specific durable enamel, but only three pints of it.
Buying standard gallons for tiny spaces isn’t just a storage nightmare; it’s money down the drain.
If you are living in a studio apartment or a tiny home, the standard rules of paint mixing and types don’t apply to you. You need to understand chemistry (for air quality in small volumes), you need to master “micro-batching” custom colors, and you need to know exactly which paint type sticks to laminate furniture vs. drywall without peeling six months later.
From a $15 DIY tinting project to high-end architectural finishes, let’s break down how to handle liquid color when every inch counts.
The Chemistry of Small Spaces: Paint Types Explained
In spaces under 600 sq ft, avoid oil-based paints due to lingering fumes. Stick to 100% Acrylic Latex for walls (flexible, breathable) and Waterborne Alkyds for cabinets/trim (durable like oil, cleans up with water). Always verify Low-VOC (<50g/L) certification.
Why “Type” Matters More in a Tiny House?
In a large suburban home, if you use a high-VOC oil paint in the bedroom, you can sleep in the guest room while it cures. In a 300 sq ft tiny house, you sleep, eat, and work in the fumes.
The “type” of paint defines the binder, the glue that holds the pigment to your wall.
Water-Based Latex (The Standard)
This is your go-to for drywall and ceilings. It dries fast (1-2 hours) and has low odor.
- Best for: Walls, low-traffic ceilings.
- Tiny House Tip: Look for “Self-Priming” labels to save the storage space of keeping a separate primer can.
100% Acrylic (The Performer)
Acrylic is a step up from standard latex. It has more elasticity. Tiny houses on wheels move; they vibrate down the highway and shift with temperature changes. Standard latex might crack. Acrylic expands and contracts with your home.
- Best for: Tiny homes on wheels (THOWs), exterior siding, bathrooms.
Waterborne Alkyd (The Hybrid)
This is my favorite product for small space furniture. It behaves like an oil paint, leveling out smoothly to hide brush marks, but cleans up with soap and water.
- Best for: Kitchen cabinets, built-in storage units, multipurpose furniture.
Read more: Paint Brands for Small Spaces
Oil-Based (The Danger Zone)
Honestly? Skip it. The solvents require mineral spirits for cleanup and release high levels of Volatile Organic Compounds (VOCs). In a small unventilated bathroom or loft, this can cause headaches and dizziness.
Read more: Low VOC Paint for Tiny Houses
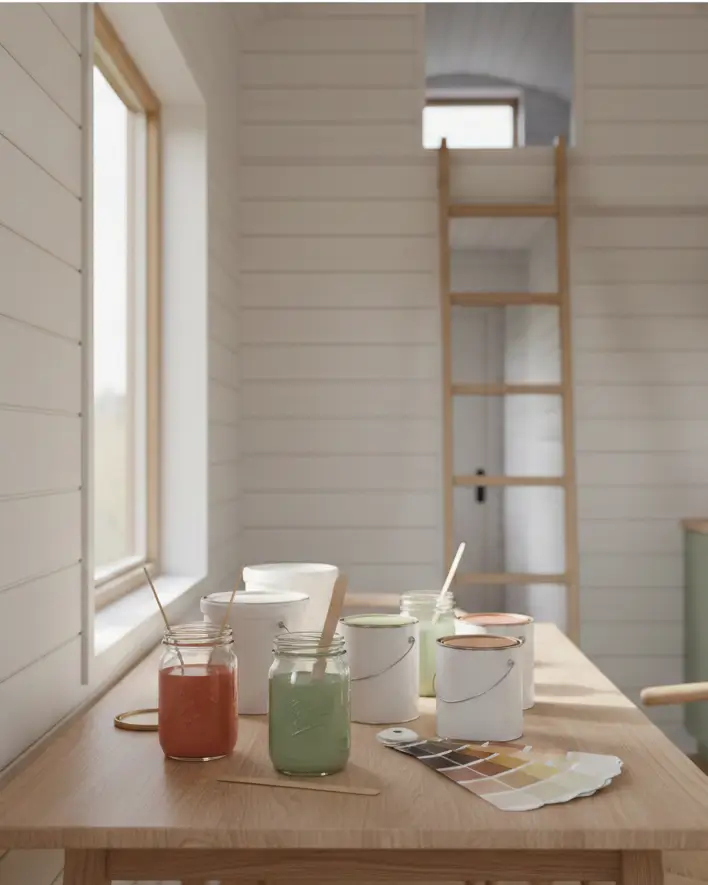
Micro-Batching: Mixing Custom Colors at Home
“Micro-batching” is mixing paint in small volumes (8oz to 1 quart) for accent areas. Use a white base and universal acrylic tints. Start with a ratio of 10 parts base to 1 part tint. Always mix 20% more than calculated to ensure color consistency for touch-ups.
The Problem with the Paint Counter
If you walk into a hardware store and ask for “Classic Gray,” they usually have to mix a full quart minimum. But what if you only need a cup to paint a floating shelf?
Mixing your own paint allows you to control the volume and the budget. You can turn a leftover half-gallon of white ceiling paint into three different colored accent paints.
Step-by-Step DIY Mixing Guide
- Gather Supplies:
- Base Paint (White or Neutral High-Quality Acrylic).
- Universal Tints (Concentrated pigment bottles, usually $5-$8 each).
- Measuring cups (use dedicated plastic cups, not your baking ware!).
- Glass Jars with airtight seals (Mason jars work perfectly).
- The “Slow Drop” Technique:
Start with 1 cup of white base. Add your tint drop by drop.- Pastel: 2-5 drops per cup.
- Mid-tone: 1 teaspoon per cup.
- Deep Tone: Up to 1 tablespoon per cup (Note: Too much tint can weaken the paint binder. Never exceed 10% tint by volume).
- The Index Card Test:
Paint dries darker (usually) or lighter (occasionally, depending on sheen) than it looks wet. Smear a sample on an index card and dry it with a hair dryer to see the “true” color before committing to the wall. - The “Box” Method:
If you are mixing two separate cans of the same color (even if bought from the store), pour them both into a larger bucket and mix them together. This “boxing” technique ensures that if there is a slight manufacturing variance, you won’t see a seam in the middle of your wall.
Pro Tip: Keep a “Formula Log.” If you create a custom sage green for your kitchen backsplash, write down exactly “1 cup white + 12 drops Thalo Green + 2 drops Raw Umber.” You will thank yourself two years from now when you get a scratch.
Read more: Paint Coverage Calculation
Sheen Selection: Expanding Space Visually
Sheen affects how light bounces. In small spaces, Satin is the universal standard, it reflects enough light to brighten the room but isn’t so shiny that it highlights drywall imperfections. Use Semi-Gloss only for trim and moisture-prone areas like tiny bathrooms.
When you are sitting four feet away from a wall in a small apartment, the finish becomes very noticeable.
The Sheen Spectrum for Compact Living
| Sheen Type | Reflectivity | Durability | Best For | Small Space Risk |
| Flat/Matte | 0-5% | Low | Ceilings, Low-traffic walls | Scuffs easily; hard to clean in tight hallways. |
| Eggshell | 10-25% | Medium | Living areas, Bedrooms | The safe bet. Hides flaws well. |
| Satin | 25-35% | High | Kitchens, Bathrooms, Hallways | My Recommendation. Bounces light to make rooms feel larger. |
| Semi-Gloss | 35-70% | Very High | Trim, Doors, Cabinets | Can create glare from close-proximity lighting. |
| High Gloss | >70% | Extreme | Furniture accents | Highlights every bump in the wall surface. |
In a tiny house, walls get touched constantly. You brush against the hallway wall carrying groceries; the dog rubs against the wainscoting. Therefore, I rarely recommend Flat paint for walls in small spaces. It just can’t handle the abrasion.
Read more: Paint Finishes for Small Spaces
Mixing for Texture and Imperfections
To hide uneven walls in a rental or DIY build, mix in additives. Sand additives create a grip texture. Joint compound mixed with paint (skim coating) creates a plaster look. Always test texture mixes on a scrap board first.
The “Rental Rescue” Mix
Many small apartments have terrible drywall patch jobs from previous tenants. Painting regular gloss over them makes them look worse.
The Solution: Mix a “High-Build” Primer.
You can buy specific high-build primers, or in a pinch, professional painters sometimes mix a very small amount of joint compound into their primer to thicken it (carefully!). This fills in minor sanding scratches and pinholes.
However, for a purposeful aesthetic, Limewash is becoming huge in the tiny house community. It creates a cloudy, matte texture that adds depth without shrinking the room visually. It’s breathable and naturally resistant to mold, a massive plus for tiny house bathrooms.
Read more: Bathroom Paint Moisture Solutions
Storage and Disposal: The Tiny Reality
Do not store rusty gallon cans. Transfer leftover paint into glass mason jars. Label the lid with: Date, Room Used, and Brand/Code. Store in a climate-controlled area (under a bed or in a closet), as freezing temps in an exterior storage locker will ruin latex paint.
The Shelf-Life of Paint
- Unopened Latex: 2-3 years (if kept from freezing).
- Opened Latex: 1 year max before it starts to smell sour or clump.
- Oil-Based: 10+ years (if sealed perfectly).
In a tiny house, space is currency. Keeping five half-empty gallon cans “just in case” costs you about 4 cubic feet of prime storage.
My Rule: Transfer leftovers to pint jars immediately. If you have more than a pint left, offer it to a neighbor or use a paint hardener to dry it out and dispose of it, then keep just the small jar for touch-ups.
Read more: Paint Storage Conditions
Budget Breakdown: DIY vs. Custom Match
A gallon of premium paint costs $60-$80. Mixing your own using a budget base ($30) + tints ($15) saves money only if you have tools. For areas under 100 sq ft, buying “Sample Pots” (usually 8oz for $5-8) is the most cost-effective secret.
Let’s look at the math for a 60 sq ft accent wall in a studio apartment.
Option A: The Gallon
- Cost: $55.00
- Waste: You use 15% of the can. 85% sits in your closet.
- Total Cost: $55.00
Option B: The Sample Pot Hack
- Most brands sell “color samples” in pints or 8oz jars.
- Coverage: 8oz covers roughly 15-20 sq ft.
- Purchase: 3 sample pots at $7 each.
- Total Cost: $21.00
- Warning: Some sample pots do not have hardeners included. Check the label. If it says “Sample Only – Not for Top Coat,” do not use it for durability. However, many high-end brands sell actual pints of the real formula.
Read more: Paint Budget Cost Analysis
Troubleshooting Common Mixing Mistakes
Problem: “My custom mix looks streaky.”
Cause: Incomplete mixing.
Fix: Use a drill attachment mixer ($5 tool) rather than a wooden stick. Mix for fully 2 minutes longer than you think you need to.
Problem: “The paint smells like rotten eggs.”
Cause: Bacteria growth in old paint.
Fix: Throw it out immediately. Do not try to mix fresh paint into it. The smell will never leave your tiny home.
Problem: “The color is separating.”
Cause: Incompatible types. You likely mixed an oil-based leftover with a water-based leftover.
Fix: Unsalvageable. They will never bond. This is why labeling your storage jars is critical.
Read more: Paint Problems & Solutions
Final Thoughts
Designing for small spaces requires precision. You don’t paint with broad strokes; you paint with intent. Whether you are using a Waterborne Alkyd to refinish a dual-purpose table or micro-batching a custom terracotta hue for your reading nook, the key is understanding the materials.
By mixing your own volumes and selecting the right chemical base for your specific environment, you improve your indoor air quality, save precious storage space, and get a finish that lasts.
- Check any old cans for rust or sour smells.
- Calculate the exact square footage (Height x Width) before you buy.
- Look for quarts or pints first.
For more on applying these paints specifically to small-scale furniture, check out our guide on Painting Furniture and Home Decor.

