
If you’ve inherited a room with a shoddy drywall finishing job that was then painted over, you’ll need to take some careful steps to fix it. Mudding and taping over painted drywall requires finesse so you don’t damage the existing paint job. With some sanding, skim coating, priming and repainting, you can turn that bad mud job into a smooth, flawless wall surface.
Key Takeaways
- Sanding is crucial to flatten ridges and texture before adding skim coats. Work systematically with increasingly finer grits.
- Use thin coats of joint compound and minimal sanding to avoid damaging the existing paint.
- Cut out and repair any seriously damaged spots before skim coating.
- Allow ample drying time between steps. Rushing leads to problems.
- Prime sanded walls before painting for proper adhesion and uniform finish.
- Redoing all the drywall tape may be required in severe cases to get walls smooth.
- Consider hiring a pro for big drywall finishing projects. Their work will be higher quality.
- Maintain painted drywall properly through repainting, caulking, and gentle cleaning.
- Work patiently and methodically for the best results. It’s a process.
- The goal is to create an even surface profile for high-quality paint coverage.
- Damaged drywall under existing paint must be addressed or it will still show.
- Use quality paint and applicators like mini-rollers to get a professional painted finish.
- Monitor the finished job under bright light to catch any imperfections before final coat.
- Don’t use flat paint for walls with repaired drywall areas. Eggshell or satin is best.
- Ensure the room environment is controlled properly for drying each step according to label directions.
- Caulking, nail holes, trim gaps all take finishing work for truly flawless walls.
- Theprep work makes all the difference in getting painted drywall repairs to blend in seamlessly.
- Completely resurfacing the texture may be needed if sanding doesn’t adequately flatten it.
- Patience and attention to detail are must-haves for DIY drywall finishing and painting.
Assessing the Drywall Damage
Start by thoroughly examining the drywall for flaws. Look for these common problems:
- Uneven mud ridges
- Visible drywall tape joints
- Cracked or damaged mud patches
- Uneven paint coverage or texture
- General bumpiness across the surface
Try running your hand lightly over the wall to feel for any imperfections or areas that weren’t properly sanded. Identify each trouble spot so you know how much work will be involved in smoothing and repairing the wall.
Sanding Down High Spots
Before attempting to skim coat or add any new mud, you’ll need to flatten down the existing texture as much as possible. This is done through careful sanding:
- Use a pole sander with 120-150 grit sandpaper to sand down high ridges and uneven mud spots. Work in a circular motion.
- Sand just enough to knock down the high points without sanding deep into the paint or existing mud.
- Go over the entire surface, not just visible flaws, to flatten any variations in texture.
- Change to progressively finer grit sandpaper as you get closer to a smooth finish. 200-220 grit works well for the final sanding.
- Rinse the wall with clean water on a damp sponge to remove all dust between sanding sessions.
- Inspect closely under good lighting to ensure you’ve removed any unevenness. Rework any stubborn spots.
The goal is to get the surface as flat and uniform as possible before applying any new mud or primer. Be patient and thorough in the sanding process for best results.
Repairing Damaged Areas
For cracked or missing mud patches, you’ll need to cut away the damaged areas and remud those spots:
- Use a sharp utility knife to cut out any cracked or hollow sections of mud all the way down to the drywall paper.
- Cut and peel away any loose drywall tape.
- Using a 6” drywall knife, apply a smooth layer of joint compound into the holes and gaps.
- Let it dry completely, then apply a second coat if needed to flatten it.
- When dry, sand the patched areas smooth and level with the rest of the wall.
This approach is preferable to applying new mud right over flawed areas. By cutting out the damage first, the wall will be ready for a consistent skim coat.
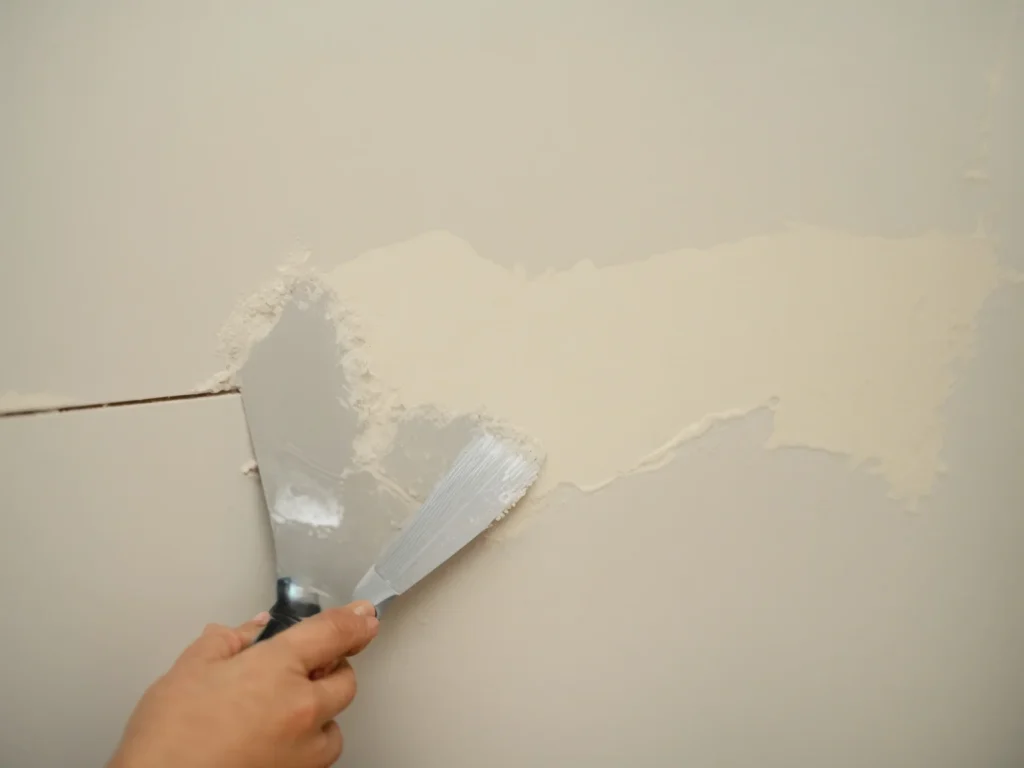
Skim Coating Over Painted Drywall
Once all sanding and repairs are complete, you can apply a thin skim coat to smooth everything out:
- Use a 12” drywall knife and all-purpose pre-mixed joint compound for skim coating.
- Apply a very thin, even layer across the entire area you sanded and repaired.
- Let the skim coat dry fully according to the product directions. It may take 24 hours or more.
- Lightly sand again with 220 grit after drying to blend the skim coat and remove any high spots.
- Take care not to sand through the mud down to paint. Keep sanding minimal.
- Apply a second skim coat if needed to build up low spots and create one uniform surface.
This professional technique yields a perfectly smooth finish over painted drywall. The thin mud layers fill in imperfections without heavy sanding of the painted surface underneath.
Priming Before Painting
Primer is essential before repainting over sanded and skim coated drywall:
- Use high quality drywall primer designed for new mud and tape joints.
- Apply a coat of primer to the entire area, not just repaired spots. This ensures the paint will adhere properly.
- For best results, use two thin coats of primer to seal everything uniformly.
- Lightly sand again after priming if any ridges or bumps are present.
- Let primer fully cure for at least 24 hours before painting.
Primer locks in the mud work, allowing for an even paint finish. Tinting the primer close to your final paint color helps hide imperfections better as well.
Painting Over Previously Painted Drywall
The final step is repainting the wall for a fresh look:
- Use high quality interior wall paint in a matte or eggshell finish. Avoid flat paints.
- Apply two finish coats of paint for adequate coverage and an even appearance.
- Use a mini foam roller and cut in edges with a quality angled brush for seamless results.
- Work methodically and maintain a wet edge to prevent lap marks and variation in sheen.
- Let the first coat fully dry before adding the second coat for best durability.
- Add a third coat if any unevenness in sheen or texture is present after two coats.
With quality prep work and materials, you can achieve a flawless, professional paint finish over your once-damaged drywall.
Tips for a Smooth Finish
Here are some additional pointers for getting the best results:
- Allow plenty of drying time between steps. Rushing the process can ruin the work.
- Keep sanding very minimal to avoid penetrating the paint or primer coats.
- Fill any nail holes with spackle before painting.
- Carefully wash walls first to remove all grease, dust and grime before priming.
- Work methodically and patiently for smooth, consistent coverage.
- Maintain humidity between 40-50% in the room to optimize drying.
- Turn on all lights to check for imperfections before final painting.
- Use high quality painter’s tape for clean edges along trim and ceilings.
- Caulk along seams and corners after painting for a polished finish.
When to Redo Drywall Taping
In some cases, it may not be possible to achieve a perfect finish by skim coating and priming alone. Extensive cracks, damaged corners, and loose tape may require redoing the entire drywall taping process:
- Remove all loose tape by cutting into the center and peeling away.
- Use water and a drywall mesh screen to scrape off cracked or hollow mud.
- Wash the walls with TSP substitute cleaner to remove dust.
- Cut out any damaged drywall and screw in new sheets as needed. Mud the seams.
- Apply new paper drywall tape embedded into thin layers of joint compound.
- Cover all seams with 1-2 more coats of compound, feathering it out wide.
- Fill all inside corners with flexible corner beads for durability.
- Let dry fully, then sand for smoothness prior to priming.
- Skim coat as needed to create one uniform plane.
Completely redoing the taping is more work, but sometimes necessary for extensively flawed drywall finishing. This helps create a like-new wall surface to paint.
Hiring a Drywall Professional
For large drywall repair projects, or very complicated finishing issues, it may be wise to hire a professional drywall contractor. A good drywaller has the skills and tools to:
- Easily match existing drywall texture.
- Perfect the seams, corners, and skim coating for a flawless finish.
- Efficiently smooth walls and avoid excessive sanding or damage.
- Provide the prep work needed for you to complete painting yourself.
Look for a contractor experienced in both drywall installation and finishing repairs. Get estimates from several companies before hiring.
While hiring out drywall work costs more upfront, it may save frustration and prevent problems later on for tricky drywall repairs. The results will be much smoother than a DIY patch job.
Maintaining Painted Drywall
Once your drywall is smoothed and painted, follow these tips to keep it looking fresh:
- Repaint walls every 3-5 years to keep them looking clean and prevent yellowing.
- Use mold resistant paint in moisture-prone rooms like bathrooms.
- Caulk cracks as soon as they appear to prevent water intrusion.
- Avoid hitting walls with furniture or heavy impacts.
- Clean painted walls only with soft cloths and mild cleaners. Avoid abrasives.
- Fix popped nails or screw heads that compromise the surface.
- Monitor for any potential plumbing leaks behind walls to avoid water damage.
With proper prep and maintenance, your repaired and repainted drywall can look amazing for years before needing work again. Take steps to keep walls smooth and prevent damage.

