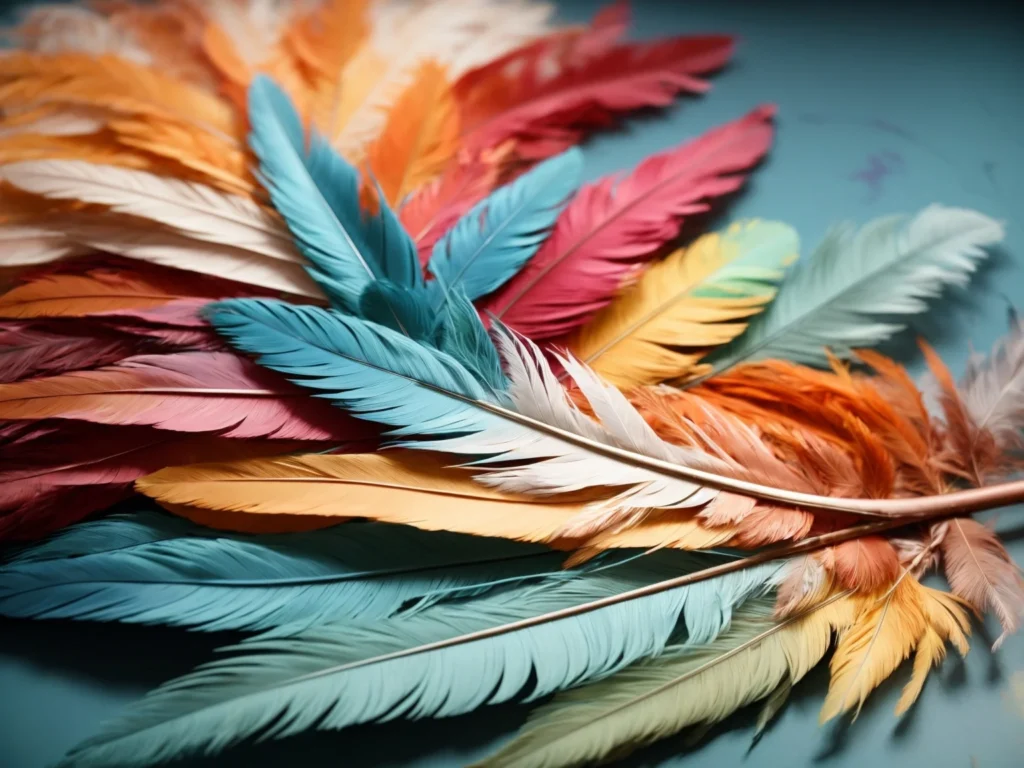
Spray painting feathers allows for creative coloring and designs without having to dye plumes in a vat. With the right paints and technique, you can transform plain feathers into works of art using a spray can or airbrush. This comprehensive guide covers how to successfully spray paint feathers for crafts, costumes, accessories, and more.

Can You Spray Paint Feathers?
Yes, you can spray paint feathers to change their color or add artistic designs. The trick is using light, even coats of spray paint so that the paint adheres properly without being too heavy and weighing the feathers down.
Acrylic craft paints designed for spray painting work best when spray painting feathers. Avoid saturating the feathers with too much paint or using heavy coatings, as this can make plumes stiff and cause the barbs to clump together into a matted mess. With the right paint and a light touch, spray painted feathers take on brilliant new hues.
Best Spray Paints for Feathers
These types of spray paints work well for feather painting projects:
Acrylic Craft Spray Paints
Look for lightweight acrylic craft paints designed for spray application on material like wood, fabric, wicker, and more. These provide vivid color without saturating delicate feathers. Brands like Krylon, Montana Cans, and Rustoleum make acrylic craft spray paints.
Airbrush Paint
Airbrush paints allow for ultra fine spray painting applications. The soft mist won’t overwhelm feathers. Create ombre fades and frosted color effects.
Fabric Spray Paint
Fabric paint sprays adhere well to all kinds of material without being too heavy. Use light coats for feathers.
Clear Topcoats
Use clear acrylic sprays like Krylon to seal completed spray painted feathers. This protects the finish.
Avoid Spray Enamels
Enamel spray paints may be too heavy for feathers and make them stiff. Stick to formulated acrylic sprays.
Spray Painting Feathers vs Dyeing
Both spray painting and dyeing can transform plain white feathers into brilliant hues. However, there are some differences between the two techniques:
- Spray painting applies color to the surface of the feather while keeping the interior structure untouched. It creates an opaque effect.
- Dyeing saturates the entire feather and penetrates the inner barbs and rachis for see-through color effects.
- Spray paint coats the exterior and can leave the edges of barbs lighter. Dye permeates everything evenly.
- Spray painting has a learning curve to get the right amount of spray. Too much paint causes problems.
- Dyeing requires extensive drying time. Spray painted feathers can be handled faster.
- Spray painting allows for ombre gradients. Dyeing gives flat, saturated color all over.
- Spray painting offers precise control for intricate patterns and designs. Dyeing lacks precision.
So while dyeing thoroughly changes feather color, spray painting provides more versatility for different artistic effects. Light coats of spray paint help keep feather structure intact.
How to Spray Paint Feathers
Follow these steps for spray painting feathers successfully:
1. Gather Materials
- Feathers to paint
- Acrylic craft spray paint
- Newspaper or drop cloth
- Masking tape
- Cardboard for work surface
- Acrylic sealer spray (optional)
- Paper plate palette
- Respirator mask & ventilated workspace
2. Prepare Feathers
- Clean feathers first by wiping down with a dry cloth to remove dust and surface debris.
- Lay feathers out on cardboard and loosely secure with masking tape. Keep organized.
- For white feathers, consider priming first with white acrylic paint/gesso to help spray paint adhere better. Let primed feathers fully dry first.
3. Cover Workspace
- Work in a well-ventilated area, outside or in a spray booth. Avoid breathing in paint vapor.
- Lay down newspaper or plastic drop cloth over your work surface. Tape edges.
- Position feather work piece in the center of the protected workspace.
4. Test Spray
- First test spray a scrap piece of cardboard to check spray width and consistency.
- Adjust distance/angle of spray can to feather piece to optimize spray control.
- Mist a scrap feather and observe paint adherence. Adjust if needed.
5. Apply Paint in Light Coats
- Shake spray paint can vigorously for a minute first.
- Hold can 6-10 inches from feather surface.
- Use short 1-2 second spray bursts across feathers to gently layer color.
- Build up color intensity gradually with multiple thin coats instead of one heavy coat.
- Allow each coat to dry fully before adding another layer, usually 5-10 minutes.
- Avoid oversaturating feathers with excess paint. This causes clumping and matting.
- Work in sections, spray painting a few feathers at a time for best results.
6. Create Artistic Effects
- For ombre feathers, lightly mist pale colors at the tips first. Build towards darker spray at the base.
- Try speckled patterns using scattered short bursts instead of a continuous spray.
- For frosted feathers, apply very light coats for a translucent look.
- Outline feather details with fine tip spray paint.
7. Finish and Protect
- Let fully dry 24 hours for acrylic spray paint to cure.
- Spray with clear acrylic sealer for added protection and to lock in designs.
- Attach a wire stem if desired to create jewelry or accessories from painted feathers.
Airbrush Spray Painting Feathers
Airbrushing allows for delicate detailing when spray painting feathers. An airbrush sprays a very fine mist to gently layer color without oversaturating delicate material.
Benefits of using an airbrush include:
- Ultra light application for gradual color buildup
- Greater control for soft blended effects
- Details work like veins and outlining
- Ombre color transitions and gradients
- Translucent frosted tints
An airbrush system requires a bit more setup and practice to master precision feather painting techniques. But the fine spray capacity offers advantages over standard spray cans.
Invest in a quality airbrush kit designed for detailed craft painting. Use the same feather preparation steps, then test airbrush settings on cardboard first. Slowly build up sheer layers of color. The soft spray prevents paint clumping on feathers.
Best Feathers for Spray Painting
You can spray paint all kinds of feathers, but these varieties are excellent choices:
- Turkey feathers – Affordable and easy to find in craft stores. The sturdy structure takes spray paint well. Great for beginners.
- Goose feathers – Large, full plumes with fluffy barbs perfect for bold spray painted looks.
- Pheasant feathers – Delicate and iridescent patterns shine when enhanced with spray paint.
- Peacock feathers – The vivid eyespots allow for tropical spray painted accents.
- Ostrich feathers – Dramatic and luxe ostrich plumes create stunning statements when spray painted.
- Rooster hackle feathers – Long hackle feathers work beautifully for ombre color gradients.
- Duck feathers – Pick colored tail or wing feathers to overlay spray paints for cool effects.
- Craft feathers – Affordable bags of assorted small feathers are fun for projects.
The key is using properly dried feathers. Avoid painting over wet, dirty, or oil-coated feathers for best spray paint adherence.
Spray Painting Ostrich Feathers
Giant ostrich plumes make a gorgeous canvas for spray painted designs. Their feathery barbs readily take to paint. Follow these tips when spray painting dramatic ostrich feathers:
- Carefully clean feathers first since ostrich oil repels paint. Use mild soap if needed.
- Allow to fully dry flat overnight before painting. Wet feathers resist paint.
- Prime with white paint so colors pop. Ostrich is porous and absorbs paint unevenly without primer.
- Slowly build up sheer coats for translucent painted effects. Avoid heavy paint deposits.
- Work in sections, painting the tip layers first. Let dry before base layers.
- Use short bursts and varied angles to reach inner barbs. Ostrich has thick fluff.
- Outline veins or details with coordinated fine-tip paint.
- Seal with clear coat for protection.
Ostrich feathers bring luxury and texture. Vivid spray painted looks make these feathers true standouts for costumes, fashion, and décor.
Spray Painting Feather Wings
Transform plain feather wings into works of art by spray painting intricate designs. Follow these tips:
Prepare Wings
- Remove feathers from wing base and lay flat if possible.
- Clean feathers thoroughly first before spray painting.
- Cover wing base thoroughly with painter’s tape to protect.
Prime Surface
- Lightly mist entire wing with white primer/gesso spray.
- Let fully dry flat for optimal paint adhesion.
Plan Design
- Decide on overall color scheme and patterns.
- Sketch out ideas first with pencil lightly on feathers.
- Keep wings symmetrical by working on one side fully before opposite side.
Paint in Sections
- Work in small feather sections for best results.
- Use painter’s tape to isolate regions and keep spray controlled.
- Apply color gradients by starting light at tips and getting darker towards base.
- Alternate painting sessions with drying time to set layers.
Details
- Use fine tip spray nozzle for delicate outlines and small details.
- Add visual interest with contrasting colors and accents.
- Consider embellishing with glitter spray or pearlescent finishes.
Protect Finish
- Let fully cure 48-72 hours for acrylic spray paint to harden completely.
- Apply 2-3 thin coats of clear sealer to feathers to protect the completed wing.
- Attach to costume carefully to avoid scraping paint. Store flat when not worn.
With the right preparation and painting technique, spray painted wings make a bold statement for masquerade balls, theater productions, Halloween costumes, and more. The artistic designs infuse creative expression into ordinary feathered wings.
How to Change Feather Color
Besides spray painting, here are other methods for changing plain white feathers into brilliant hues:
Fabric Dye
Immerse feathers in prepared dye baths for all-over saturated color. Great for boas, dusters, and plumages.
Food Coloring
Diluted food coloring provides fun DIY dyeing. Best for small projects.
Clothing Dye
Use clothing dye kits from brands like Rit or Dylon. Follow instructions for dyeing delicate fabrics.
Bleach
For delicate color shifts, use diluted bleach on white feathers. Rinse and dry well.
Glitter Paint
Add sparkling accents with glitter infused craft paints in any color.
Airbrush Ink
Airbrushing transparent inks allows subtle ombre tints and gradients.
Spray Paint Ombre
Lightly misting spray paint on tips gradually layering into heavier color creates ombre effects.
With some creative experimenting, you can turn drab feathers into works of wearable art using these color transformation techniques. The right approach depends on the specific feather type and project.
What to Avoid When Spray Painting Feathers
Since feathers have a delicate structure, avoid these mistakes when spray painting:
- Don’t apply paint too heavily all at once. Slow built up of thin layers is best.
- Avoid close-range spraying. Hold the can 6-10 inches away and use short bursts.
- Don’t paint feathers that are wet, dirty, or greasy. Paint won’t adhere well.
- Don’t use enamel, oil-based, or heavy bodied spray paints. Acrylic spray paints are a feather-friendly option.
- Don’t overload the feathers with excess paint. This causes the barbs to clump together.
- Avoid spraying too much on the rachis quill. Keep it lightweight.
- Don’t spray paint feathers near heat or open flame. Paint fumes are flammable.
- Don’t spray paint feathers still attached to a bird, animal, or the wing base. Remove them first.
- Don’t spray paint without adequate ventilation, breathing protection, and covered workspace. Inhaling paint is unhealthy.
Proper preparation, using appropriate spray paint, and building up light layers of color help create stunning spray painted feather designs without clumping or matting down the delicate structures. Avoid shortcuts for best results.
Caring for Spray Painted Feathers
Follow these care tips to help spray painted feathers last:
- Allow paint to fully cure 48-72 hours before wearing or assembling into projects
- Apply a clear acrylic spray sealer over paint for protection
- Handle gently to avoid cracking paint that is still drying
- Store flat or upright in vases to prevent bending of painted feathers
- Spot clean gently with a soft brush to remove dust
- Avoid getting spray painted feathers wet or exposing to moisture
- Keep away from direct heat which can damage acrylic paint finishes
- Consider lightly spraying projects yearly to refresh painted feathers as needed
Get Creative with Spray Painted Feathers!
The artistic possibilities are endless when spray painting feathers. With the right approach, you can create colorful masterpieces, including:
- Costume wings – Dazzling spray painted masquerade feathery wings
- Hair accessories – Vibrant painted feathers on hair clips, fascinators, and extensions
- Jewelry pieces – Delicate painted feather pendants, dangles, and earrings
- Home accents – Brighten up vases, lamps, wreaths, and wall art with painted plumes
- Nail art – Mini painted feathers on nail tips or feathered manicures
- Clothing trim – Add bohemian flair to jackets and dresses with painted feather trims
- Masks & headdresses – Bold ostrich plumes spray painted in fierce designs
- Crafts – Painted feathers on mirrors, boxes, candles, and mixed media art
- Party décor – Spray painted feather wreaths, garlands, bouquets, and backdrops
- Window treatments – Delicate painted feathers on curtain panels or bamboo shades
Let your imagination soar by spray painting stunning feather pieces for wearable art, home décor, costumes, crafts, and more. The transformative power of spray paint takes ordinary feathers to extraordinary new heights.


