
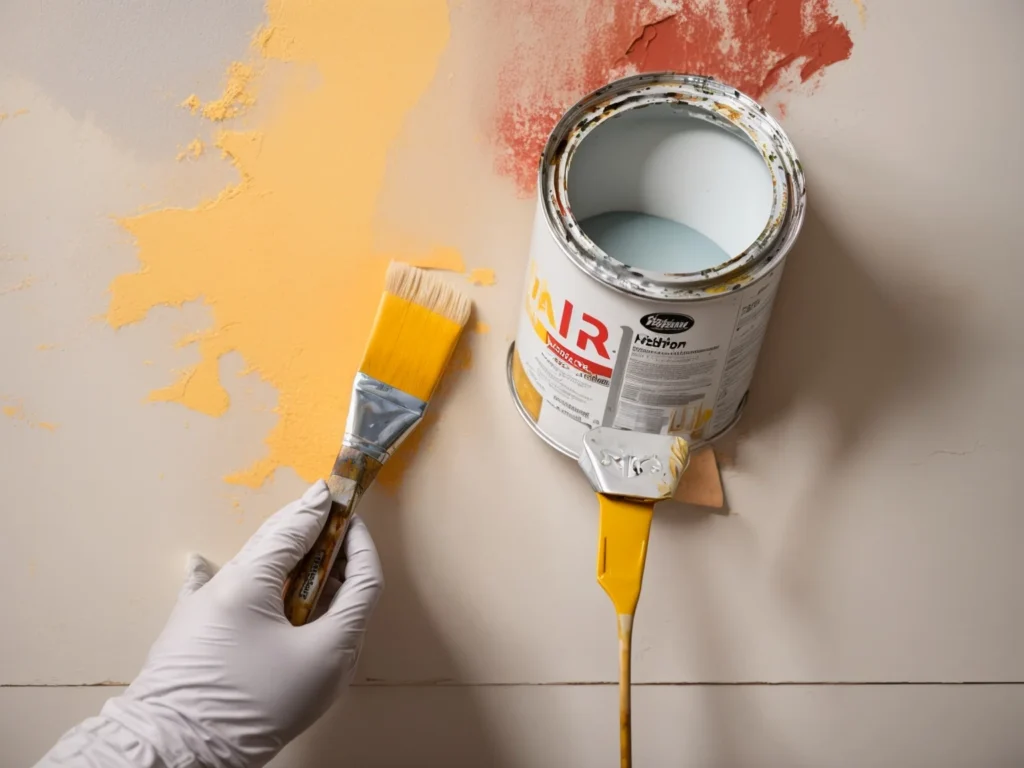
Painting over existing paint on walls, furniture, cars and other surfaces is a common task for many homeowners and DIYers. With proper preparation and technique, it is often possible to paint over old paint without having to strip and remove existing layers first. This comprehensive guide covers everything you need to know about painting over existing paint.
Evaluating the Existing Paint
The first step is to assess the condition and type of the existing paint you wish to cover. This will determine the steps needed to prepare the surface and which type of new paint will adhere best. Consider the following factors:
Paint Condition
- Good condition: The existing paint should be fully dried/cured, adhered well to the surface, free of excessive cracks or peeling and not visibly deteriorate. Good paint can usually be painted over.
- Poor condition: Paint that is peeling, cracking, flaking or otherwise damaged should be removed before repainting. Use a paint scraper, chemical stripper or sanding to remove failing paint.
- Glossy surfaces: Glossy paints and clear coats need to be dulled for paint to adhere well. Lightly sand to dull the sheen before repainting.
- Dirty surfaces: Make sure to clean grease, dirt and grime so the new paint can properly bond.
Paint Type
- Latex paint (acrylic): Water-based paint used on walls, wood, metal and other surfaces. New latex paint usually adheres well over old latex.
- Oil-based/alkyd paint: Traditional oil-based paint used for trim, furniture and metal. New oil paint often adheres to old oil paint.
- Other specialty paints: Paints like epoxy, automobile paints and elastomeric coatings may require special treatment or primers. Always check manufacturer recommendations.
- Mixing types: Don’t put oil paint over latex or vice versa without primer in between. The layers won’t adhere.
- Unknown type: Test for latex with rubbing alcohol, for oil with paint thinner. Or prime first before repainting.
Surfaces and Special Cases
- Walls: Painting over walls is quite common. Assess paint condition and treat any underlying issues. Lightly sand glossy areas.
- Wood: Unpainted wood must be primed first. For painted wood, sand any glossy areas to roughness. Wood tends to absorb paint so multiple coats are ideal.
- Metal: Remove any rust. Apply a rust-inhibiting primer if needed, then a bonding primer before painting metal.
- Cars/vehicles: Follow auto paint manufacturer instructions. Remove any rust, then apply auto-specific primer, sand and refinish with compatible paints.
- Appliances: Clean and sand surfaces first. Use appliance enamel paint for a durable finish. Prime first if needed.
- Outdoor surfaces: Be sure the existing paint is intact and that the surface is cleaned and prepared before repainting outdoor items.
Keys to Successful Painting Over Old Paint
Follow these best practices to ensure your new paint job adheres well and looks great:
- Check that existing paint is in good condition and properly prep surfaces.
- Remove any failing, cracked or peeling paint using sanders, chemical strippers or paint scrapers.
- Clean surfaces of any grease, grime or mildew before painting.
- Sand glossy surfaces to dull the sheen so paint can adhere.
- Spot prime bare wood and metal before painting.
- When covering dark colors with light paint, tint the primer towards the final color for better coverage.
- Consider a bonding primer for slick or hard-to-paint surfaces. They help paint grip better.
- Make sure to use compatible paint types (latex over latex, or oil over oil).
- Allow proper dry time between paint coats according to manufacturer directions.
- Apply at least 2-3 paint coats for a smooth, even finish with good coverage.
Preparing Different Surfaces for Painting
Proper preparation is crucial for a long-lasting paint job. Here are surface-specific tips:
Walls and Ceilings
For painting over existing wall paint:
- Inspect walls for failing paint or underlying moisture issues which can cause the paint to fail. Fix any leaks or moisture problems before painting.
- Clean walls to remove grease, grime or mildew. All-purpose cleaner and warm water works for most walls.
- Lightly sand glossy painted walls to dull the finish so new paint can bond well.
- Scrape off any loose or peeling sections of old paint.
- Fill any cracks, nail holes or imperfections with spackle or drywall joint compound. Let dry and sand smooth.
- Spot prime any unpainted drywall patches with drywall primer before painting.
- Consider applying a light coat of primer over the entire surface if the existing paint is glossy or the new paint color is much lighter.
Wood Surfaces
For painting over existing paint on wood:
- Lightly sand to rough up any glossy painted surfaces for better paint adhesion.
- Clean wood with a degreaser or ammonia solution to remove residues from old finish.
- Scrape off any cracked or peeling sections of old paint down to the bare wood.
- Sand rough paint edges smooth with the surrounding surface.
- If any bare wood is exposed, spot prime those areas with a quality wood primer.
- For unfinished wood, apply wood primer over the entire surface before painting.
- Apply two coats of alkyd/oil-based paint for a smooth finish on woodwork and trim. Water-based acrylic paint can also be used.
- Allow proper dry time between coats as directed by the paint manufacturer.
Metal Surfaces
When painting metal like wrought iron or steel:
- Remove any rust, loose or peeling paint by sanding, grinding or using a wire brush. Get down to bare metal.
- Clean metal with solvents like mineral spirits to remove grease and oil residues.
- Apply a metal primer like rust-inhibiting metal primer for optimal corrosion resistance and paint adhesion.
- For metal like galvanized steel, apply a specialized galvanized metal primer first.
- If multiple old paint layers exist, apply a bonding primer before repainting metal.
- Allow each coat of primer and paint to fully dry between applications.
- Use oil-based or specialty paints formulated for metal for best durability. Latex can also be used if properly primed first.
Outdoor Surfaces
For exterior surfaces like stucco, brick or siding:
- Power wash surfaces to remove loose paint, dirt and grime that could interfere with paint adhesion.
- Scrape off any loose or peeling sections of old paint. Sand edges smooth.
- Repair any cracks, holes or other damage to create an even surface.
- Apply exterior primer to any bare wood or metal before painting.
- Use exterior acrylic latex paints or specialty paints formulated for masonry and stucco. Avoid flat paints outdoors as they don’t withstand weathering.
- Apply paint on dry days when temperatures are between 50-90°F for proper drying and curing of the paint film.
Cars/Automobiles
To paint over existing finish on cars and vehicles:
- Completely remove any rust by sanding to bare metal and applying body filler as needed.
- Sand the existing car paint to rough up the finish for better adhesion.
- Wipe sanded areas down with paint thinner to remove residue.
- Apply auto-specific primer to any bare metal or body filler before painting.
- Use high quality automotive paint products and apply as directed on the label. Several coats of color paint and clear coat will provide the best finish.
- Paint in a dust-free area like a paint booth. Carefully follow all safety precautions when spray painting vehicles.
Using Primers and Sealing Old Paint
Applying the right primer helps new paint adhere while covering stains and flaws in the existing finish. Use these tips for priming:
Why Prime?
- Primers adhere to glossy or slick surfaces better than paint alone. This allows for better bonding between the old and new paint.
- Primers help cover stains that could bleed through the new topcoat of paint. They also conceal imperfections.
- Priming provides a more uniform surface for the new paint, allowing for better coverage.
- Primers like kilz help seal odors from smoke, pets, food, etc. that can bleed into new paint.
Choosing a Primer
- For most surfaces, a quality multi-purpose primer works well. Many are tintable to match the new paint color.
- Use drywall primer over unpainted drywall repairs before painting walls.
- For bare wood, use a wood primer like Zinsser Bulls Eye 1-2-3.
- Metal and rust-prone surfaces benefit from corrosion-resistant metal primers.
Selecting Primer vs. Paint and Primer Combos
- Many quality paints now contain both paint and primer in one can, like BEHR Premium Plus Ultra or Sherwin Williams Harmony. These simplify the process by combining steps.
- For dramatic color changes or troubled surfaces, a separate stain-blocking primer still provides the best results.
- Primers are essential for new drywall, bare wood, bleeding stains, raw metal, etc. The combined paint and primer won’t address those needs sufficiently.
- A paint and primer combo works well for repainting walls in a similar color or going from a light to slightly darker shade. The primer tint helps provide enough coverage.
- If covering a bold/dark color with a much lighter shade, use a tinted primer or the primer coat will need multiple applications to fully hide the old color.
Application Tips
- Use a brush, roller or sprayer to apply primer uniformly across the surface. Work it into any imperfections.
- Allow primer to fully dry before applying paint. It’s often faster drying than wall paints.
- Sand primed surfaces to smooth any drips or imperfections between coats. Wipe away dust before painting.
- Extend prime coats onto cut-in areas that will be brushed at the edges, so all layers bond together.
- If the primer doesn’t fully hide the old color, apply a second primer coat before painting or use a heavier tinted primer.
Removing Failing Paint Before Repainting
In situations where the existing paint is severely cracking, peeling or flaking, it’s best to remove the deteriorated layers prior to putting on fresh paint:
Paint Removal Methods
- Scraping: Use a paint scraper to manually peel off paint from surfaces. Follow with sanding.
- Sanding: Both manual and power sanders can be used to abrade away old paint. Wear proper safety gear like a respirator when sanding paint, as the dust is hazardous.
- Chemical strippers: These solvent solutions soften and dissolve paint so it can be more easily scraped off. Use them in a well-ventilated area.
- Heat guns: Apply targeted heat to layers of paint until they bubble and blister, allowing you to scrape them off. Be careful not to scorch the underlying surface.
Tips for Removing Paint
- Focus on removing loose, cracked and peeling areas of paint, as firmly adhered paint can remain as a base layer in most cases.
- Use caution when stripping paint, as old layers may contain lead. Take proper safety precautions.
- Thoroughly clean surfaces after paint removal to eliminate any residue before applying new finishes.
- Allow any previously painted surface underneath to fully dry before applying primer and repainting.
- Dispose of all paint debris properly based on local hazardous waste regulations.
Painting Over Special Coatings and Surfaces
Certain surfaces require additional considerations when painting over them:
Varnished Wood
To cover wood that has been sealed with polyurethane, varnish or lacquer:
- Lightly sand to roughen and dull the clear coat finish so paint can bond adequately.
- Wipe away all sanding dust with a dry cloth.
- Use an oil-based primer meant for covering varnishes, like Kilz Premium, before painting. Water-based primers struggle to adhere to finishes.
- For best results, consider stripping the clear topcoat entirely before repainting bare wood.
Appliances and Cabinets
Painting over finished appliances, cabinets or furniture:
- Clean surfaces well and sand glossy areas to dull the sheen before painting.
- Use appliance enamel paint formulated for a hard, chip-resistant finish that withstands heat and friction.
- If covering dark stains, apply a stain-blocking primer first so the stains don’t bleed through the new paint.
- Remove cabinet doors, drawers and hardware before painting cabinets. Reinstall after the paint is fully dry.
Tile and Masonry
Painting glazed ceramic tile, concrete, brick or stucco:
- Clean surfaces thoroughly and apply an etching solution or primer specifically designed for masonry and tile. This allows better paint adhesion.
- Use a high quality exterior masonry paint, which withstands weathering and resists peeling or yellowing.
- A paint sprayer will provide the most complete, uniform coverage over textured surfaces like stucco.
- Expect to apply several coats of paint for adequate coverage on tile, concrete and masonry.
Applying New Paint Over Old Surfaces
Once you’ve properly prepped the existing surface and applied any necessary primer, follow these tips for applying fresh paint coats:
Paint Selection
- Choose exterior-grade paints for outdoor surfaces that are more durable against sun, rain and temperature changes.
- For walls, ceilings and indoor surfaces, quality interior latex or enamel paints work well. Match sheen to the old paint finish.
- Use paint formulated for specific surfaces like metal, masonry, plastic, etc. when repainting those materials.
- For the best hide and touchup ability, use the same brand and line of paint that was originally applied. Keep old paint cans for reference.
Paint Application
- Always follow the manufacturer’s instructions for paint application, dry time, number of coats needed, etc.
- Use a quality nylon or polyester brush for best results cutting in edges. Maintain a wet edge when painting.
- Only apply paint when surface and air temperatures are between 50-90°F. Avoid painting in direct sunlight or on hot surfaces.
- Apply paint in a dust-free space with ample ventilation. This prevents contamination of the wet paint film as it dries.
- Allow thorough drying between coats according to the directions. Drying time may take longer with cool, humid conditions.
Achieving an Even Finish
- Use a mini roller, pad or paintbrush to cut-in corners, edges and trim. Roll larger open areas for a smooth, consistent finish.
- Applying paint with a paint sprayer can provide a seamless, professional-looking finish. Practice spraying first to get comfortable with the technique.
- Roll or brush out paint in a consistent direction across the surface. Work from unpainted into painted areas to prevent lap marks.
- Inspect the paint surface as you work and brush out any drips, sags, or uneven areas immediately while the paint is still wet.
Hiring a Professional Painter
While repainting surfaces is often a manageable DIY project, there are benefits to hiring an experienced professional painter:
- They have the skills to properly evaluate the existing paint and prescribe the right prep work. This saves you from peeling or failing paint.
- Professional painters are familiar working with many different paint finishes and specialty coatings.
- They have the specialized tools, ladders, and safety equipment to paint effectively and efficiently.
- Experienced painters know techniques to achieve a smooth, flawless finish free of brush marks, uneven sheen, missed spots or other amateur mistakes.
- Professional painters can match existing paint colors, finishes and sheens so new paint blends seamlessly with the old.
- Many professional painters offer multi-year warranties on their paintwork, protecting you from chipping, peeling or fading paint.
If you have surfaces that require extensive prep work, unique paints or coatings, or are multiple stories up, hiring a trained and insured pro painter is often worth the investment. They’ll save you time and hassle while providing beautiful results that will last. Just be sure to get multiple quotes and verify references before selecting a painting company.
Conclusion
Painting over existing painted surfaces is often possible with proper preparation and technique. Evaluate the current paint condition, type and surface material to plan your approach. Proper cleaning, sanding, priming and paint selection will help the new finish adhere seamlessly. When existing paint is too far gone, stripping and removal is required before repainting. Follow the manufacturer’s instructions for all paint products. With some care to prep the surface and technique applying the paint, even DIYers can achieve professional-looking results painting over old paint.

