
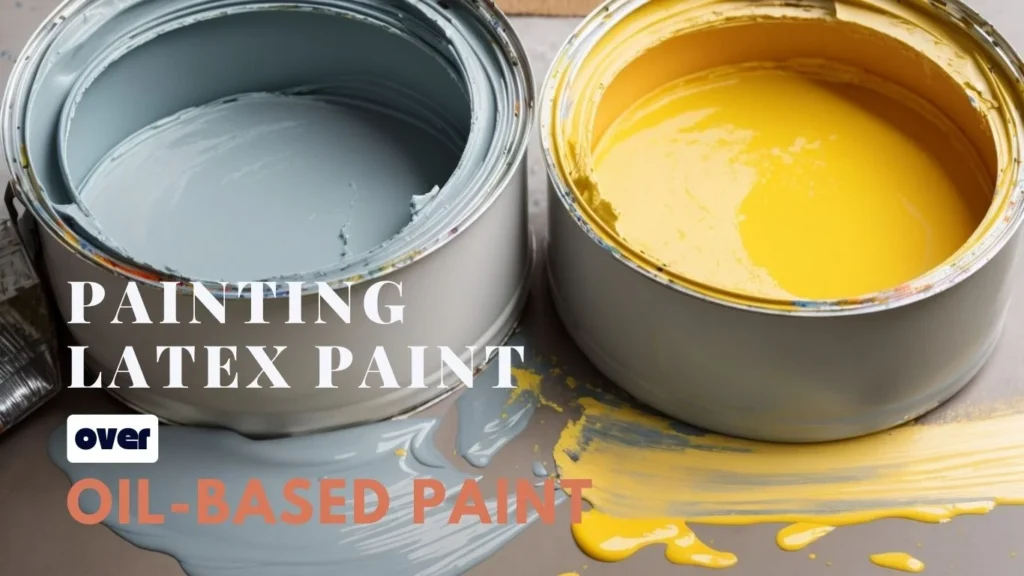
Painting a room can feel daunting, especially if you’re unsure about the existing paint on your walls and ceilings. Many homeowners have opened a can of paint only to discover that the new latex paint won’t adhere properly to the old oil-based paint underneath. This frustrating realization often leads to peeling, chipping, and poor results.
So what’s the solution? Can you safely paint latex paint over an oil-based painted surface? The short answer is yes, you can – with the right preparation and techniques. While oil and latex paints have very different properties, there are ways to transition between the two for your painting projects.
Key Takeaways
- Oil and latex paints have different properties you must address to ensure compatibility.
- Properly testing and identifying old paint is a crucial first step before painting.
- Cleaning and sanding oil-based surfaces removes gloss and creates tooth for adhesion.
- Specially formulated oil-based primers bridge old oil paint and new latex.
- Apply latex in careful coats over primed surfaces for best results.
Understanding Paint Types
To understand the considerations for painting latex over oil-based paint, it’s helpful to first look at what makes these two paint categories unique.
Oil-based paints have been around for centuries, used widely before the introduction of latex paint in the late 1950s. The key ingredients are linseed oil, turpentine or mineral spirits, and alkyd resins. Oil-based paints dry to a hard, glossy finish and are known for their durability and protective qualities. However, they take longer to dry, contain volatile organic compounds (VOCs), have a strong odor, and require mineral spirits for cleanup.
Latex paints are water-based acrylic paints made from acrylic resins suspended in water. Low odor, short dry times, easy soap and water cleanup, and lower VOCs are key benefits. However, latex paints are less durable than oil-based over the long term. Many homeowners shifted to latex for its ease of use and environmental benefits.
Understanding these fundamental differences in composition is key to addressing compatibility challenges. When painting latex over oil, it’s vital to consider adhesion and prepare the surface properly.
The Shift from Oil to Latex Paint
For most of history, oil-based paints were the standard for home interiors and exteriors. Paints consisting of linseed oil and pigments provided rich, durable color for everything from Renaissance artwork to household walls.
By the 1950s, oil-based paints were ubiquitous in American homes. But growing concerns around their strong fumes and environmental impact led paint manufacturers to innovate water-based latex paint in the late 1950s. Latex paints gained popularity through the 1960s and 70s, offering an easy clean-up, low-odor alternative.
By the 1980s, latex paint had claimed over 50% of the residential paint market. Today, it dominates the industry, with oil-based paint reserved for specialty industrial and commercial applications. This history helps explain why so many homeowners must now transition old oil-based interiors to newer latex paint.
Identifying Paint Types
Before selecting your materials, it’s critical to identify whether existing paint is oil or latex-based. You can’t always rely on the claims of previous owners or visible marks on the paint can. Many painted surfaces have been repainted over decades, often without proper record keeping.
Here are two simple methods to test existing paint:
The Oil Paint Test
This is the most reliable DIY method for identifying oil-based paint. You will need:
- Denatured alcohol, mineral spirits, or another solvent
- Clean rag
Soak the rag in your solvent of choice and rub it against the painted surface. If the existing paint softens or dissolves, it is likely oil-based paint. Latex paint will remain intact. Oil paints are vulnerable to mineral spirit solvents while latex paints are water-based and resistant.
Tip: Try testing in an inconspicuous area first. Also, wear gloves to protect your hands.
The Hot Water Test
For this test, you will need:
- Kettle or pot of hot water
- Metal spoon
- Glass jar or bowl
Transfer hot water from the kettle into the glass container using a spoon. Next, scrape a small amount of paint from the wall into the hot water. Oil-based paints will begin to melt, wrinkle up, and separate from the water. Latex paint will remain uniform and consistent when mixed with hot water.
This test can quickly confirm paint types when mineral spirits are unavailable. Just be careful not to burn yourself with the hot water!
Why Paint Identification Matters
Some homeowners wonder whether paint testing is essential before starting a painting project. Can’t you paint directly over the existing surface?
While you may be eager to begin painting, identifying existing paints simply is critical for two reasons:
1. Improper Paint Selection
If you apply latex paint directly over unidentified oil-based paint, you will likely experience peeling, cracking, and poor adhesion. The layers will not bond correctly. Knowing the existing paint type allows you to select materials engineered for adhesion and compatibility.
2. Surface Preparation
Paint, especially oil-based, can form a slick, hardened film over time. Proper sanding and cleaning techniques vary depending on oil or latex paints. Identifying the paint informs the surface prep required before painting for the best results.
Testing takes minutes but can save you from poor quality results, extra work stripping chipped paint, and redoing the job. Paint identification guides the entire process.
Preparing the Surface
Once you’ve confirmed that the existing paint is oil-based, proper surface preparation is the next step before painting latex. Effective surface prep clears the way for maximum adhesion.
Here are the key steps for prepping an oil-based surface for latex paint:
Cleaning
The surface must be free of dirt, grease, oil, and other grime that can interfere with paint bonding. Start by washing the walls with a multi-surface cleaner or dish soap and water. Rinse thoroughly and let dry.
TSP (trisodium phosphate) is an effective degreasing cleaner for heavy grime. Mix 1 cup of powdered TSP with 1 gallon of warm water. Scrub this solution on walls using a sponge or stiff brush, then rinse thoroughly. Wear gloves when using TSP.
Tip: Mark any holes, imperfections, or damaged areas needing spackle or repairs. Complete repairs after cleaning.
Sanding
Sanding creates a roughened surface “tooth” for paint to adhere to. Use 150-220 grit sandpaper to lightly sand the entire surface.
Focus extra sanding on glossy areas where the oil paint still appears slick. Completely deglossing is vital for adhesion. Be sure to sand evenly across all walls and trim.
Thoroughly vacuum up all dust after sanding. Wipe any residual dust with a tack cloth. The surface should appear dull and rough when sanding is complete.
Tip: Consider wearing a face mask to avoid inhaling paint dust while sanding.
Proper cleaning and sanding is time-consuming but worth the effort. Rushing this step can doom the new paint job from the start. The latex paint simply won’t bond well without proper deglossing and a clean, roughened surface to grip onto.
Priming: The Bridge Between Paint Types
With the surface prepped, you’re nearly ready to paint. But first, apply a high-quality oil-based primer designed for transitioning between paint types. Priming is a vital intermediary step before applying latex paint over oil paint.
Primers create an adhesion layer that binds old and new paint layers together in a way they could not. The right primer also provides a neutral base layer to improve topcoat coverage.
Choosing a Primer
You must use an oil-based primer specifically designed for adhesion to paint latex over oil. Common options include:
- Bonding primers promote adhesion on nearly any surface, including glossy finishes. They contain additional resins and binders for maximum sticking power.
- Stain blocking primers bond well and contain pigments to block stains from water, smoke, ink, grease, etc. Useful for covering up old stains before repainting.
Avoid latex-based primers or basic universal primers not formulated for heavy adhesion. Read labels closely or ask staff for recommendations.
Some top oil-based primer brands include:
- Zinsser B-I-N Primer
- KILZ Adhesion High-Bonding Interior/Exterior Primer
- INSL-X Prime Lock Plus Bonding Primer
Applying Primer
Applying a thorough, even primer coat according to label directions using a brush, roller, or paint sprayer. Coat all surfaces – walls, trim, ceilings. Primer should fully seal the previous oil paint.
Let the primer cure for at least 24 hours before painting latex. Primer dries fast but needs ample time to form a stable bond between the old and new paint.
Painting Process
Once your primer has fully cured, you’re ready for the final painting process. Follow these best practices for applying latex paint over primed oil-based surfaces:
Use Latex Wall Paint
Choose a high-quality latex wall paint in a matte, eggshell, or satin sheen for optimal results. Semi-gloss and gloss finish latex paints are not ideal over primer and may lead to poor adhesion. Opt for durable 100% acrylic latex paints over cheaper vinyl varieties.
Some top latex wall paint brands include:
- Behr Premium Plus
- Benjamin Moore Regal Select
- Sherwin-Williams Duration
Tip: Buy enough paint in one batch to complete the entire project. Varying batch numbers can lead to slight color mismatches.
Brush Work and Cutting In
Use angled paintbrushes to “cut in” along all edges and trim. Applying paint carefully along borders and corners ensures no primer shows through the final paint job.
Use high-quality synthetic bristle brushes made for latex paint. Cut in all edges first before rolling the main interior wall space.
Rolling Technique
Use a 3/8″ or 1/4″ nap roller cover compatible with latex paints for large interior wall surfaces. Load the roller evenly without oversaturating it. Apply paint in approximately 3×3 foot sections.
Maintain a wet edge by continuously painting from ceiling to floor; overlapping passes slightly as you move down. Work methodically so paint does not dry between roller passes.
Tip: Only pour out enough paint to coat one section at a time. This keeps the remainder clean for multiple uses.
Number of Coats
Apply two coats of latex paint and an even satin sheen for proper coverage. Allow the first coat to dry fully before adding the second. Two coats ensures full coverage and protection.
Dry Times
Latex paint dries within 1-2 hours between coats. Oil-based takes 6-8 hours between coats. Allow new latex paint a full 24 hours drying time before replacing furniture or disturbing the surface.
Proper cutting, rolling, and drying between coats creates a smooth, consistent latex paint finish over your primed oil-based surface. Take your time using these techniques for best results.
Potential Challenges and Solutions
Using the right preparatory steps and paint application techniques prevents most problems with latex over oil paint. But some challenges can still arise:
Peeling or Flaking Paint
This occurs when the new paint fails to adhere to the old surface underneath properly. Often it’s due to inadequate deglossing and cleaning before priming.
Solution: If paint starts to peel shortly after application, you’ll have to fully strip the new paint and start over with better surface preparation.
Poor Bonding and Adhesion
Like peeling, weak adhesion results in new paint easily scratching or chipping to the oil layer below. This is usually linked to improper primer selection.
Solution: Lightly roughen the problem areas with sandpaper and re-apply bonding primer before repainting.
Surfactant Leaching
This appears as yellowish stain seeping through the new paint. Chemical incompatibilities between new and old paint layers cause it.
Solution: Wipe stained areas with denatured alcohol. Apply an oil-based stain blocker primer before repainting.
VOC Off-Gassing
The new latex paint traps VOCs from old oil paint underneath, causing it to release into the air over time slowly.
Solution: Allow plenty of ventilation during and after painting to allow VOCs to off-gas fully.
You can avoid these potential issues when painting latex over oil-based surfaces with careful prep and application.
Advanced Tips and Tricks
Experienced DIYers have developed some additional techniques for painting over oil-based paint without extensive sanding or priming:
Lightly Scrape Surface
Instead of fully deglossing oil paint with sandpaper, carefully scrape the surface with a putty knife or paint shaver tool. This lifts the slick top layer while leaving some tooth for adhesion.
Tip: Work slowly to avoid gouging the surface. Finish with light scuff sanding.
TSP Alternative
Try trisodium phosphate-free cleaners containing sodium metasilicate, such as Dirtex or Krud Kutter, for cleaning oil-based surfaces. Rinse thoroughly after use.
Primer-Sealer Option
Some primer-sealers bond latex to oil-based paint without requiring deglossing beforehand. This allows painting without sanding.
Tip: Read product descriptions closely to ensure suitability for oil-based surfaces without sanding.
Minimal Coats
If painting a darker color over existing white or light oil paint, you can sometimes get by with only one coat of latex paint. The primer helps hide the old oil color underneath.
Caution: The minimal coat approach increases chances of uneven coverage or bleeding of the oil paint into the new color.
While useful in a pinch, these time-saving techniques may increase chances of paint failure down the road. Following the full preparation and priming process provides better long-term results.
Conclusion
Painting latex over an older oil-based painted surface presents some unique challenges compared to a standard repainting job. Oil and latex paints differ in composition, finish, and drying times.
You can successfully transition oil-based wall paint to newer latex with proper planning and the right painting approach. Identifying existing paint types, sanding and cleaning the oil surface thoroughly, applying oil-based bonding primer, and using high quality latex paint will result in a freshly painted interior without signs of your old oil paint.
Avoid painting shortcuts that could compromise paint adhesion and durability. Invest the preparation time and use premium primers and paints suitable to the task. Your patience will pay off with a seamless oil-to-latex paint finish that will last years before needing a refresh.

