
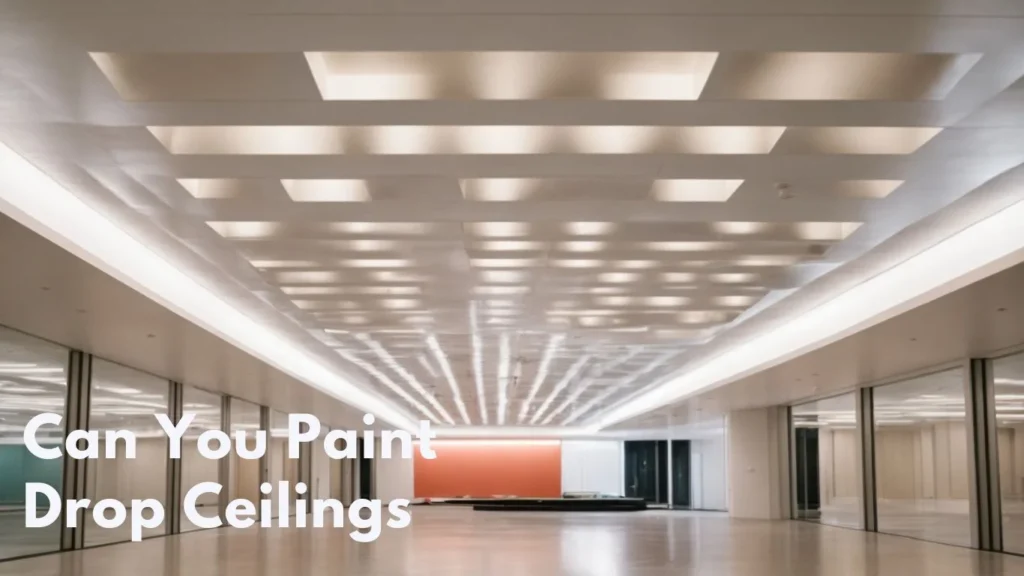
Drop ceilings, also known as suspended or false ceilings, have been a popular choice for basement and commercial building interiors since the mid-20th century. Typically consisting of removable ceiling tiles that sit within a metal grid, drop ceilings allow for easy access to pipes, wiring, and ventilation systems located between the ceiling and the structural floor above.
While practical, drop ceilings are notoriously bland. The speckled white ceiling tiles and plain metal grids do little to enhance a room’s aesthetic. Painting a drop ceiling is an easy and inexpensive way to transform this eyesore into an attractive design element that adds color, texture, and style to your basement, office, or workspace.
Should You Paint a Drop Ceiling?
Before deciding on a paint project, weigh the pros and cons of painting a drop ceiling in your space:
Pros:
- Inexpensive way to update the look of a room
- Allows you to add color and visual interest
- Option to paint the tiles, grid, or both
- Can be done as a DIY project without professional help
Cons:
- Painting the ceiling tiles is time consuming because they need to be removed and painted individually
- The ceiling grid is tricky to paint without getting drips through the openings
- Frequent access to the plenum space above may chip painted surfaces
- Paint touch ups required if tiles are moved around or replaced
If your drop ceiling is in good condition structurally and you want to refresh the space on a budget, painting it can be a great solution.
Prepping to Paint Drop Ceiling Tiles
Proper prep work is crucial for getting an evenly painted surface across all your ceiling tiles. Follow these steps to prep for painting:
- Remove tiles – All ceiling tiles must be taken down to paint effectively. Number or map out tiles to simplify reinstallation.
- Clean thoroughly – Use TSP cleaner and a sponge to remove grease, dust, and stains. Rinse with clean water.
- Fill holes and cracks – Seal any cracks or holes in damaged tiles with spackle or tile seam tape so paint looks smooth.
- Sand surface – Lightly sanding helps rough up the tile surface for better paint adhesion.
- Wipe with tack cloth – Remove all dust with a sticky tack cloth for a pristine surface.
- Apply primer – Priming ensures paint sticks to the tile surface evenly. Use spray primer or roll on with a mini foam roller.
Allow the primer to dry before painting, usually 1-2 hours fully. For extremely stained or damaged tiles, a heavy-duty primer/sealer like Kilz can help block out discolorations.
Recommended Paints for Drop Ceiling Tiles
Choosing the right type of paint ensures a durable and consistent finish across all your ceiling tiles:
- Latex paint – Water-based interior latex paints work extremely well for coating ceiling tiles and provide a smooth, consistent finish. Look for an interior latex formulated for ceilings.
- Acrylic paint – Acrylic craft paints also adhere beautifully to ceiling tiles. Thin down thicker acrylics with a bit of water.
- Spray paint – Spray paint formulas made for plastic provide great coverage on ceiling tiles once primed. Use light coats.
- Acoustic tile paint – Specialty acoustic ceiling tile paints allow sound to pass through treated tiles. Useful for painted office or music room tiles.
Avoid using oil-based enamels, vapor barrier paints, or exterior paints which can crack when applied to ceiling tiles.
Painting the Tiles
Once primed and prepped, you can paint the ceiling tiles using any color you desire. Follow these tips:
- Stir paint thoroughly – Mix in one direction to ensure uniform color and consistency.
- Use mini rollers – A 4-inch roller with 1/4 inch nap is perfect for coating ceiling tiles evenly.
- Brush small edges – Use an angled trim brush to paint cut-in areas the roller can’t reach.
- Paint back of tiles – Don’t forget to paint tile backs, edges, and sides for a finished look.
- Do 2-3 coats – Allow each coat to dry fully before adding another for best coverage.
- Dry horizontally -Tiles should lie flat while drying to prevent paint from running or dripping on the finished surface.
- Check for drips – Inspect each tile thoroughly once dry to catch any drips or uneven sections needing touch up.
Pro Tip: Add a non-slip additive like Shark Grip to the final coat of paint. This helps hold tiles firmly in the grid once reinstalled.
Painting the Ceiling Grid
The metal ceiling grid that holds up the tiles can also be painted to match or coordinate with the tile color. Here are two methods:
Painting the Grid with Tiles Removed
With all tiles taken down, the grid can be easily spray painted using a canned spray paint formulated for metal finishes:
- Mask walls and floors with painter’s tape and drop cloths to avoid overspray.
- Wipe grid with TSP cleaner and dry fully to remove dirt and oils.
- Apply a spray paint primer if finishing with a darker color.
- Spray paint grid using light, even coats allowing drying time between each.
- Remove any drips with razor blade. Do touch ups with brush.
- Allow to fully cure before reinstalling clean tiles.
Painting the Grid with Tiles in Place
To paint the grid without removing all the tiles:
- Carefully mask tiles with painter’s tape to protect finished surfaces.
- Use a small angled trim brush to brush paint onto the grid, reaching up from below to hit the middle.
- Or attach a paintbrush to an extendable pole for easier reach.
- Take your time and move systematically across the ceiling to avoid drips through openings.
- Only spray unmasked areas or touch up with spray paint once done brushing.
Painting the grid while tiles are still installed takes patience. It may require multiple coats to get full coverage. But it avoids the major task of taking down the full ceiling.
What Color Should You Paint a Drop Ceiling?
When selecting a color palette, consider how the painted ceiling will coordinate with the overall design of the room. Here are some popular options:
- White – For a clean, bright look. Different white hues like Swiss Coffee can warm up a space.
- Black – A dramatic shade that instantly makes a design statement. Matte black is ideal.
- Gray – From light silver grays to deeper charcoal, gray creates a moody, sophisticated vibe.
- Navy – For a crisp nautical feel. Pair with white trim for classic maritime style.
- Forest Green – Deep green tiles contrast beautifully against reddish brick walls.
- Beige/Taupe – Earthy tones like sand or greige warm up modern spaces.
- Metallic – Gold, silver, or copper paint adds glam and shine.
Always test colors on spare tiles first to ensure the hue works with your lighting and décor. Bold ceilings look best when walls and trim are neutral to let the color take center stage.
Special Considerations for Acoustic Tiles
Acoustic ceiling tiles contain tiny perforations that allow sound to pass through and absorb echoes in a room. Painting them requires porous paints or specialty acoustic paint to maintain sound absorbing properties.
Here are some tips for prepping and painting acoustic tiles:
- Clean tiles thoroughly to open perforations and remove debris
- Use latex or acrylic paint – avoid oils which may clog holes
- Opt for flat sheens to allow sound absorption
- Do not oversaturate tiles with too much paint
- Consider an acoustic tile paint like Rust-Oleum Specialty Ceiling Tile Paint
- Spray in light coats and do minimal brushwork to keep perforations open
In offices or music studios, it is often best to replace old acoustic tiles for aesthetics and optimal sound quality.
Achieving Full Coverage Across Tiles
Getting an even, consistent color across all your ceiling tiles takes diligence but creates a unified finished look:
- Do multiple coats – At least 2-3 thin coats allows the paint to saturate the tile surface fully.
- Blend touch ups – Feather out paint on any noticeable touch ups using a damp brush.
- Mix tile batches – When reinstalling tiles, mix painted batches from different dye lots to vary any slight color differences.
- Work in sections – Paint and reinstall tiles in sections to keep color consistency tighter across batches.
- Prime heavily – Apply two coats of primer on stained or discolored tiles to block out imperfections.
- Buy extra tiles – Having spare tiles on hand allows you to test paint colors and replace any damaged tiles later on.
Taking your time with prep, using quality primer and paint, and applying multiple coats results in a uniformly painted ceiling that looks crisp and professional.
Step-by-Step Process for Painting a Drop Ceiling
Now that we’ve covered all the prep work, materials, and techniques, here is a step-by-step overview of the entire drop ceiling painting process from start to finish:
Step 1: Remove Tiles and Clean Thoroughly
Use a helper to remove tiles systematically and keep them organized by ceiling quadrant. Number tiles on the back for reinstallation. Vacuum and use TSP cleaner to remove all debris, dirt, and oils from tiles and grid.
Step 2: Make Any Needed Tile Repairs
Inspect all tiles and use spackle or seam tape to patch any holes, cracks, or defects. Sand rough patches flush when dry.
Step 3: Prime Tiles and Allow to Dry
Use spray primer or a mini foam roller to apply a uniform primer coat on all tile surfaces and sides. Let prime dry fully before painting.
Step 4: Paint Tiles and Let Dry Horizontally
Using a small paint roller, apply two to three finish coats on all tile surfaces, allowing proper dry time between coats. Lay tiles flat to dry.
Step 5: Paint Grid (Optional)
Once tiles are removed, spray paint grid. Or with tiles in place, carefully brush paint grid sections using small trim brush. Allow paint to cure fully.
Step 6: Reinstall Painted Tiles
Referencing your numbered tiles, reinstall them into the original ceiling grid locations. Mix tile batches for color consistency.
And that’s it! With some planning and elbow grease, you can transform the look of a drab drop ceiling by painting the tiles and grid yourself.
Painting Drop Ceiling Tiles Without Removing
While removing all ceiling tiles to paint is ideal for the most uniform and professional results, it is possible to paint tiles without taking them out of the grid. This avoids the major undertaking of dismantling the entire ceiling just for a cosmetic refresh.
Here are some tips for successfully painting tiles in place:
- Use painters tape to mask edges of tile seams and wall trim to avoid splatter.
- Work in a systematic grid, tile by tile, across the ceiling to keep track of what’s been painted.
- Use an extender pole and roller to reach the tiles without climbing a ladder. Load the roller carefully to minimize drips.
- Paint perpendicular back and forth passes across each tile to ensure even coat coverage.
- For textured or acoustic tiles, a spray paint method works better than rolling to reach shadows and perforations.
- Go slowly and do multiple thin coats. It takes longer but prevents drips through grid holes.
- Cut in edges with an angled trim brush once tiles are coated to finish small gaps.
Painting overhead without removing tiles requires more precision. Having a helper track tile progress and touch ups is useful.
What Sheen of Paint Works Best?
When selecting ceiling paint sheen, here are some guidelines:
- Flat – Best for hiding imperfections and allowing light to reflect brightly. Most popular finish for ceilings.
- Eggshell – Provides a very subtle sheen. More durable than flat but may show lap marks on ceiling.
- Satin – A smooth, velvety sheen that’s easy to clean. Can accentuate uneven textures.
- Semi-Gloss – Highly reflective with a noticeably shiny surface. Not ideal for hiding flaws.
- High Gloss – Gives a mirror-like wet look. Very bold but will showcase any surface defects.
For most standard drop ceilings, a flat white paint is the best choice and will give the cleanest, brightest finish. Matte black is also a dramatic but forgiving choice.
How to Minimize Lap Marks When Painting
Nothing ruins the look of a freshly painted ceiling faster than seeing obvious paint “lap” marks between tile edges. Here are some tips to minimize visible lap marks:
- Use high quality paint designed specifically for hiding lap marks. Look for “zero VOC” on the label.
- Do not overload the roller with paint. Apply in thin, even coats.
- Maintain a wet edge and work systematically so paint does not dry between tiles.
- Feather out the transition line using a damp roller when reloading with more paint.
- Cut in tile edges with a trim brush to help visually break up roller sections.
- Finish with perpendicular strokes rather than parallel to the tile seams.
- Adjust room lighting or viewing angle so lap marks are less noticeable. They become less obvious over time as paint fully cures.
With care and some strategic lighting, lap marks on painted ceiling tiles can be minimized for a consistent looking finish.
Painting Damaged Drop Ceiling Tiles
Many older drop ceilings have tiles that are visibly damaged, discolored, or warped. Painting can help improve their appearance, but the best solution is replacing any tiles that are structurally compromised or showing signs of water damage or mold growth.
For tiles that are in fair condition, painting them follows a similar process but often requires more prep work:
- Clean surface thoroughly with TSP to remove stains and residue
- Use spackle or caulk to fill any cracks, gouges, or holes
- Sand rough areas smooth once patching compound dries
- Spot prime any remaining stains with a stain-blocking primer like Kilz
- Apply 2-3 finish coats of paint using small foam roller
Heavily primer stained or damaged tiles to help hide imperfections shadowing through the new paint. It often takes several coats to hide flaws fully.
Painting New Ceiling Tiles Before Installation
For the most efficient and professional looking results, consider removing all the existing tiles and painting brand new replacement tiles before they are installed:
Here is the process:
- Take down old ceiling and dispose of any damaged tiles and grid sections
- Clean and paint grid as desired
- Purchase new tiles – match size and style to existing ones
- Remove protective film coating from new tiles
- Set up an organized painting area and prep tiles as noted earlier
- Prime and paint all new tiles with the desired colors – do multiple coats
- Allow tiles to fully cure laying flat for at least 48-72 hours
- Finally, install the pre-painted tiles into the painted grid
Though more expensive than just painting the old tiles, this technique allows you to start fresh with a flawless, uniformly painted ceiling. You avoid dealing with any scratches, stains, or inconsistencies found on older tiles.
Cost to Paint Drop Ceiling Tiles
If hiring a professional contractor, you can expect to pay in the range of $3-$6 per square foot for painting a drop ceiling. This may include tile prep, priming, painting, and reinstallation. For a 10′ x 10′ room that’s $300-$600.
If painting ceiling tiles yourself as a DIY project, your only costs are:
- Paint – $30-$60 depending on brand and quantity needed
- Paint supplies – $30-$50 for rollers, brushes, trays, primer, etc.
- Drop cloths, masking tape, cleaning supplies – $20
- New tiles (optional) – $1-$3 per square foot
So for about $100-$200 in supplies, you can paint a standard small basement or bedroom ceiling on your own. Larger commercial spaces may run $500-$1000 or more in paint and materials to revamp the entire ceiling.
FAQs About Painting Drop Ceilings
Here are answers to some frequently asked questions about revamping drop ceilings with paint:
What kind of paint adheres best to ceiling tiles?
Interior latex or acrylic paints specifically designed for use on ceilings provide the best adhesion and most durable finish.
Do you have to take down all the tiles to paint a drop ceiling?
It is highly recommended to remove all tiles for the most consistent, professional results. Painting in place is possible but more challenging.
Should drop ceiling tiles be primed before painting?
Primer helps paint adhere evenly while covering stains, discoloration, and tiles with slick surfaces. Always prime before painting.
Can you use spray paint to paint ceiling tiles and grid?
Yes, spray paint works extremely well for coating tiles and offers great metal finish results on the grid framework.
How long does it take to paint a drop ceiling?
Removing tiles, prepping, priming, painting 2-3 coats, and reinstalling tiles typically takes 5-10 hours for a small 10′ x 10′ ceiling. Larger ceilings may take 15-30 hours.
Can you paint acoustical ceiling tiles?
Yes, acoustic tiles can be painted using porous paints like latex or specialty acoustic ceiling paints. Avoid thicker coatings that may clog perforations.
What sheen is best for painting drop ceilings?
A flat or matte paint finish provides the most flawless, uniform look on ceiling tiles by hiding imperfections and preventing shiny lap marks.
Transform Your Space with a Painted Drop Ceiling
Drop ceilings are often bland and dated eyesores that show their age quickly in basements and commercial buildings. But with some careful prep work, quality paint, and bold color choices, you can easily convert that eyesore into an attractive design element.
Painting the tiles, grid, or both completely updates the look of a drop ceiling. It allows you to add color, texture, and style without the major expense of full ceiling demolition and replacement.
With the right supplies and techniques, painting drop ceiling components can be done as an affordable DIY project. Just take the necessary steps to clean, prime, and prep the tiles and grid beforehand. Use flat latex interior paints and apply multiple thin coats for the most flawless finish.

