
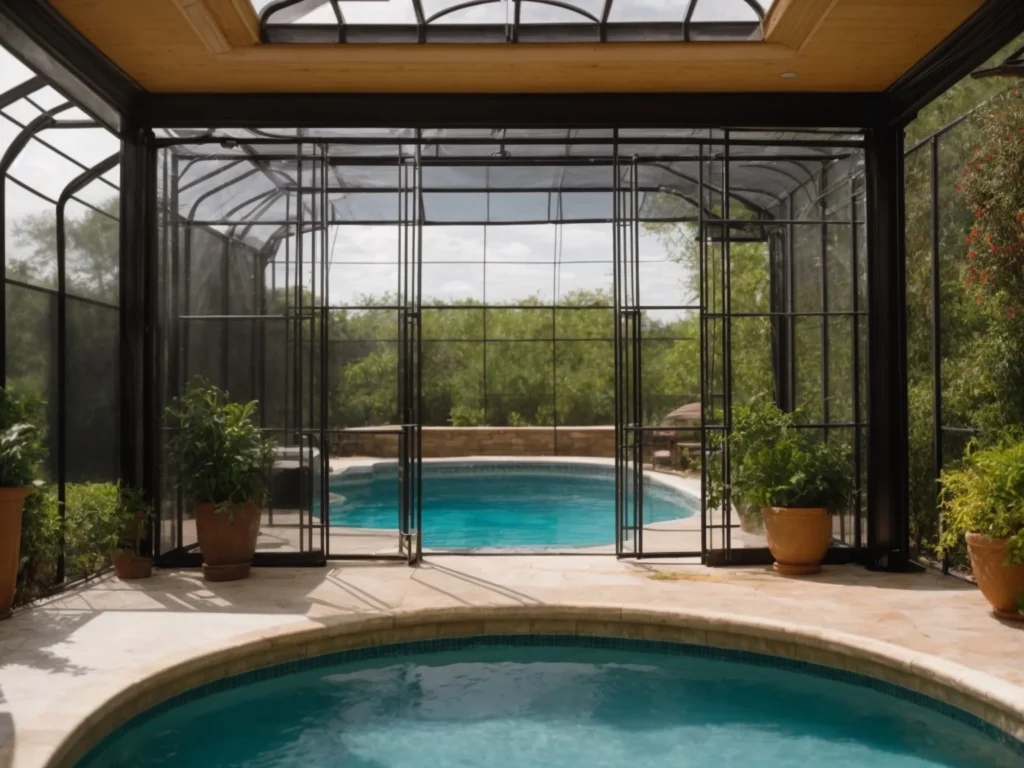
Having a pool cage is a great way to extend your pool season and protect your pool from debris. However, the aluminum framework and screens are exposed to sun, rain, and chemicals which can cause fading and wear over time. Painting your pool cage is an affordable way to refresh the look and add protection.
Why Paint Your Pool Cage?
There are several benefits to repainting an aging pool enclosure:
- Restores a faded and weathered appearance
- Provides a fresh, updated look that matches pool decking
- Protects the aluminum framework from further corrosion
- Seals small cracks and flaws from elemental damage
- Lengthens the lifespan of the existing structure before needing full replacement
- Allows you to change the color if desired for a whole new vibe
Pool cage paint jobs can last 15-20 years when proper preparation and application methods are followed. Even after 10-12 years, the paint may look faded but still adequately protect the metal. Touch up painting and minor repairs can extend the life even further. So if your pool cage is showing some wear, don’t replace the whole thing just yet! Investing in a restoration painting often makes more financial sense.
When Is It Time to Repaint?
Watch for these signs that your pool cage is due for some new paint:
- Visible fading, chalking, or loss of original color
- Rust starting to show through paint on metal members
- Areas of paint peeling or bubbling up
- Noticable amounts of missing or cracked paint
- Framework showing white oxidation and corrosion
- Small holes, cracks, or gaps forming in metal
- Screens with brittleness, tears, or section replacements
Typically, you can expect to repaint an aluminum pool cage every 10-15 years depending on the quality of the original application, environmental factors, and upkeep. Coastal areas may need painting every 8-10 years due to salt air. Well-maintained inland cages can sometimes go 15-20 years before needing paint.
It’s recommended to address any paint flaws early on. Spot painting areas of peeling or rust as soon as they appear will extend the life of the overall finish. Waiting until widespread peeling occurs leads to faster degradation. Keep up on regular maintenance and repairs, and your pool cage can stay looking great for years before a full repaint is needed.
Pool Cage Paint Prep Work
Proper prep work before painting is crucial for getting great results that will last. Here are the key steps:
Cleaning
Give the pool cage a thorough cleaning to remove dirt, grime, oxidation, chalky paint residue, and any oily film. Use a degreaser or TSP substitute cleaner and a stiff scrub brush for heavily soiled areas. Rinse thoroughly.
Repairs
Inspect for any cracks, holes, broken welds, or gaps that have formed in the framework and screens. Repair these before painting so they don’t continue to spread. Seal any small gaps or holes with caulk.
Peeling Paint Removal
Use a putty knife, scraper, or sandpaper to remove any loose, cracked, or peeling sections of old paint. Feather the edges smooth.
Sanding
Lightly sand all surfaces to degloss and roughen them up for better paint adhesion. Pay extra attention to any glossy areas and spots of shiny oxidation.
Spot Prime
Spot prime any bare metal that’s exposed with a suitable metal primer like Rustoleum Rusty Metal Primer. This prevents further rusting.
Masking
Use painter’s tape and plastic sheeting to mask off any areas you don’t want painted like tile, concrete, windows, etc.
Check Weather
Paint when temperatures are 50-90°F and humidity is low to avoid blushing issues. Avoid painting in direct sun.
Choosing the Best Exterior Paint
The right type of paint ensures maximum durability and protection when painting a pool enclosure. Consider these factors:
Aluminum-Compatible Paints
Some paints will not properly adhere to aluminum over time. Specialty pool cage paints are specially formulated for aluminum’s unique properties. Rustoleum and Behr make aluminum-friendly pool and patio paints. An industrial acrylic or enamel works too.
Rust-Inhibiting Paints
Aluminum can oxidize when exposed to water, forming white corrosion and pits. A paint containing rust/metal inhibitors offers the best protection. Rustoleum Professional is a top-rated option.
Gloss Finish
A high-gloss or semi-gloss enamel or acrylic paint gives the most durable and weather-resistant finish. Matte paints look nice at first but show dirt and wear too easily.
UV-Resistant
Look for paints specially formulated to resist fading in sun exposure. UV-inhibitors prevent the finish from breaking down prematurely.
Mold/Mildew Resistant
Pool cages have increased moisture exposure. Paints with EPA-registered mildewcides help prevent ugly black mold and algae growth on the surface.
Elastomeric Coatings (optional)
These flexible, rubber-like paints provide the ultimate protection by expanding and contracting with temperature changes to prevent cracking. They’re more expensive but offer extended service life.
Sample Colors
Purchase sample size paint cans first to test colors on a small section before fully committing to a color. Ensure you like the shade and appearance before buying gallons.
Top Paint Brands
Rustoleum Professional – Offered in semi-gloss, gloss and satin. Provides excellent rust prevention and metal adhesion with UV resistance. The leading brand for painting pool cages.
Behr Premium Plus Ultra – Behr’s high quality acrylic-enamel formulated specifically for pool and patio use on aluminum. More budget friendly option.
Valspar Duramax – Combines durability and weather resistance at a reasonable price point. Good aluminum adhesion.
Sherwin-Williams Pro Industrial – An industrial-grade acrylic enamel for metal substrates. Higher prices but offers extreme durability.
Determine How Much Paint is Needed
Don’t underestimate how much paint you’ll need or you may end up short. Measure the square footage of all cage outer and inner surfaces needing painting. Figure approximately 300-350 square feet of coverage per gallon. Buy 20% extra for a second coat and touch-ups.
For a 500 square foot enclosure, you’ll need around 2 gallons for one coat. Purchase 3 gallons including the extra.
Should You Repair or Replace Screens?
When repainting the pool cage framework, also inspect the screen panels. Replacing any sections that are torn, brittle, sagging, or have holes will provide a fully refreshed appearance.
Fiberglass screen panels typically have a 10-15 year lifespan matching metal frames. PVC-coated screens last 5-8 years before needing replacement.
Consider upgrading to a clearer view product like Phifer’s Patio View to allow more light and visibility while still blocking debris. This is installed the same way as traditional screens.
Screen costs range from $0.80-$1.25 per square foot. To redo screens on a 500 sq ft cage, you would pay $400-$625 in materials. Have a pool company professionally replace the screens for $1-2 per sq ft.
Doing the screen replacement when repainting only marginally increases the cost but provides huge visual impact.
Hiring a Professional vs. DIY Painting
You can either hire a pool cage painting company to handle the job or take on the DIY painting project yourself. Here’s an overview of both options:
Professional Pool Cage Painting
Hiring professional painters is the best way to get a high-quality, long-lasting paint finish, especially for large cages. Pros have the right equipment, can access tricky spots, and properly prep the surface.
The average cost to hire a company is $3,500-$6,000 for a 500-1000 square foot enclosure. Smaller cages may be $2,000-$3,500. Rates average $4-8 per square foot depending on location.
Look for licensed painters experienced specifically with pool cages. Check reviews and examples of past aluminum painting work. Get an itemized estimate for the prep work, paint, and projected timeframe.
While pricier than DIY, professional painting typically lasts longer and comes with guarantees. The cost is reasonable compared to fully replacing a pool cage.
DIY Pool Cage Painting
With proper prep and patience, homeowners can tackle paint jobs themselves for big cost savings. This works best for smaller enclosures under 500 sq ft.
You’ll need basic tools – sanders, paint sprayer, brushes, rollers, masks, etc. Allow substantial time for prep and painting. Have tall ladders to reach the peak.
Doing prep thoroughly is challenging for DIYers – getting every surface sanded, primed, and cleaned takes diligence. Rushing this step leads to peeling or poor paint adhesion later.
Spray painting gives better coverage than rolling or brushing by hand. Maintain consistent spray distance and overlap strokes. Expect to spend $500-$1,500 or more on supplies for a DIY project.
Step-By-Step Painting Process
Follow these steps for proper application when painting your pool cage:
1. Prepare the Area
Clear out any furniture, accessories, hoses, cleaning tools, etc around the pool cage so they don’t get sprayed. Cover nearby plants and grass. Use plastic sheeting secured with weights to protect decking and concrete from paint drips.
2. Repair Any Damage
Fix all holes, gaps, cracks, broken welds, missing screws, or problem areas following the manufacturer’s repair recommendations before painting. Use filler caulk for small gaps.
3. Wash and Degrease
Use a strong TSP substitute cleaner or degreaser and a stiff scrub brush to thoroughly clean all surfaces of the pool cage. This removes built-up dirt, grime, chalky paint residue, salt spray, and oily deposits. Rinse off with a high-pressure hose.
4. Lightly Sand
Use 150-220 grit sandpaper to scuff sand every inch of the pool cage framework. This deglosses the surface for paint adhesion. Pay special attention to any glossy, smooth, or shiny areas.
5. Spot Prime Bare Metal
Apply metal primer like Rustoleum Rusty Metal Primer to any exposed bare aluminum following the product instructions. This prevents further oxidation.
6. Feather Paint Edges
Where any old paint has peeled or chipped away, use sandpaper to feather and smooth the edges for a flush transition. Wipe away all sanding dust.
7. Apply First Coat
Follow the paint manufacturer’s instructions for drying times between coats. Apply the first coat evenly while maintaining a wet edge. Work in sections starting from the top down. Use a brush for hard to reach spots. Coat all framework and screens.
8. Inspect and Lightly Sand Again
Do a thorough inspection looking for any drips, splatters, thin spots, or imperfections. Use 220 grit sandpaper to lightly smooth any flaws to a uniform surface. Clean off dust.
9. Apply Second Coat
Apply the finish coat in the same method as the first. Allow proper drying time between coats. Two coats provide enough coverage and protection in most cases. Add a third coat if needed.
10. Remove Masking and Sheeting
Carefully remove all painter’s tape, masking materials, and protective sheeting from nearby areas. Use mineral spirits for paint drips on concrete or finished wood. Avoid damage to plants from plastic removal.
11. Let Cure Completely
Leave the freshly painted pool cage undisturbed for several days to fully cure before reinstalling screens or accessories. Curing takes longer in cool, humid weather.
Tips for Achieving an Expert Paint Finish
These tips will help you get professional-looking results on your pool cage paint job:
- Maintain a consistent spray distance while painting of 8-10 inches from the surface. Keep sprayer nozzle perpendicular to the surface, not at an angle.
- When spray painting, use horizontal strokes followed by vertical strokes to ensure complete, even coverage. Overlap the strokes by 50%.
- Paint in steady back-and-forth motions, not just pressing the sprayer in one direction. Control the speed to avoid drips and runs.
- Use angled painting extensions for hard-to-reach interior roof peaks and corners. Use painters pyramids for extra stability.
- Apply paint from the top down. Finish upper sections first before lower parts to avoid drips falling onto newly painted areas.
- Work in small sections of around 8-10 square feet at a time to keep a wet edge and consistent coats.
- In hot, humid weather, paint early in the day before the peak temperature to allow proper drying between coats.
- Don’t apply paint in direct sunlight or if rain, dew, or temperatures under 50°F are expected within the drying period.
- Box fans can be positioned nearby to help accelerate drying times in shaded areas.
What Are the Best Pool Cage Paint Colors?
Choosing a color is an important design decision when painting your pool enclosure. Here are popular color ideas to consider:
Bronze
A rich bronze hue is the most common pool cage color. It elegantly complements pavers and tan coping while hiding flaws better than lighter colors. Bronze has a classic, elegant look.
White
White painted aluminum provides a clean, bright appearance that makes the space feel more open and airy. It reflects light well. White shows dirt easily and requires more frequent touch ups.
Beige/Tan
Softer beige and tan tones integrate nicely with stone or concrete decking and still hide imperfections better than white. Taupes and brown tones are eye-pleasing.
Color Matching
Choose a paint color that coordinates with the pool deck or exterior house paint for a cohesive look. Paint companies can color match to your existing tones.
Accent Colors
Some homeowners opt for a bold accent color on the horizontal cross beams mixed with a neutral bronze framework. Try navy, green, red or other deep tones.
Sky Ceilings
Painting the interior upper ceiling a sky blue color gives the illusion of openness and mimics looking up at the real sky. Extend the blue onto upper walls.
Creative combos
Pair bright white structures with bronze screening or try black screens with a bronze frame. Mix gloss and satin finishes. Get creative!
Remember to purchase sample size paint cans and test colors on a small area first before committing to gallons. Ensure you like how the tone interacts with the landscape.
Maintaining Your Painted Pool Cage
Regular maintenance preserves your pool cage’s freshly painted look. Follow these tips:
- Inspect the paint every year before season opening. Touch up any flaws immediately to prevent spreading.
- Use touch up paint on chips, cracks, or scratches as soon as they appear. Sand first and spot prime if bare metal shows.
- Wash the enclosure at least twice a year using a pressure washer and mild detergent. Avoid abrasive cleaners.
- Check and repair sealants every few years. Reapply in any gaps around screws, joints, or foundations.
- Check for signs of oxidation or rust and quickly repaint those areas before they spread.
- Consider waxing the enclosure yearly using a polishing compound safe for painted metal. This adds protection from the elements.
- Keep trees and bushes trimmed back from touching the framework to prevent abrasion damage.
Proper prep work, using the right paints, and annual maintenance will give you the longest lasting, best looking paint finish on your pool cage. Enjoy the refreshed new look!

