
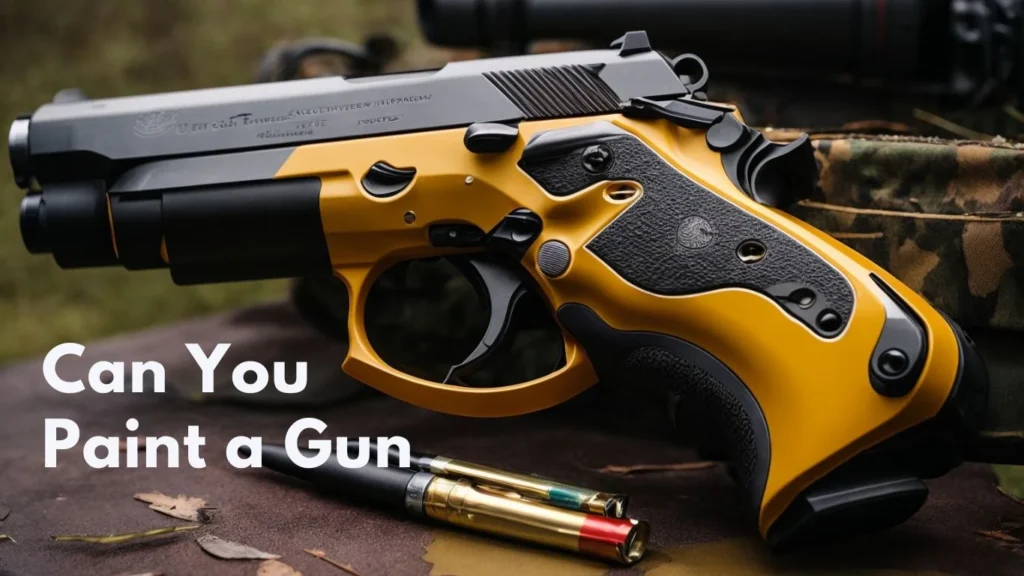
Painting your gun can be a great way to customize the look, provide protection, or add camouflage for hunting. With the right type of paint and proper preparation, you can easily change the color of your firearms at home. This comprehensive guide will provide everything you need to know about painting guns.
Can You Paint Guns?
Yes, you absolutely can paint guns if you use the proper type of durable coating designed specifically for firearms. While regular spray paints are not well-suited for gun finishes, many specialty metal and polymer paints are made to withstand the rigors of firearm use. Brands like Krylon, Rust-Oleum, Duracoat, Cerakote, Aluma-Hyde II make long-lasting, durable spray paints intended for guns.
With the right paint and thorough preparation, you can successfully change the color of the metal and polymer components on rifles, pistols, shotguns, and more. A fresh coat of paint can give your firearm a custom look, provide extra protection, or add camo patterns for hunting.
What Kind of Paint to Use on Guns
Choosing the right type of paint for your firearm is crucial to achieving a long-lasting finish. Here are the best options:
- Firearm-Specific Enamel Spray Paints: Brands like Krylon and Rust-Oleum make durable enamel spray paints designed specifically for use on guns and firearms. Look for paints marketed for metal and polymer gun components.
- Cerakote: This professional-grade ceramic coating provides excellent adhesion and an extremely durable finish. Available in a wide range of colors and requires baking to cure fully.
- Duracoat: A air-cure ceramic coating that is highly durable and abrasion resistant. Easy to apply with a spray gun.
- Aluma-Hyde II: An air-dry rubberized coating ideal for metals and polymers. Provides excellent corrosion resistance.
- KG Gunkote: A tough, military-grade polyurethane coating well-suited for firearms. Easy to apply and very durable.
- Air-Cure Gun Finishes: Durable polymer paints like NP3, Roguard, and Perma-Blue provide lasting protection with simple air drying.
Avoid using regular spray paints or lacquers which lack the adhesion and durability needed for firearms. Stick with coatings specifically made for metal guns.
How to Paint a Gun
Proper preparation and application technique is key to achieving an attractive and durable painted firearm finish at home. Follow these steps:
Prep the Surface
- Completely disassemble the gun to be painted. Remove all parts from the upper, lower, and furniture.
- Thoroughly clean each part with solvent like brake cleaner or acetone to remove all oils, grease, dirt, and residue.
- Lightly sand any glossy finishes with fine sandpaper to roughen and prep the surface.
- For polymer frames, use a solvent like acetone to strip the surface. Lightly sand.
- Mask or remove any parts you don’t want painted like springs, pins, sights, etc.
Prime (Optional)
- On bare metal, apply a thin coat of self-etching primer formulated for metals. Allow to fully dry.
- For polymer, a primer isn’t necessary. Can optionally use a plastic adhesion promoter.
Paint in Thin, Even Coats
- Shake the spray paint very well and spray in smooth, even passes about 8-10 inches from the surface.
- Apply 2-3 thin coats a few minutes apart to build up the finish, allowing proper drying time between coats.
- Avoid runs, drips, or heavy application by using multiple light coats.
- For professional finishes like Cerakote and Duracoat, follow manufacturer instructions for spray application.
Curing the Finish
- Allow paint to air dry fully for 24-48 hours. Follow coating directions for recommended cure times.
- Can optionally bake parts at 180°F for 1 hour to speed cure time. Required for some ceramic finishes.
- Reassemble the painted gun when fully cured. Make sure action cycles smoothly.
Maintaining the Finish
- Avoid harsh cleaners, heavy abrasives, or solvents that could damage the paint.
- Durability will vary based on quality of prep work, paint used, application technique, and conditions.
- Periodically inspect finish for any chips or wear and touch up as needed.
Is it Legal to Paint Your Gun?
In most cases, it is perfectly legal to paint your own firearm for personal use as long as you follow certain guidelines:
- Cannot disguise firearm to look like a toy. Paint job must not resemble a toy gun.
- Serial numbers and other required markings cannot be obscured or covered.
- Local regulations may prohibit certain colors or patterns to avoid mimicking law enforcement firearms.
- Comply with any state/federal regulations regarding modifying firearm appearances.
- Generally not legal to paint then sell/transfer a firearm without proper gunsmith licensing.
- Painting for personal customization is allowed. Check local laws before painting.
If you aren’t attempting to disguise it, alter markings, or impersonate law enforcement, painting your personally owned gun for aesthetic reasons is lawful in most states.
Cost to Paint a Gun
The cost to paint your firearm can vary drastically depending on the method, materials, and who does the work:
- DIY with spray paint: $5 – $20 for rattle can enamel sprays from Krylon, Rustoleum, etc.
- DIY with gun coatings: $50 – $100 for specialty spray paints like Duracoat, Cerakote, etc.
- Professional spray/bake: $100 – $300+ for patterns, hydrodipping, Cerakote finish, etc.
- Airbrushed artwork: $200 – $1000+ for complex multi-color jobs.
Doing it yourself with quality spray paint can give you a durable new finish for less than $20. More advanced DIY projects with bake-on coatings run $50-100 in materials. For show-quality finishes with complex art, expect costs from $250 up to over $1000 for extensive hydrodipping or airbrushed paintwork.
How to Spray Paint a Gun
Using spray paint is the easiest DIY method to change the color of your firearms. Follow this process:
Choose a Durable Firearm Spray Paint
Look for specialty spray paints designed for guns. Krylon, Rust-Oleum, KG Gunkote, and Aluma-Hyde II work well. Opt for matte or satin finishes.
Disassemble and Prepare Properly
Take gun fully apart and clean all components thoroughly with solvent. Lightly sand glossy areas. Mask off non-painted parts.
Use Thin, Even Coats
Hold can 6-8 inches away and spray in smooth, light passes. Apply 2-4 thin coats a few minutes apart until fully covered.
Allow Proper Curing Time
Let paint dry 24-48 hours until fully cured. Follow manufacturer’s directions. Optionally bake parts at 180°F to speed cure time.
Reassemble and Test Function
Once fully cured, reassemble gun. Make sure action still functions smoothly and parts fit correctly.
Spray painting requires some disassembly but allows you to refresh or customize guns with a simple rattle easily can paint job.
Painting Gun Parts
Most metal and polymer components on guns can be painted with proper preparation and durable coatings:
- Frames: Clean thoroughly with solvent like brake cleaner. Lightly sand and apply thin coats of polymer/metal spray paint.
- Slide: Same process as frame. Make sure to prep well and use thin coats of high heat paint.
- Barrels: Remove barrel from action. Clean and degrease inside and out. Mask ends and paint exterior only.
- Small Parts: Remove springs, pins, etc. Clean and paint components like extractor, safety, mag release, triggers, etc.
- Furniture: Clean, scuff and apply new spray paint to handguards, pistol grips, stocks, etc.
- Magazines: Aluminum mags can be sanded, primed and painted with thin coats. Use high heat paint for AR-15 style magazines.
Proper cleaning, masking, and prep allows you to paint frames, slides, barrels, small parts, furniture, and magazines to customize the look.
How to Paint Polymer Frames
Painting polymer handgun frames is a popular way to customize the look. Here are some tips:
- Thoroughly clean frame to remove all residues using acetone or brake cleaner on a rag.
- Lightly scuff surface with 600 grit sandpaper to rough up and prep frame.
- Rinse frame and allow to fully dry. Wipe down again with solvent like acetone.
- Apply 2-3 light, even coats of polymer spray paint like Krylon Fusion allowing drying time between coats.
- Use thin coats and keep about 8 inches away from frame to avoid drips.
- For a distressed look, use acetone on a cotton swab to rub away paint in key spots once cured.
- Allow paint to cure for 24 hours until fully hardened before reassembling lower.
- Test function to ensure smooth cycling and fit with painted frame.
- Avoid standard enamels which may not adhere well to polymer. Use flexible paints like Krylon Fusion.
Prep work is crucial for good adhesion. Make sure to thoroughly clean and scuff the frame before painting. Flexible spray paints work much better than regular enamels. Apply in light coats for a smooth finish.
How to Paint Rifle Receivers
Rifle receivers are one of the most commonly painted gun components. Here is how to paint AR-15, AK, 10/22 receivers and more:
- Fully disassemble upper and lower receivers removing all parts, springs, pins, etc.
- Thoroughly degrease and clean with solvent like brake cleaner. Scuff surface lightly.
- Mask off any areas like threads, mag wells, etc. you don’t want painted.
- Use self-etching primer spray if painting over raw aluminum. Allow to dry.
- Apply 2-4 thin coats of durable spray enamel like KG Gunkote, Krylon, etc. in smooth passes.
- Allow 24-48 hours for paint to cure before reassembly fully. Check fit and function.
- Don’t cover any required markings like serials. Tape over roll marks if desired.
- Apply very lightly around any tight tolerance areas. Don’t clog threads with paint buildup.
Proper cleaning and prep is crucial to paint adhesion. Use masking and very light coats in small crevices. Allow full cure before reassembling.
Painting Gun Barrels
You can change the exterior color of barrels through painting if done properly:
- Remove barrel from firearm action/upper prior to painting. Mask chamber end.
- Clean exterior thoroughly with solvent like acetone to degrease surface. Lightly scuff.
- Plug muzzle end with rag to prevent paint overspray inside barrel.
- Use very thin, light coats of high heat engine paint. Allow to dry between coats.
- Keep paint buildup minimal around locking lugs and any threads.
- Allow paint to cure fully for 48 hours before handling. Reinstall in upper.
- Do not paint barrel interior as this can affect accuracy and is unsafe. Exterior only.
Go slowly with light coats to avoid runs and drips which can impede function. High heat paints withstand heat better than standard enamels. Never paint inside bore.
Painting Magazines
You can customize the look of magazines through painting. Here are some tips:
- Disassemble magazine for cleaning. Remove baseplate, followers, floorplate, etc.
- Thoroughly degrease and clean components with solvent like acetone or brake cleaner.
- Lightly sand anodized aluminum mags to roughen surface for paint adhesion. Use primer first.
- Polymer mags benefit from light sanding as well. Can skip primer.
- Use thin even coats of quality spray paint on all components. Reassemble when fully cured.
- For AR-15 style magazines, use high heat paint rated up to 300°F to handle heating.
- Check function after reassembly to ensure smooth feeding. Fix paint buildup if needed.
Proper disassembly allows thorough cleaning and painting of all magazine parts. High heat paint prevents issues with heated AR mags.
How to Bake Paint Gun Parts
For professional gun finishes like Cerakote and Duracoat, baking painted components helps fully cure the coating:
- Follow all prep and painting steps per manufacturer instructions. Allow to air dry.
- Bake parts in oven at 180°F for 1 hour. This allows coating to fully cure.
- Some coatings like Cerakote ceramic may require higher baking temps. Follow product directions.
- Use oven thermometer to monitor temperature. Set timer to avoid over-baking.
- Allow parts to cool fully before handling. Provides an ultra-durable finish.
- Can skip baking if using air-dry coatings. But baking provides harder cure.
Baking helps paints fully cure for maximum durability. Use care when handling hot parts after baking. Allow parts to cool before reassembly.
Removing Paint from Guns
If you need to remove paint from a firearm, here are some options:
- Chemical Strippers – Paint removers like Citristrip work well to dissolve paint layers. Allow to sit then scrub with plastic brush. Rinse thoroughly.
- Bead Blasting – Uses fine glass beads at high pressure to remove paint down to bare metal. Requires an air compressor and bead blaster cabinet.
- Media Blasting – Similar to bead blasting but uses materials like walnut shells or aluminum oxide. Strips quickly but may damage surface.
- Sand Blasting – Uses high-pressure air to propel abrasive sand at the surface. Quickly removes paint but also wears down metal.
- Mechanical Removal – Wire wheels on a drill or Dremel tool allow carefully scraping paint. Avoid digging into metal. Very time intensive for full removal.
- Oven Cleaner – Spraying Easy-Off oven cleaner can soften some paints for removal with plastic scraper and brass brush. Use caution.
Avoid using open flames, high heat, or extremely caustic chemicals to remove paint as these can damage the firearm. Use proper eye and hand protection whichever method you choose.
Camo Painting for Hunting Guns
Adding camo patterns to your hunting rifle, shotgun, bow or other firearms can help conceal them in the field. Here are some tips:
- Carefully plan out your camo pattern beforehand. Freehand painting takes skill to blend pattern smoothly. Use masking tape and netting to help create shapes.
- Light earth tone base colors like tans, olive drab, flat dark earth work well for many camo patterns. Allow base coat to dry first fully.
- reference photos of camo patterns like Realtree, Mossy Oak, Kryptek Typhon, etc. when selecting colors and designing your own camo.
- Use images of natural camouflage as inspiration. Break up solid colors with lighter highlights and darker shadows.
- Apply darker accents in thin spraying motions or dabbing to create organic blotches rather than hard lines.
- Use matte or flat spray paint finishes. Glossy paint reflects too much light.
Take your time and use light coats to layer colors. Practice first on cardboard or wood before tackling your firearm. Simple is often better for camo painting.
Painting Suppressors and Silencers
Suppressor tubes can be painted to change color or add camo patterns. Here are some tips for painting silencers:
- Make sure to choose a high heat specialty paint that can withstand the heat generated. High temp engine paint works well.
- Fully disassemble the suppressor and clean all components before painting. Degrease and lightly scuff.
- Use multiple thin coats of paint on the outer tube. Allow proper drying time between coats.
- Consider using a heat-resistant ceramic coating like Cerakote for maximum durability. Will require baking to cure.
- Don’t allow paint to clog baffles or interior pieces. Light exterior spraying only.
- Reinstall all components once paint has fully cured. Make sure to align baffles properly.
- When reinstalling end caps, use care not to damage fresh painted exterior.
Avoid excess paint buildup that could affect proper suppressor function. Use high heat paints rated for at least 400°F or higher.
Painting Pistol Grips
You can customize and improve your grip on handgun handles through painting. Here’s how:
- Thoroughly clean and degrease grips prior to painting using dish soap, acetone or alcohol. Lightly sand.
- Use masking tape to block off areas you don’t want painted like the grip screw hole.
- Look at grip texture and determine best pattern. Can paint just high points in a stippled pattern for example.
- Use thin layers of spray paint in matching colors or contrasting colors for two-tone style. Allow to dry between coats fully.
- Consider using skateboard grip tape cut to size instead of paint for added texture. Or paint first then apply grip tape.
- For rubber grips, scuff well before painting. Use flexible paints like Plasti-Dip designed for rubber and plastics.
Paint allows customizing grip color as well as creating unique patterns or textures for improved hold. Make sure paint has fully cured before reinstalling grips.
Safety Tips for Painting Guns
Painting firearms requires some basic safety precautions:
- Always wear eye protection, gloves, and an approved respirator when spray painting. Avoid inhaling overspray or fumes. Work in a well-ventilated area.
- Remove all ammunition and disassemble firearms prior to cleaning or refinishing for safety.
- Use caution when baking painted firearms in oven to avoid potential fume inhalation. Bake and allow parts to fully cool before handling.
- Follow manufacturer’s directions for proper use of chemical paint strippers or cleaners. Avoid skin contact.
- Be aware of flammability concerns with spray paints and solvents. Eliminate any ignition sources when refinishing guns.
- Work slowly and methodically when painting assembled firearms like receivers to avoid paint buildup in mechanisms.
- Properly block barrels, actions, springs and other areas from overspray when painting assembled guns.
- Don’t attempt to spray paint ammunition, powder, primers, or other combustible components.
Paint fumes and overspray can be hazardous. Work in a clean, organized manner using proper gear and ventilation. Never paint loaded firearms or live ammunition.
Choosing Colors for Painting Guns
You have tons of color options when it comes to painting your firearms. Here are some ideas to consider:
- Black – A classic tactical color for any gun. Matches most gear and provides a sleek look.
- Flat Dark Earth – Popular camo tan color that works for military, hunting, or range guns.
- Olive Drab – Traditional military green hue that looks great on vintage firearms.
- Sniper Gray – Dark neutral gray color well suited for urban tactical firearms.
- Burnt Bronze – Rich metallic brown finish with visual depth. Looks great accented with black.
- Tungsten – Slightly greenish light gray color similar to the metal tungsten. Unique but subdued.
- Robin’s Egg Blue – Bright and attractive blue for range/competition guns. Also available in red and other colors.
- Kryptek Camo Patterns – Choice of several camo schemes like Highlander, Typhon, Mandrake etc.
- Pink – Vibrant and non-tactical color choice. Fun for recreational plinking guns.
Choose colors that fit your intended use – tactical, hunting, competition, etc. Brighter colors work well for sport shooting while neutral earth tones are good for tactical and camo needs.
Hiring a Gunsmith for Professional Painting
For expert quality paint and complex patterns like hydrographics, consider hiring an experienced gunsmith. Benefits include:
- Professional spray equipment like airbrushes and spray guns allow for finer finish details.
- Access to full disassembly for more thorough prep and painting.
- Wider range of durable ceramic and other professional-grade coatings.
- Experience with baking parts for curing baked-on coatings.
- Application of hydrographics dipping patterns.
- Ability to completely remove previous finishes through bead blasting before new paint.
- Competitive pricing in some cases vs DIY costs.
- Expert workmanship and handling of firearms.
For intricate paint jobs, airbrushed artwork, hydrodipped graphics or multicolor patterns, a professional gunsmith may provide better results than DIY attempts.
Maintaining a Painted Gun’s Finish
To keep your custom painted firearms looking their best for years, follow these tips:
- Gently clean painted surfaces with silicone or dry cloths to avoid finish wear. Avoid harsh chemicals.
- Inspect finish closely for any chips, cracks or wear and touch up as needed. Stop minor damage from spreading.
- Reapply finish coats as needed to refresh older paintwork. Strip and repaint worst areas.
- For camo patterns, periodically “re-hide” the gun with new pattern coats as existing one wears and fades.
- Don’t leave painted guns in direct sunlight for extended time as UV rays will fade the color.
- Avoid excessive handling and holster wear on high-contact areas which can rub off paint.
- Use paint-friendly lubricants like Slip 2000 EWL on moving parts. Some oils can break down paint over time.
- Ensure cleaning solvents and other chemicals won’t react with paint used. Test on small area first.
With proper care and maintenance, a quality painted gun finish should last many years and maintain its luster. Touch up wear as soon as it appears.
Ideas for Painting Guns
Beyond just new base color coats, there are many cool ways to customize your firearms through painting. Some ideas include:
- Camo patterns like forest camo, desert camo, winter white camo, etc. for hunting rifles. Use tape and netting for best results.
- Two-tone designs with contrasting slide, frame, and accessory colors on handguns.
- Cerakote bright Sniper Gray or Robin’s Egg Blue for flashy competition guns.
- Extensive airbrushed artwork covering the entire firearm with landscapes, figures, etc.
- Detailing parts like controls, sights, barrel bands, etc in a different accent color than main paint color.
- Hydrodipping graphics and simulated carbon fiber or wood grain patterns.
- Worn paint effects like chipped paint or patina style finish for vintage guns.
- Stenciled logo, text or design details using cutouts and masks.
The possibilities are endless for creating truly unique painted firearms that match your style through DIY creativity or pro custom work.
Conclusion
Custom painting allows you to refresh, personalize, and protect your firearms in any color or pattern desired. With proper preparation using durable coatings designed for guns, you can achieve professional-looking finishes through simple spray paint techniques. Or opt for a gunsmith-applied hydrographic or airbrushed paint job for show-stopping results. Whichever method you choose, make sure to prep thoroughly, apply in light even coats, and allow full curing time. Care and creativity can give your firearms a vibrant new look while maintaining complete functionality.

