
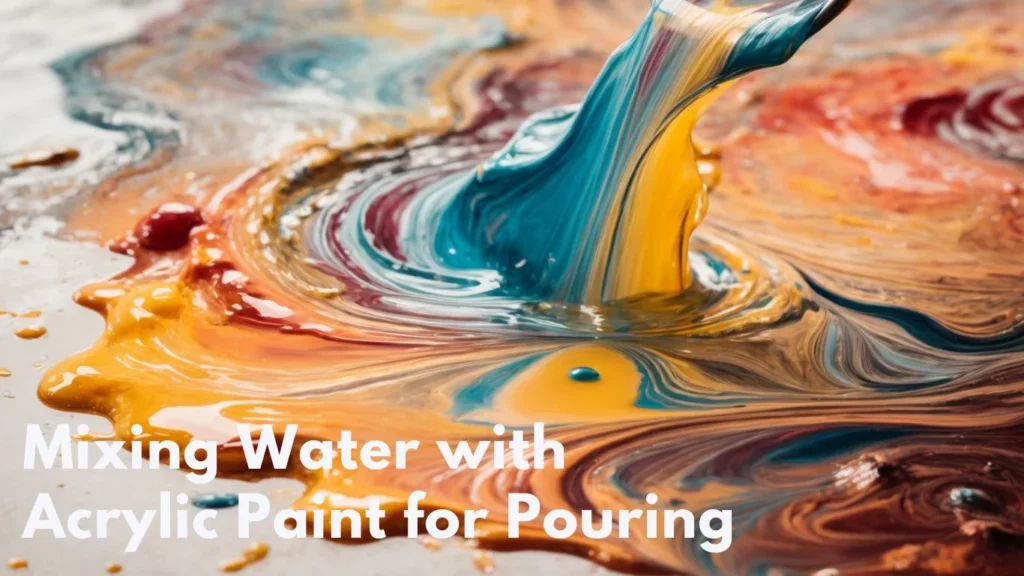
Acrylic pouring has exploded in popularity in recent years as an engaging, expressive, and beginner-friendly art form. Its free-flowing creativity makes it a great way to explore color combinations and fluid painting techniques. But what is the best way to get acrylic paint to the right consistency for pouring? One of the most common and versatile options is mixing it with water.
Why Use Water as a Pouring Medium?
Water is readily available, affordable, and easy to use. It thins acrylic paint for smooth drizzling effects. Compared to alternatives like acrylic pouring medium or Floetrol, water creates a thinner, more watery consistency. This allows acrylic paints to spread and flow freely across the canvas.
For beginners, water is the perfect introduction to acrylic pouring. All you need is paint, water, and a few basic materials to create swirling, organic designs. The fluid colors intermix and interact in mesmerizing ways.
Water also allows acrylic paints to level out on their own. This self-leveling effect helps create smooth, uniform coats of paint. Other benefits of water include:
- Evaporates quickly allowing faster drying and layering
- Won’t alter acrylic colors like some additives
- Easily adjustable consistency with more or less water
- Widely available and inexpensive
Water is an essential acrylic pouring tool. Even when using other pouring mediums, adding some water helps increase flow and interaction between colors. Mastering the basics of water mixing prepares beginners for exploring more advanced techniques.
Mixing Ratios for Water and Acrylic Paint
Determining the ideal acrylic paint to water ratio is an experimental process. No set formula works for every situation. It depends on the specific acrylic paint line and its initial viscosity. Heavy body acrylics require more water than thinner fluid acrylics.
A good starting point is mixing equal parts paint and water, such as:
- 1 cup paint to 1 cup water
- 2 parts paint to 2 parts water
This 1:1 ratio provides a baseline for testing. Adjust as needed to achieve your desired acrylic pouring consistency.
Some key factors in finding the right paint to water balance:
Paint Viscosity – Start with the manufacturer’s viscosity description. Heavy body paints need more thinning than fluid acrylics.
Add Water Gradually – Add small amounts of water and mix thoroughly before adding more. This prevents over-thinning the paint.
Test Consistency – Check the mix by drizzling on a surface. It should flow smoothly but still hold a general shape rather than disappear immediately.
Room Temperature – Warmer temperatures make acrylic paint more fluid. Cooler conditions may require slightly more water.
Canvas Absorption – Denser canvases like wood or gesso boards require more watery mixes than porous canvases.
Desired Effects – Specific techniques like balloon kissing or ring pours use thinner mixes than swipe or flip cup pours.
With experience, you’ll dial in the perfect water-to-paint ratios for different consistencies and acrylic brands. Keep detailed notes since mixes can’t be precisely duplicated.
Step-by-Step Water Mixing Instructions
Mixing acrylic paint with water for pouring requires careful attention to detail. Follow these step-by-step instructions:
Supplies Needed
- Acrylic paints – fluid and heavy body work best
- Distilled water or filtered water
- Containers for mixing
- Stir sticks
- Canvas or pouring surface
Mixing Process
- Determine how much painted pouring medium you need for your canvas size and design. Mix this amount at one time to ensure color consistency across the entire painting.
- Pour distilled water into your mixing container. Use a clear container to see the consistency easily.
- Add acrylic paint colors one at a time, starting with a 1:1 paint to water ratio. Mix thoroughly after each addition.
- Gradually add more water in small increments if needed until achieving a warm honey-like consistency.
- Avoid over-thinning the acrylic paint. Stop adding water if the mix becomes too watery or transparent.
- Use a stir stick to incorporate the water and paint fully. Mix until smooth with no streaks.
- Test consistency by drizzling paint onto a surface. It should flow smoothly and hold its shape momentarily before disappearing.
- Make small adjustments if needed. Allow any air bubbles to pop before pouring the painted medium onto the canvas.
- Combine and swirl colors as desired. Layer more coats once previous layers are dry.
- Clean tools and containers promptly after pouring to prevent drying acrylic paint from building up. Rinse thoroughly.
Troubleshooting Watery Acrylic Paint Mixes
It takes practice to master mixing acrylic paint and water. Here are some common issues and solutions:
Problem: Paint separates from water and slides off canvas
Solution: Mix needs more water to increase flow and levelling properties
Problem: Colors blend and muddy too quickly
Solution: Add less water to maintain distinct color patterns
Problem: Paint dries with bumps or divots in surface
Solution: Strain mix through filter to remove clumps and bubbles
Problem: Acrylic cracks or lifts off canvas
Solution: Paint layer was too thick, mix with more water
Monitoring the consistency and testing small batches first helps minimize problems. Keep notes on ratios that work well for your specific acrylic paints and techniques.
Using Distilled vs Tap Water with Acrylic Paint
Choosing between tap water and distilled water merits careful consideration when mixing acrylic pouring mediums.
Tap water contains minerals, chlorine, calcium, and other particles that may interact undesirably with acrylic paint. These impurities can create lumps, alter drying times, cause discoloration, or reduce paint adhesion. However, tap water is readily available and fine for informal practice pours.
Distilled water is purified through steam distillation and does not contain impurities. This makes it the top choice for smooth, professional acrylic pouring. Distilled water mixes cleanly with paints and won’t affect acrylic chemistry. It’s inexpensive and found with drinking water in grocery stores.
Filtered water from refrigerators and pitchers has less impurities than tap water but still contains some minerals. It’s an acceptable option but distilled is better for flawless acrylic pouring effects.
For clean, vivid acrylic pours, invest in distilled water. It eliminates variables so any issues stem from improper mix ratios or technique rather than water quality.
Alternative Pouring Mediums Besides Water
While water works beautifully, acrylic painters can explore other pouring mediums for different effects:
- Floetrol – Adds shine and helps acrylics spread evenly. Best for fluid, open designs.
- Elmer’s Glue – Slows drying and improves acrylic adhesion. Helps create cells.
- Pouring Medium – Specialty additives help with leveling and acrylic manipulation.
- Silicone Oil – Boosts fluidity and causes cellular patterns in the dried acrylic.
- Isopropyl Alcohol – Increases acrylic drying speed. Useful for layered techniques.
These additives can be combined with water or used alone. Each has unique properties to create dazzling acrylic pouring effects. However, mastering basic water techniques provides the foundation.
Creative Acrylic Pouring Techniques with Water
Ready to explore fun acrylic pouring techniques using water? Here are some beginner-friendly styles to try:
Puddle Pour
- Mix 1-2 acrylic colors in separate cups with equal parts paint and water.
- Pour the two colors near each other in the center of the canvas.
- Tilt the canvas slowly to blend the paints in mesmerizing patterns.
Swipe Pour
- Cover canvas with a colorful base layer.
- Pour contrasting paints mixed with water across the center.
- Drag a wet paper towel across to reveal the base coat color underneath.
Ring Pour
- Mix acrylics with water and pour into a cup in concentric rings of alternating colors.
- Pour the cup out in one spot and spread it around to create rings.
Flip Cup Pour
- Layer acrylic paint colors mixed with water into a disposable cup.
- Place cup mouth down on canvas and flip over to let paints emerge.
Balloon Kiss Pour
- Blow up a balloon and dip it in thinned acrylics to coat the balloon.
- Press balloon gently on canvas to leave a print of the acrylic bubble.
Don’t be afraid to experiment! Acrylic pouring with water allows endless creativity.
How Much Water Should I Add to Acrylic Paint for Pouring?
Finding the perfect ratio of water to add takes experimentation and depends on the paint brand and consistency desired. Start with a 1:1 ratio of paint to water. For heavy body paints, increase water up to 3:1 ratio. For fluid acrylics, use less water starting around 1:2 paint to water. Test consistency and make adjustments as needed.
Too much water makes acrylics overly thin and transparent. Too little water leaves mix too thick preventing proper flow. Getting the ratio right involves trial and error. Take detailed notes on what ratios work for your pouring techniques.
Does Acrylic Paint Mix Well with Water?
Water is an excellent mixing medium for acrylic pouring. Acrylic paint is water-based, so it readily incorporates water into the binder emulsion. Water thinning creates a smooth, pourable acrylic consistency.
However, too much water can over-thin the paint, reducing adhesion and binding power. Finding the sweet spot with the right amount of water takes practice. Test small batches first. Distilled water provides the most reliable results versus tap water with minerals.
Can You Use Tap Water for Acrylic Pour Painting?
Tap water can be used to thin acrylic painting but distilled water is better. Tap water contains impurities that may cause issues like:
- Clumping from mineral deposits
- Bubbles and foaming
- Inconsistent drying times
- Discoloration from chemicals
- Reduced adhesion
For best results, use distilled or boiled water. The purified water won’t interfere with the acrylic binder chemistry. However, tap water is fine for informal practice sessions. Just stir well before use to dissipate any chlorine.
How Do I Thin Acrylic Paint for Pouring Without Water?
Besides water, common acrylic pouring mediums include:
- Floetrol – Improves flow and surface levelling. Adds glossy finish.
- Elmer’s Glue – Slows drying time. Produces defined acrylic cells.
- Pouring Medium – Specialty blends aid manipulation.
- Silicone Oil – Boosts fluidity and causes cells.
- Isopropyl Alcohol – Speeds up acrylic drying.
These can fully replace water or be mixed with water. Each has unique benefits depending on desired effects. Floetrol makes glossy acrylic flows, while Elmer’s glue helps create patterns.
Should I Use Hot or Cold Water to Mix Acrylic Paint?
Use room temperature or slightly warm water when mixing acrylic pouring paints. Cold water from the tap can shock acrylic emulsions, making them stiff and thick. Hot water speeds up acrylic drying which causes problems.
Room temperature provides the best balance for smooth, fluid acrylic pouring consistencies. Just avoid overheating the mix, which speeds evaporation. For best results, let cold tap water sit out until it warms up before mixing.
Can You Revive Acrylic Paint After Adding Too Much Water?
It’s difficult to salvage acrylic paint after adding excessive water. The binder emulsion becomes permanently diluted. However, you can try:
- Letting the over-thinned paint fully dry into a acrylic film, then re-wetting and mixing with fresh acrylic paint.
- Pouring the ruined paint out onto an absorbent surface like paper towels or cardboard to soak up excess moisture.
- Using a hair dryer to speed up drying time if wet paint is pooled in areas.
- Adding a tiny bit of acrylic retarder to slow drying and give more working time.
- Accepting the paint is too thin for pouring and using it for color washes instead.
Next time, add water gradually and test consistency frequently to avoid over-thinning. Acrylic dries fast, so the window is small for adjustments.
How Long Does Acrylic Paint Last After Adding Water?
Acrylic paint thinned with water has a shortened working time compared to unmixed acrylics straight from the bottle. The water speeds up drying, giving a window of 1-2 hours maximum for pouring techniques.
Plan painting sessions accordingly. Mix only as much thinned acrylic as can be used within a few hours. Keep mixes sealed in airtight containers if taking a short break.
For extended delays between mixing and pouring, consider an acrylic retarder additive. This slows the drying time of water-thinned acrylics back closer to regular acrylic.
Work swiftly when pouring thinned acrylics. Have all materials and canvas prepped and ready to make the most of the shortened working time.

