
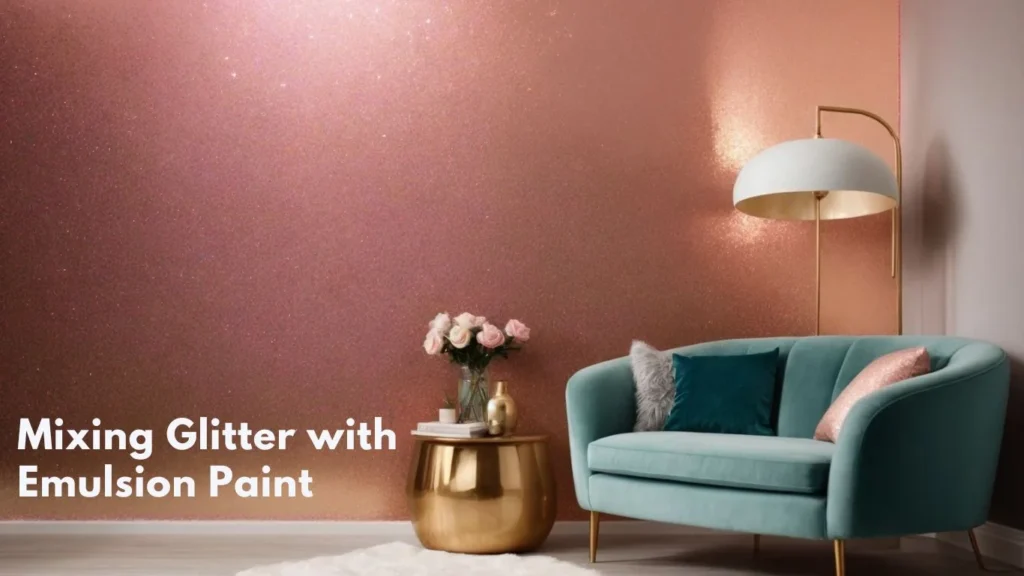
Glitter paint is a fun and creative way to add some extra sparkle and pizzazz to your walls. The reflecting light from small flecks of glitter can liven up a boring wall and make any room feel more glamorous. But getting the right glittery effect takes some finesse.
Mixing loose glitter directly into emulsion paint often results in clumping and uneven coverage. The key is using special glitter paint additives designed to mix into paint and adhere properly to walls. With the right products and techniques, you can transform your walls into a shimmering work of art.
Supplies You’ll Need
To get started with glitter walls, assemble these basic supplies:
- Emulsion paint – Latex wall paint with an eggshell, satin or semi-gloss finish works best. Flat paint is difficult for glitter to adhere to.
- Glitter paint additive – Look for premixed additives made for walls, not craft glitter. Hemway and Krylon are good brands.
- Roller with 1/2″ nap – A thicker roller helps apply glitter additive evenly.
- Brush – For cut-in work around trim and edges.
- Paint tray – To hold and mix glitter paint.
- Stir sticks – For mixing in the glitter additive.
- Painters tape – For masking off trims and edges.
- Drop cloths – Glitter can travel, so cover your floors.
- Sealer/Topcoat – A clear acrylic sealer helps glitter adhere.
Selecting the Right Glitter Paint Additive
Once you have your basic supplies, it’s time to choose a glitter paint. There are a few considerations when selecting the right product:
- Wall paint formulated – Avoid craft glitters not designed for walls. Acrylic wall paint additives adhere best.
- Latex-based – Glitter mixes best into water-based latex paints rather than oil-based.
- Desired glitter size – Additives come in fine, medium and chunky glitter.
- Color – Clear base additive or colored for a tinted sheen.
- Amount of glitter – More glitter means more sparkle. Look for high concentrations.
- Coarse or fine – Coarse glitter stands out more on walls. Fine glitter provides a more subtle sheen.
Once you decide on the right glitter paint additive for your project, determine how much you’ll need based on the wall size. Most additives cover up to 400 sq ft per quart or bottle.
Preparing Your Walls
Before breaking out the glitter, take time to properly prepare your walls for a smooth, professional glitter finish:
- Clean surfaces – Wipe away any dirt, grease or grime so paint can adhere well.
- Repair flaws – Fix any holes, cracks or imperfections with spackle and sand smooth.
- Sand glossy walls – De-gloss previously painted walls so the new paint can bond.
- Remove wallpaper – Glitter adheres best to bare drywall rather than wallpaper or other coverings.
- Mask trims – Use painter’s tape to cover baseboards, moldings, electrical outlets and light switches.
- Ventilate room – Open windows or use fans to circulate fresh air while prepping and painting.
Proper prep creates the pristine surface glitter paint needs to bond to. It also prevents imperfections from showing through your new glittery finish.
Choosing a Base Color
Glitter pops best against darker base colors versus light wall colors. Here are some top base color options for making glitter shine:
- Black – A dramatic backdrop for any glitter color, especially silver or holographic.
- Navy or dark blue – Makes lighter glitters like blue, purple or pink stand out.
- Charcoal or dark grey – Allows colorful glitter to take center stage.
- Warm neutrals – Medium to dark browns, tans, beiges or maroons work well.
- Primary colors – Deep reds, greens and purples boost same-tone glitters.
- Metallic paint – Picks up the sparkle factor of any glitter.
- Bold accent wall – Highlight glitter on one focal feature wall.
Take color cues from your home’s existing decor when selecting a base color. Paint a test patch to ensure the glitter shows up well before committing to the whole wall.
Applying the Base Color
Once you’ve prepped the wall and chosen a base color, it’s time to apply the first coat of paint:
- Use a 1/2″ or 3/4″ nap roller and angled brush to apply base color.
- Work in 3′ x 3′ sections, cutting in edges first, then rolling the main field.
- Apply paint in a “W” or crisscross pattern, blending as you go.
- Work quickly and maintain a wet edge to prevent lap marks and texture differences.
- Roll the full roller vertically first, then lightly re-roll horizontally.
- Paint two full coats allowing proper drying time between coats.
- Check walls for any drips or missed spots and smooth before moving on.
The base coat should fully cover the wall, providing an even foundation and blank canvas for the glitter topcoat.
Mixing the Glitter Paint
Once your base color has dried 24 hours, it’s glitter time! Here’s how to properly mix in glitter paint additive:
- Stir additive well – Mix for 2-3 minutes before adding to ensure uniform glitter distribution.
- Add to paint – Slowly pour glitter additive into premixed latex wall paint, a little at a time.
- Mix thoroughly – Stir mixture vigorously for 5-7 minutes to fully incorporate glitter throughout paint.
- Check consistency – The paint should flow easily and glitter should remain suspended when mixing stops.
- Remix often – Stir frequently when painting to prevent settling of glitter at bottom.
- Follow ratios – Don’t exceed recommended mix ratios or glitter may clump.
Take care not to simply dump in all the glitter at once. Slow mixing ensures even glitter coverage in your finished look.
Applying the Glitter Paint
Now comes the really fun part – rolling on the glittery paint! Follow these tips for best glitter application:
- Use a thick roller – A 1/2″ or 3/4″ nap roller helps apply the chunky glitter evenly.
- Pour paint into tray – Continuously remix glitter paint as you pour fresh batches into the paint tray.
- Work in sections – Paint 3′ x 3′ areas at a time to prevent dry edges and overlap marks.
- Roll vertically first – Load roller and roll up and down to distribute glitter evenly side to side.
- Fill in horizontally – Lightly re-roll horizontally to smooth and blend the area.
- Work fast – Maintain a wet edge so glitter blends seamlessly.
- Check for clumps – Ensure glitter isn’t clumping or sticking unevenly in certain spots.
- Feather edges – Soften edges where wall sections meet using light, blending strokes.
- Coat trim – Remove tape and carefully cut-in around trim for a polished finish.
Proper rolling technique ensures your glitter has smooth, consistent coverage across the entire wall surface.
Achieving Different Glitter Looks
Glitter paint can produce several distinctive finishes depending on your application method and materials:
- Subtle sparkle – Fine glitter or low mix ratio for delicate shimmer.
- Textured dimension – Heavy coarse glitter creates depth and catches light.
- Gradient glitter – Transition from heavy to fine glitter using a wet-blending technique.
- Accent wall – Add drama by glittering only one feature wall in a room.
- Geometric shapes – Tape off stripes, diamonds, or geometric patterns when applying glitter.
- Splatter glitter – Flicking glitter paint with a brush creates a lively splattered look.
- Glitter ombre – Paint walls darker at the top and lighter at the bottom for bold fade effect.
Test different application techniques on poster board before painting your wall to achieve the perfect custom glitter effect.
Glitter Paint Tips and Tricks
Follow these additional tips when working with glitter paint for best results:
- Size glitter correctly – Larger grit sizes works best on walls versus super fine craft glitter.
- Never sprinkle loose glitter – It will just fall off. Always use premixed glitter additives.
- Check label directions – Follow recommended mix ratios, drying times and application methods.
- Mix just what you’ll use – Glitter settles quickly once mixed so mix only needed amounts.
- Remix paint frequently – As you paint, stir the glitter paint additive often to keep glitter suspended evenly.
- Work quickly – Maintain wet edges so glitter blends smoothly across sections.
- Watch paint thickness – Too much additive may make paint too thick for spraying.
- Clean tools promptly – Glitter dries quickly and can clog sprayers and brushes.
- Apply sealer coat – A clear acrylic sealer helps adhere glitter to the wall.
- Use roller covers – Disposable roller covers prevent shedding glitter into future paint projects.
- Remove overspray – Carefully wipe excess glitter from wall outlets, trim and baseboards with a damp cloth.
- Store glitter paint well – Tightly seal mixed glitter paint and store any leftovers properly for touch-ups.
With some care and planning, you can achieve stunning glitter walls in your home. Just follow these tips for glitter that stays put!
Applying a Clear Topcoat
For maximum durability so glitter doesn’t shed easily, it’s important to apply a clear acrylic sealer or topcoat over the glitter paint:
- Allow glitter paint to dry fully, about 24 hours.
- Use water-based acrylic polyurethane sealer formulated for walls.
- Work in smaller sections applying sealer just like paint.
- For smooth results, apply two thin coats rather than one thick coat.
- Let the first sealer coat dry fully before adding the second coat.
- Follow manufacturer’s instructions for application and drying times.
The sealer binds glitter to the wall and provides protection from fingerprints, scratches and vacuum cleaners so your glitter wall maintains its sparkle.
Cleaning and Caring for Glitter Walls
Glitter walls require some special care and cleaning to keep them looking their best:
- Use a soft microfiber cloth to gently dust walls instead of abrasive scrubbing.
- Spot clean marks and stains carefully using a lightly dampened cloth with mild soap if needed.
- Avoid applying cleaners or pressure directly on the glitter or sealer coat.
- Touch up any chips or damaged areas promptly to prevent further wear.
- Limit direct sunlight exposure which can cause fading over time.
- Draw curtains or blinds during very sunny times of the day.
- Repair any moisture issues quickly to prevent sealer or paint damage.
With proper care, your gorgeous glitter accent wall can maintain its brilliance and visual impact for many years!
Amazing Glitter Wall Inspiration
Need a little design inspiration before getting started with your glitter wall project? Here are some stunning examples of glitter used creatively on accent walls:
- Geometric shapes – Bold triangles, diamonds or chevrons outlined with silver glitter.
- Sunset ombre – Gradient glitter fading from warm gold at the top to deep crimson at the bottom.
- Galaxy wall – Deep blue or purple base with holographic silver glitter.
- Polka dots – Retro fun with large dot shapes in alternating glitter colors.
- Damask pattern – Elegant vintage vibe with silver glitter damask print.
- Art deco – Sleek vertical stripes in black, silver and champagne glitter.
- Mermaid – Ocean-inspired teal and seafoam green glitter blending subtly.
- Rainbow – Whimsical glory with all colors of the rainbow glittered horizontally.
Now that you’re fully prepared to mix and apply glitter paint like a pro, it’s time to decide on your design and make your walls shine bright! With a little creativity, effort and these tips, you can achieve breathtaking glitter walls that WOW.

