
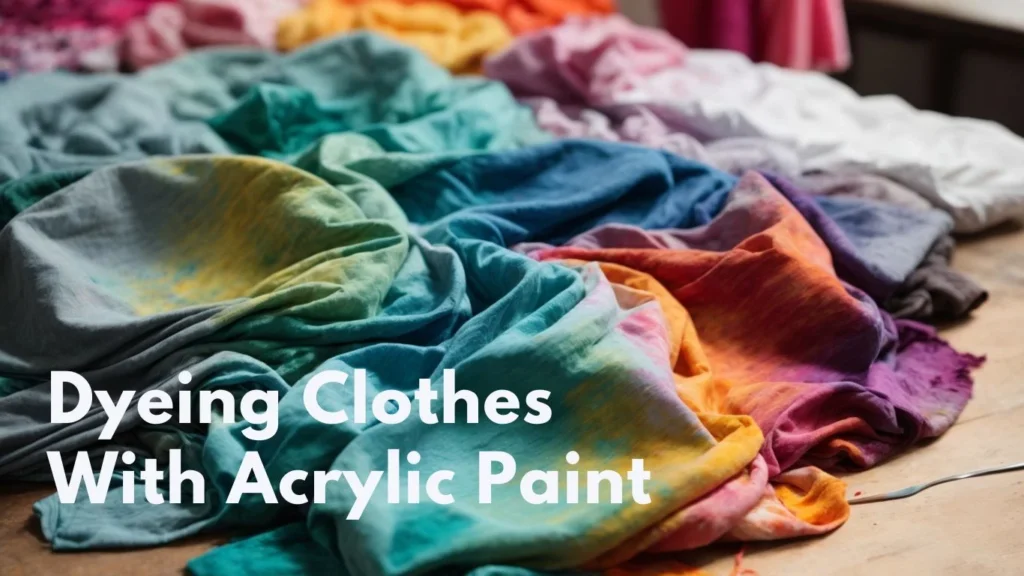
Acrylic paint is a popular medium for artists, crafters, and hobbyists. Its versatility and affordability make it an attractive option for creative projects. But did you know acrylic paint can also be used to dye fabrics and clothing? With some special considerations, acrylic paint can produce vibrant, custom colors on your clothes.
How Acrylic Paint Works on Fabric
The key thing to understand is that acrylic paint sits on top of fabric rather than dyeing the fibers. When used on fabric, acrylic paint behaves more like a pigmented coating. This means it can crack or peel off over time as the fabric flexes and moves. However, there are some steps you can take to help acrylic paint bond better and become more durable on fabric:
- Use an acrylic medium or textile medium – These help the paint flex and adhere to the fibers rather than sit stiffly on top.
- Heat set with an iron or dryer – Heat helps to fuse and seal the acrylic paint in place.
- Hand wash gently and hang dry – This prevents cracking and keeps colors vibrant.
Best Fabrics for Acrylic Paint
Acrylic paint works best on natural fabrics like cotton, linen, silk, and wool. It doesn’t adhere as well to synthetics like polyester. The porous, absorbent nature of natural fibers allows the paint to grip and bond. Start with light colors on fabric. You can always add more layers to achieve a darker hue.
How to Apply Acrylic Paint
It’s important to properly prepare and apply acrylic paint for the best fabric color results:
- Use heavy body or artist acrylics – Craft paints tend to be too thin and transparent.
- Thin with water, medium, or textile medium – About a 50/50 paint to medium ratio is ideal.
- Use soft brushes, sponges, stamps – Smooth, even application works best.
- Heat set with an iron on medium heat – Helps seal the paint.
- Additional coats can deepen colors – Allow paint to fully dry between coats.
Advantages of Acrylic Paint
While it’s not as colorfast or permanent as commercial fabric dye, acrylic paint offers some unique advantages:
- Vibrant colors – Acrylic paint comes in any color imaginable for creative effects.
- Painting effects – Acrylics can be blended, layered, marbled, and manipulated easily.
- Cost effective – Acrylic paint is affordable and accessible. A little goes a long way.
- Non-toxic – Acrylic fabric paints are water-based and free of harmful chemicals.
With some care and precaution, acrylic paint can produce stunning color effects on clothing and fabrics. Follow these tips to ensure your acrylic painted clothes stand the test of time. Let your creativity run wild!
Troubleshooting Acrylic Paint on Fabric
When working with acrylic paint on fabric, there are a few common problems that can arise. Here is how to troubleshoot some acrylic painting issues:
Paint Cracks
If you notice cracks forming in the acrylic paint after washing or wearing the item, the paint likely did not fully adhere to the fabric. Make sure to use an acrylic medium next time to improve flexibility. Also be sure to heat set the paint properly. Gently re-wash cracked items by hand to remove any loose paint.
Paint Peels Off
Like cracking, peeling occurs when the paint fails to bond with the fabric. Try a textile medium next time. Make sure to prep fabric by washing to remove sizing. Start with light layers of diluted soft body paint. Heat setting helps prevent peeling.
Fabric is Stiff
Using too much undiluted acrylic paint can leave fabric stiff and uncomfortable to wear. Always thin paints appropriately with water or medium and apply in thin layers, allowing to dry between coats fully. Add just enough paint to achieve the desired color.
Color Looks Uneven
The acrylic paint may apply unevenly leaving a splotchy or mottled look. Using proper brush techniques will help. Apply paint in smooth, even strokes. Work quickly before drying as acrylics set up fast. Blotting excess paint helps prevent uneven saturation.
Paint Won’t Dry
In humid conditions, acrylic paint can remain tacky and take much longer to dry on fabric. Move to a lower humidity area or dehumidify the room. Adding a drying retarder to paints can also prevent quick drying. Ensure paints are fully cured before rinsing or wearing.
Fabric Distorts
If fabric becomes warped, stretched or distorted after painting, the paint may be too heavy. Keep paint layers thin and lightweight. Letting coats dry fully between applications prevents distortion. Mediums help keep fabric supple. Gently reshape fabric by hand while drying.
With some adjustments and practice, you can troubleshoot any acrylic painting issues on fabric. Creatively dyeing clothes with acrylics is rewarding when done properly. Follow these tips and tricks for custom color effects.
Supplies Needed
To get started dyeing fabrics with acrylic paint, you will need to gather some basic supplies:
- Acrylic paints – Heavy body or artist acrylics work best. Avoid thin, transparent craft paints.
- Fabric medium or textile medium – Helps paint better penetrate and flex with fabric.
- Soft brushes and sponges – For applying paint smoothly and evenly.
- Fabric or clothing – Natural fibers like cotton, linen, rayon, wool.
- Water – For thinning and cleaning up acrylic paint.
- Containers – For mixing paints and holding rinse water.
- Iron – To heat set fabric paint after drying.
- Drying racks or lines – To hang and cure painted fabric projects.
- Drop cloths – To protect work surfaces from paint spills and drips.
- Gloves and apron – To keep clothes stain-free during painting.
Preparing Fabric for Acrylic Paint
Proper fabric preparation is key to achieving vibrant, lasting acrylic painted fabrics. Here are some tips:
- Wash fabric first – Remove any factory sizing or coatings that could interfere with paint adhesion.
- Consider pre-soaking – For heavy fabrics like canvas, soak in water to allow better paint saturation.
- Iron flat – Eliminate wrinkles and fabric texture that can make paint application uneven.
- Mask off areas – If not wanting entire fabric dyed, tape off sections to keep paint-free.
- Use interfacing – Apply iron-on interfacing to stiffen limp fabrics for easier handling while painting.
- Stretch fabric – For shirts, dresses or other garments, insert a cardboard panel to keep item taut while painting.
Mixing Acrylic Paint for Fabric
Acrylic paint right from the tube is too thick for fabric painting. Properly thinning it helps the paint penetrate fabric better for more even application and flexible hand.
- Use textile or fabric medium – Add roughly equal parts medium and paint.
- Try glaze medium – Helps produce transparent effects on fabric.
- Thin with lots of water – Up to 50% for thin, free-flowing consistency.
- Add a fabric flow improver – Helps paints glide smoothly onto fabrics.
- Mix into light cream consistency – Too thick paint sits heavily on fabric.
- Test on swatch first – Adjust consistency until paint glides on evenly.
Application Techniques
Once paint is prepared, there are many creative ways to apply it to fabric:
- Brushing – Use smooth, even strokes. Avoid over-brushing once drying.
- Sponging – Dab lightly for soft mottled effects.
- Stamping – Use carved erasers, corks, potatoes for patterned prints.
- Stenciling – Cut designs from cardboard as guides for repeated imagery.
- Splattering – Flick brush bristles to speckle paint. Use toothbrush or mesh screen.
- Paint pouring – For marbled patterns from dripping, swirling paint.
- Painting freehand – Use detail brushes for drawing or lettering effects.
- Spraying – Airbrush or aerosol paints work for large scale coverage.
- Resists – Block out sections with wax or glue, then paint over. Remove to reveal resisted areas.
- Blending – While wet, gently stroke two colors together where they meet.
Setting the Paint
Once applied to fabric, acrylic paint needs proper setting to become colorfast and durable:
- Air dry fully – Allow several hours or overnight before heat setting.
- Iron on medium – Place scrap cloth over painted fabric and iron 2-3 minutes to heat set.
- Tumble dry low – Tumbling on low heat can also help set the paint. Place in dryer 10-15 minutes.
- Use a heat press – For specialty fabrics like t-shirts, a heat press ensures direct contact for curing paint. Follow manufacturer guidelines for temperature, time and pressure.
- Bake in the oven – For stiff fabrics like canvas shoes or denim, baking at 200°F 25-30 minutes can set acrylic paint. Insert cardboard to retain shape.
- Steam set – Holding a garment or fabric item over a steaming kettle of water helps set colors too. Keep about 12 inches above steam.
- Allow lots of cure time – Acrylic paint continues to set and become colorfast over the first 1-2 weeks after applying. Allow new items time to cure before frequent washing fully.
- Do touch up ironing – If paint shows signs of cracking or peeling after some wear and washing, spot iron over it again to re-set the bonded areas.
Curing and Washing Painted Fabric
It’s important to let acrylic painted fabrics properly cure and set the paint before washing and wearing the finished pieces.
- Allow paint to cure 72+ hours before washing
- Gently hand wash in cold water using a mild detergent
- Avoid harsh scrubbing or detergents which can loosen paint
- Hang items to drip dry or dry flat to prevent cracking
- Repeat washing cycles gently wash out any residual paint
- Once washed, tumble dry on low or hang dry
- Heat setting with an iron can help re-seal paint after washing
- Spot clean painted clothes as needed between full washes
Over time, some fading or minor cracking of the acrylic paint is to be expected with repeated washing and wearing. But taking care with gentle cycles and air drying will help preserve the painted fabric.
Advanced Techniques
Once comfortable with the basics of fabric painting, there are many creative techniques to take your projects to the next level:
- Use a resist paste to block out designs before painting – the paste peels off later to reveal white areas
- Paint the fabric while still wet for cool watercolor bleeding effects
- Use a glue-based resist on fabric, paint over it, then wash away the glue revealing a clear resisted shape
- Crumple and wrinkle the fabric while wet with paint to create organic cracked patterns
- Paint the fabric on a block of carved foam for embossed 3D texture effects
- Use thickened paints and palette knives for impasto textures with bold brush strokes
- Get graffiti effects by layering and spraying paints through stencils or mesh screens
Combining these advanced steps with the basic techniques vastly expands your painted fabric possibilities. Don’t be afraid to experiment!
Garment Painting Tips
Want to paint vibrant designs on finished clothing items? Here are some top tips for success:
- Insert a cardboard panel while painting to keep the garment from warping
- Use fabric medium in paints to prevent stiffness on flexible clothing
- Baste pieces of a garment together to paint across seams smoothly
- Paint both sides of transparent fabrics to avoid color show through
- Mask off buttons, closures, and adjacent fabrics you don’t want painted
- For wearable art clothes, use softer draping fabrics that won’t crack paint as easily
- Hand wash gently inside out and hang to dry to protect painted exterior
- Heat set paint by hovering iron above garment – don’t press directly
With some care and planning, you can turn clothing into a colorful canvas for unique self-expression.
Improvising with Household Paints
Don’t have specialized acrylics on hand? Many household paints can work too:
- Latex wall paints offer a budget option with lots of color choices
- Water down latex house paints with a 50/50 ratio of water for best fabric application
- Craft paints work but may fade faster – add fabric medium to boost longevity
- Tempera kids paint is very transparent but non-toxic and versatile
- Milk paint is eco-friendly – just thin with water and apply in layers for opacity
- Enamel model paints bond very durably but require solvent for thinning
- Artist tube watercolor and gouache both apply beautifully to fabric
A little creativity and experimentation can uncover lots of inexpensive paint options for fabric dyeing projects.
Safety Tips
While acrylic fabric painting is quite safe compared to traditional dyeing methods, there are still some basic precautions to take:
- Work in a well-ventilated area and take breaks for fresh air
- Wear a protective face mask when spraying paints or mediums
- Use gloves and keep skin protected to avoid irritation
- Don’t spray paint near open flames as overspray is flammable
- Rinse brushes in soap and water to avoid contaminating paints
- Clean up spills immediately to prevent slick surfaces or staining
- Dispose of rinse water properly and don’t pour down household drains
- Check fabric paint labels and keep out of reach of children and pets
With some common sense safety measures, acrylic painting is both fun and hazard-free.
Inspiration and Ideas
Need some inspiration for getting started? Here are just a few ideas to spark your creativity:
- Ombre dip-dye effects – blend multiple colors in graduated tones
- Abstract expressionist paint splatters and drips
- Large graphic florals, leaves, tropical motifs
- Geometric triangles, lines, dots, zigzags
- Words, lyrics, poems, inspirational quotes
- Starscapes, planets, unicorns, dragons, mermaids
- Ethnic designs inspired by henna, mandalas, paisleys
- Artsy splatters mimicking Jackson Pollock paintings
- Customize your own fabric with original patterns and colors
Let your imagination run wild! Acrylic paint unleashes endless possibilities for decorating fabric.
So grab some paints and textile medium and try your hand at dyeing clothing and fabrics. With a few simple techniques, you can create colorful works of wearable art to make your wardrobe uniquely your own. Paint, dye, spatter and splatter to your heart’s content!

