
When it comes to interior painting projects, choosing the right paint for each surface is key to achieving a professional-looking finish. While walls and ceilings may seem interchangeable, some important differences between wall and ceiling paints impact how they look, perform, and apply.
Many homeowners wonder if they can save time and money by using leftover wall paint on ceilings instead of purchasing separate ceiling paint. While you can technically use wall paint on your ceilings, doing so has some drawbacks. In general, it’s best to use paint formulated specifically for ceilings to get optimal results.
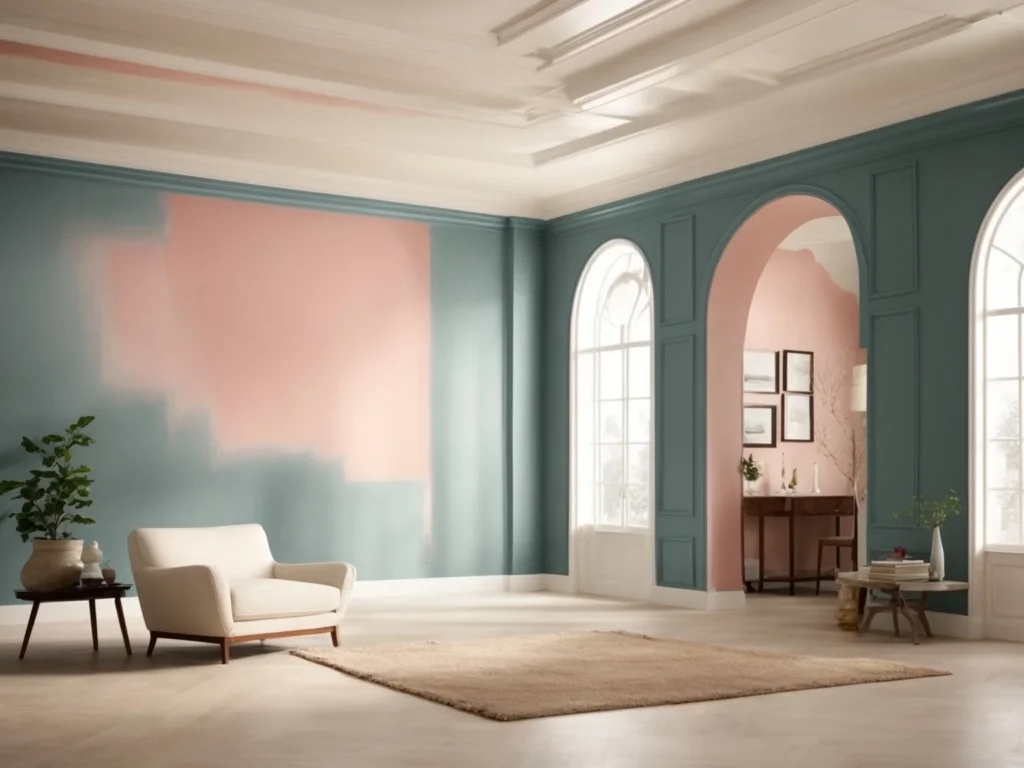
Below is an in-depth look at the differences between wall and ceiling paint, the pros and cons of using wall paint on ceilings, and tips for choosing the right paint for your project.
Wall Paint vs. Ceiling Paint
Wall and ceiling paints differ in several ways:
Composition
- Ceiling paints tend to have a higher vinyl content than wall paints. The higher vinyl composition makes ceiling paints thicker and helps prevent drips and sags when painting overhead.
- Wall paints rely more on binders like acrylic, latex, and other polymers. Wall paint has a lower viscosity so it can glide onto walls smoothly without dragging.
Sheen
- Ceiling paints come in flat, matte, or low sheen finishes that help hide surface defects. Flat paint doesn’t reflect light, keeping the focus on the walls.
- Wall paints come in a wider variety of sheens like eggshell, satin, and semi-gloss. Higher sheens make cleaning easier but also accentuate wall defects.
Hiding Power
- Ceiling paints contain more titanium dioxide pigment for maximum hiding power on ceilings. They easily cover stains, uneven textures, previous water damage or inconsistencies.
- Wall paints don’t require as much hiding power and spreadability since walls are easier to paint. They provide good color uniformity on smoother wall surfaces.
Mildew Resistance
- Ceiling paints often contain mildewcide additives to prevent mold and mildew growth in humid, moisture-prone overhead areas.
- Wall paints may offer mildew resistance depending on the paint line, but typically not as much as ceiling paints designed for bathrooms or kitchens.
Touch-Up Ability
- Ceiling paints like flat white can be touched up after several years without showing differences between the old and new paint.
- Wall paints may vary slightly between touch-ups if the color formula changes, making the new paint noticeably different.
Pros of Using Wall Paint on Ceilings
While ceiling paint is ideal for overhead surfaces, some people use wall paint on their ceilings. Here are some of the reasons why:
1. Cost Savings
For those painting on a tight budget, using wall paint can eliminate the need to buy separate cans of ceiling paint. Since you likely already have leftover wall paint from another project, putting it on the ceiling saves a few dollars upfront. However, it may cost you more in time and effort in the long run if you have to redo a subpar paint job.
2. Convenience
Using wall paint means you only have to buy, stir, and clean up one type of paint. You don’t have to deal with multiple paint cans. It also allows you to paint the ceiling and walls simultaneously without stopping to change between paints.
3. Uniform Look
Applying the same wall color to the ceiling can create a seamless, cohesive look. If you’re painting the walls and ceiling the exact same shade of white or another color, wall paint may suffice to achieve a uniform appearance.
4. Suitable for Minor Ceiling Imperfections
Flat wall paint may provide sufficient coverage to mask imperfections for ceilings that are in good overall condition with only minor surface flaws. There’s no need to buy ceiling paint if you don’t require heavy hiding power.
5. Lower Odor
Some homeowners find the smell of certain oil-based ceiling paints overpowering and unpleasant. Using water-based latex wall paint instead can provide lower odor and faster drying.
Cons of Using Wall Paint on Ceilings
On the other hand, here are some potential drawbacks to be aware of when using wall paint on ceilings:
1. Increased Risk of Drips and Runs
Since wall paint is thinner than ceiling paint, it’s much more prone to dripping when applied overhead. Gravity causes it to run down before drying. This can lead to unsightly drips and uneven coverage requiring additional coats.
2. May Require Additional Coats
The lower hiding power and spreadability of wall paint often means needing to apply multiple coats to cover ceiling imperfections fully. Ceiling paint’s thicker consistency provides better coverage in fewer coats.
3. Quicker Dirt Accumulation
Due to its lesser durability and stain-resistance than ceiling paints, wall paint may become dirty, dingy, or yellowed faster when used on ceilings.
4. Less Mildew Protection
In bathrooms, kitchens, and other rooms prone to moisture buildup, wall paint won’t prevent mold and mildew growth as well as paints formulated with mildewcides for ceilings.
5. Mismatched Touch-Ups
Years later when it’s time to spot paint, the existing wall paint on the ceiling may no longer match the newer formulation of the same color. Variations between old and new paint are more obvious.
6. Flat Finish Shows Flaws
While flat wall paint helps hide imperfections on matte walls, it reflects light differently on smoother ceiling surfaces. Any uneven textures or flaws become more visible.
7. Lack of Bright Whiteness
Most wall paints don’t have the blue undertones that make ceiling paints appear clean, bright white. Wall paint may look dingy or yellowed by comparison.
Factors to Consider When Choosing Ceiling Paint
If you decide to use speciality ceiling paint, here are some factors to take into account when selecting the best product:
Paint Finish
- Flat, matte, and eggshell finishes perform well on ceilings by helping conceal imperfections while avoiding high reflectivity.
- Higher sheen paints like satin or semi-gloss are unsuitable for ceilings as they accentuate flaws and create glare.
Coverage Capability
- Look for ceiling paints touting “one coat coverage” or “hides in one coat” to avoid needing multiple coats.
- Stains, patches, uneven textures, and dark colors require paints with maximum hide for complete coverage.
Mildew Resistance
- In damp rooms like bathrooms, prioritize paints formulated with mildewcides to inhibit mold growth.
- Look for ceiling paints for basements and laundry rooms that resist humidity and moisture damage.
Color Options
- White is the most common ceiling color for its light reflection and brightening effect.
- Coordinate ceiling color with your wall color for a cohesive look, while avoiding matching whites.
- Bright, deep-tone ceiling colors can make overhead spaces feel more intimate.
Specialty Options
- Consider acoustic ceiling paints that dampen sound echoes in media rooms or music spaces.
- Radiant barrier paints for hot climates can reflect heat and lower cooling costs.
Price
- While higher priced doesn’t always mean higher quality, inexpensive ceiling paints may contain fewer solids for coverage.
- Invest in more expensive paints for ceilings with heavy water damage or deep stains to mask flaws fully.
Brand Reputation
- Look for top brands known for ceiling and primer paints like Behr Premium Plus, Sherwin-Williams ProMar, Benjamin Moore Ultra Spec, and Valspar Reserve.
Tips for Painting Ceilings
Once you’ve selected high quality ceiling paint, follow these tips to get flawless results:
1. Prepare the Ceiling Surface
Fill cracks, smooth textures, patch holes, remove loose paint, and clean grease and dirt so paint adheres well. Lightly sand glossy areas.
2. Cut In Ceiling Edges First
Use a brush to carefully “cut in” around the ceiling perimeter near walls and trim before rolling the central area. This prevents drips.
3. Use a High Nap Paint Roller
Choose a 1/2″ or 3/4″ nap roller to apply an even coat without constant reloading. Angled roller extensions provide easier overhead reach.
4. Divide Large Ceilings into Sections
On expansive ceilings, work in smaller 3′ x 3′ sections to keep a wet edge and ensure uniformity as you go.
5. Apply Multiple Thin Coats
Adding multiple thin coats creates a smoother finish than trying to get full coverage in one thick coat which can sag.
6. Work Quickly to Minimize Lap Marks
Maintain a steady pace so each section is painted within the paint’s open time before drying. Overlapping dried areas creates visible lap marks.
7. Paint Perpendicular to Light Sources
Position yourself to roll perpendicular to any windows or light fixtures. This makes it easier to see any areas you missed.
8. Inspect from Multiple Angles
View the ceiling from all sides of the room after each coat to ensure you have even coverage, with no sags or misses.
9. Apply Extra Coats Near Vents
Air flow near HVAC vents can cause paint to dry too quickly before adhering well. Add additional coats near vents as needed.
10. Paint Ceiling First, Then Walls
Finish cutting in and rolling the ceiling before moving on to the walls. This prevents drips from overhead hitting freshly painted walls.
11. Allow Proper Dry Time
Give ceiling paint several hours to dry completely according to manufacturer guidelines before doing touch-ups or second coats. Proper drying prevents uneven sheen.
12. Apply Primer on Severely Stained Areas
For water stains or very dark ceiling surfaces, apply a stain-blocking primer like Kilz before applying ceiling paint for best concealment.
13. Maintain Proper Ventilation
Open windows and use fans to provide good airflow and help paint dry thoroughly, especially in humid climates. This also dissipates paint fumes.
14. Watch for Sagging near Textured Areas
Heavily textured popcorn or stippled sections require extra care when painting nearby. Roller pressure can cause wet paint to seep into textures.
Solutions for Ceiling Paint Problems
If you do run into issues when painting your ceiling, here are some troubleshooting tips:
Drips and Runs
- Allow paint to dry fully then scrape off drips with a putty knife.
- Sand smooth any raised drips before repainting.
- Apply thicker coats or ceilng paint instead of thin wall paint.
Streaks and Lap Marks
- Roll over marks with extra downward pressure to blend before drying.
- Apply paint uniformly from a pan instead of roller for very smooth ceilings.
Flashing on Repainted Areas
- Apply a primer/sealer coat over old paint before adding new ceiling paint.
- Allow each coat to dry fully before adding another to prevent flashing.
Poor Coverage of Stains
- Switch to an oil-based stain-blocking primer if water-based paint doesn’t conceal stains.
- Or use a thicker ceiling paint formulated with high hiding pigments.
Uneven Sheen on Touch-ups
- Always clean surface before patching peeling paint or water spots.
- Feather out edges for a smoother transition between old and new paint.
Mildew Growth in Bathrooms
- Clean ceiling fully with bleach solution and let dry before priming and painting.
- Use bathroom-rated ceiling paints with mildewcide additives.
FAQs About Painting Ceilings
Should I use flat, matte, or eggshell paint on my ceiling?
Flat or matte paint is best for hiding imperfections on ceilings without adding any reflective sheen. Eggshell offers a bit of durability while still providing a subtle finish.
How long does it take ceiling paint to dry?
Most ceiling paints dry to the touch within 1-2 hours at 70°F. Full drying and curing takes around 24-48 hours. Proper ventilation speeds dry time.
Should ceiling and wall paint colors match or coordinate?
Matching ceiling and wall colors can sometimes look odd. Often white or off-white ceilings contrast nicely with colored walls. But you can coordinate similar hues.
Can you use regular roller paint brushes for ceilings?
Yes, angled rollers work well. Look for rollers with longer nap synthetic or microfiber covers to apply ceiling paint smoothly and evenly.
Do you need to prime already painted ceilings before repainting?
If the existing paint is intact, you likely don’t need primer. But primer helps cover stains and improves adhesion on glossy or peeling ceilings.
Conclusion
While it may seem quick and convenient to use leftover wall paint on overhead surfaces, ceiling paint ultimately provides better results on ceilings. Formulated specifically for ceilings, it applies easily without drips, hides flaws, and provides long-lasting protection and coverage. Investing in quality ceiling paint matches your needs helps ensure a professional paint job.
Carefully prepping ceilings, choosing flat or matte finishes, applying multiple thin coats, and properly ventilating the space also contributes to a successful ceiling painting project. With high quality ceiling paint and proper application techniques, you can achieve beautiful, flawless ceilings.

