
Skim coating is a process of applying a thin layer of joint compound or plaster over a surface to smooth imperfections and create a uniform finish. It is commonly used on walls and ceilings to prepare them for painting or wallpapering. A frequent question that arises is whether you can skim coat directly over existing paint rather than removing the paint first.
The short answer is yes, you can skim coat over paint in most cases. However, there are some important factors to consider to ensure proper adhesion and a quality finish. Proper surface preparation and application techniques are key when skim coating over paint.
Should I Remove Paint Before Skim Coating?
In most situations, it is not necessary to completely remove old paint before applying a skim coat. Lightly sanding the surface and cleaning it thoroughly is usually sufficient preparation for skim coating over existing paint. Here are some general guidelines on whether paint removal is recommended before skim coating:
- Flat or matte paints: Skim coating directly over these low sheen paints typically works well. The porous surface provides texture for the skim coat to adhere to.
- Glossy paints: Due to the smooth, non-porous surface, glossier paints can cause adhesion issues for skim coating. It is best to degloss first by lightly sanding or using a deglossing liquid.
- Dark colors: Very dark paints like deep reds or browns can sometimes bleed through the skim coat. Priming over them first is recommended to prevent discoloration.
- Severely damaged/peeling paint: If the existing paint is very damaged, with major peeling or cracks, it is best to remove loose paint so the skim coat bonds to a solid surface.
- Heavy buildup of old paint: Thick layers of old paint may become prone to peeling over time. Stripping back excessive paint buildup can help the skim coat last longer.
- Drywall repairs: If drywall joints or repairs are underneath the paint, you may get indentations as the paint and joint compound dry at different rates. Skim coating directly over new drywall repairs is best.
Only removing paint that is loose, glossy, or extremely thick is recommended. A good general sanding and cleaning is often all that is needed prior to skim coating over existing flat paints.
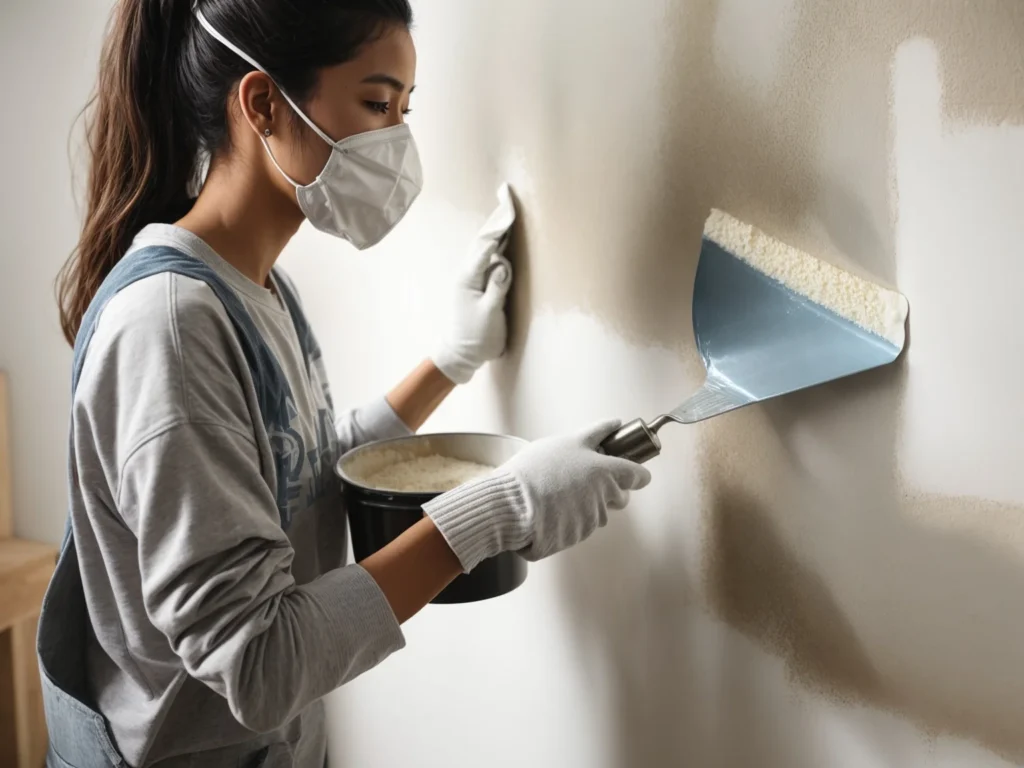
How to Apply Skim Coat Over Painted Walls
Once you have determined the existing paint is suitable for skim coating over, the next key is proper application techniques. Here is a step-by-step guide for skim coating over painted walls:
Supplies Needed
- Drywall joint compound (all-purpose or topping compound)
- Joint knife or trowel
- Sanding pole and sandpaper
- Paint roller and tray
- Primer (for glossy paints)
- Plastic sheets or painters tape (for protecting floors/furniture)
Surface Preparation
- Clean the walls thoroughly to remove any dirt, grease, or other contaminants that could impede adhesion.
- Lightly sand the walls using 150-220 grit sandpaper to scuff up the surface. This helps the skim coat grip.
- Use a damp cloth to wipe away any dust after sanding. Let the surface dry completely before skim coating.
- Apply primer if coating over glossy paints. This optional step helps rough up slick surfaces.
Mix the Joint Compound
- Mix up drywall joint compound per package directions, to a smooth, lump-free consistency.
- Let it sit for 5-10 minutes so bubbles can rise to the surface.
- remix before starting to skim coat. The consistency should be thin, similar to a thick pancake batter.
Apply First Coat
- Use a joint knife or trowel to apply a tight, thin layer of joint compound over the wall.
- Spread it on evenly, keeping the coat as smooth as possible. Apply in 3×3 foot sections.
- Let the first coat dry fully before sanding or applying a second coat. Drying times vary based on humidity.
Sand and Repeat
- Once dry, gently sand any high spots or trowel lines smooth. Avoid scuffing down to the paint.
- Vacuum away dust and wipe clean.
- Apply a second, thin coat of joint compound if needed to even out the surface. Allow to dry fully.
- Sand again lightly if needed, then wipe clean.
Prime and Paint
- Once you achieve a smooth, uniform skim coat, apply a coat of high quality primer to seal the surface.
- After priming, the walls can be painted or wallpapered over.
- Take care not to damage the smooth finish when moving furniture or hanging wall decor.
The skim coating process takes some finesse and practice to master, but is very effective for smoothing textured or damaged walls under new paint. The keys are proper surface prep, thin even coats, adequate drying time, and a gentle final sanding. Be patient through the process and the end results will be worth it.
Can You Skim Coat Over Painted Ceilings?
In addition to walls, skim coating is often used to improve the appearance of popcorn or heavily textured ceilings. With ceilings, gravity becomes a factor to consider when applying a skim coat over existing paint. But with care and preparation, it can be an effective ceiling resurfacing technique.
Here are some tips for successfully skim coating over painted ceilings:
Use a thinner consistency mix – Gravity will naturally pull the joint compound thinner as you work overhead. Aim for a pancake batter-like consistency rather than thicker mud.
Apply thinner coats – Heavy coats are prone to dripping and sagging on ceilings. Keep coats thin, in the range of 1/16″-1/8″ thickness. Allow complete drying between applications.
Work systematically in small sections – Dividing the ceiling into 3×3 or 4×4 foot sections helps control overlap and make sure the coats stay consistent.
Load the trowel lightly and hold at a low angle to prevent drips. Remove excess compound frequently as you work. Applying it in a crisscross pattern helps ensure even coverage.
Smooth gently – A very light touch when smoothing is key to avoid pulling down or dripping the skim coat. Feather each pass to blend edges.
Use caution at edges and seams – Take extra care smoothing and blending the skim coat at any seams or borders to prevent cracks or thick edges.
Allow lots of drying time – Drying will take longer with thin ceiling coats. Give each application at least 24 hours to dry thoroughly before sanding or adding more layers.
As on walls, a prime and paint finish will seal and protect the skim coated ceiling. Proper prep to rough up glossy paint, combined with thin, methodical applications will lead to success with skim coating over existing painted ceilings. The results are well worth the effort and care taken in the process.
Frequently Asked Questions
Now that we’ve covered the basics of how to skim coat over existing painted surfaces, here are answers to some other common questions that come up regarding this technique:
What kind of joint compound should I use to skim coat over paint?
All-purpose joint compound works well for most skim coating projects. It spreads smoothly and has good adhesion. Topping or finishing compound is another option that dries harder and sands easily for a super smooth finish. Avoid lightweight spackling as it can dry too quickly and shrink.
Does skim coating work on all types of paint?
Skim coating adheres best over flat, low sheen paints. Glossy surfaces should be dulled for the best results. Oil-based paints can sometimes cause adhesion issues with skim coats as well. If skim coating over unknown paint types, test a small area first.
How many coats of joint compound are needed to skim coat?
This varies based on the surface condition, but 2-3 thin coats is typical. Allow thorough drying between coats. It’s better to do multiple thin coats rather than one thick application to prevent cracking and shrinkage of the joint compound.
Can I use a paint roller to apply joint compound when skim coating?
Applying joint compound with a paint roller is not recommended. It tends to create air bubbles and an uneven coat. Use a joint knife or trowel instead for best results. Rollers are best reserved only for the final priming and paint coats.
How long does it take for joint compound to dry when skim coating?
Drying time depends on temperature, humidity, ventilation, and thickness. In general, allow 24-48 hours between coats. Quick-drying joint compounds are available but may not create as smooth a finish. Be patient and allow proper drying to prevent problems.
Do I have to sand between coats when skim coating?
Light sanding between coats helps smooth any trowel lines, ridges, or high points before applying the next layer. Use 150-220 grit sandpaper and avoid scuffing down to bare.
What grit sandpaper should be used when skim coating?
Use a medium grit sandpaper in the range of 150-220 grit for skim coating projects. Higher grits over 220 can overly smooth the surface, preventing the next coat from adhering. Lower grits under 150 can scuff down too much and expose the original paint.
How smooth of a finish can be achieved when skim coating over paint?
With proper technique, skim coating over paint can achieve a smooth, pro-quality finish. But it takes time, patience, and multiple thin coats to level out the surface. Each coat will improve smoothness, but 3-5 may be needed for perfection.
Can you skim coat with regular drywall mud?
Pre-mixed drywall mud is convenient but not ideal for skim coating. It tends to dry too quickly and shrink. Mixing joint compound powder allows controlling the thickness. But pre-mix can work in thin coats if needed.
Is skim coating good for ceilings?
Yes, skim coating is an excellent resurfacing option for textured or acoustic ceilings. It can cover heavy textures and popcorn ceilings to create a smooth, seamless appearance before repainting. Proper prep and thin coats are key.
Is skim coating hard to do?
Skim coating is a learned technique that takes some practice. Getting a perfectly smooth, flawless finish takes skill, patience, and finesse. But with some experience, it is very doable for DIYers willing to take the time to learn.
Can I use a paint sprayer to skim coat?
Applying joint compound with a paint sprayer is challenging. It requires extensive thinning and straining to avoid clogs. Trowel or knife application gives a more controlled coat. Sprayers work better for priming and painting after skim coating.
Will joint compound stick to shiny surfaces?
Joint compound bonds best to porous, slightly textured surfaces. High-gloss and very slick surfaces can cause adhesion problems. Lightly deglossing with sanding helps create texture for the skim coat to grip.
What are the advantages of skim coating vs new drywall?
Skim coating is far less labor intensive than removing old drywall and hanging new sheets. It also generates less waste. The results can yield a similar smooth surface when done properly. Skim coating is a cost and time-effective resurfacing method.
Can you put plaster over painted drywall?
Yes, thin plaster coats can be applied over existing painted drywall. The plaster adds a very smooth, solid surface for painting. The process is similar to skim coating but requires a primer coat first to aid adhesion.
Final Thought
Skim coating over existing painted surfaces is a smart technique to improve wall and ceiling appearances without extensive removal and hanging of new drywall. With proper preparation and application, painted surfaces can be refreshed to a smooth, professional-grade level suitable for high-quality repainting or wallpapering.

