
Hydro dipping, also known as water marbling, has become an extremely popular technique for creating unique and eye-catching finishes on various items. The swirling, marbleized patterns achieved through hydro dipping can transform plain objects into works of art.
While spray paint is the most common type of paint used for hydro dipping, many people wonder if standard acrylic craft paints will also work for this technique. In short – yes, you can hydro dip using acrylic paints; however, there are some important factors to consider.
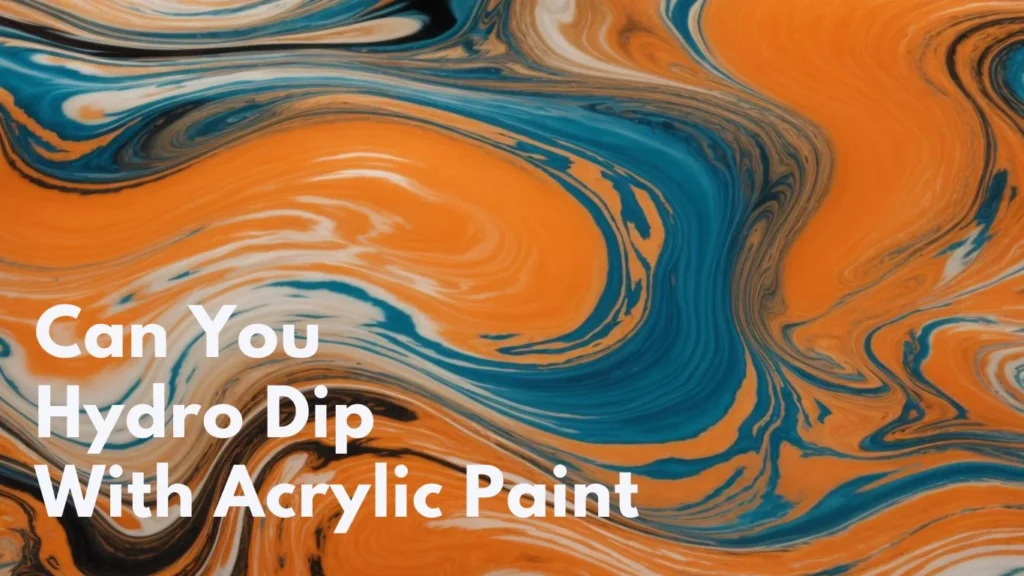
How Hydro Dipping Works
Before diving into using acrylics, it’s helpful to understand the basics of how hydro dipping works. Hydro dipping involves floating paint in a pattern on the surface of water, then dipping an item into the paint to transfer the design.
The process starts by filling a tub or tank with enough water to submerge the object you are looking to dip fully. The water must be clean and free of any contaminants that could mar the paint design. Many hydro dippers recommend using distilled water to achieve the best results.
Paint is then dropped onto the surface of the water in a swirling or swirling pattern. Special hydro dipping paints are formulated to spread thinly and float on the water’s surface. When the paint is applied correctly, it will spread and swirl together to create unique patterns.
Once the paint has been applied in the desired design, the object to be dipped is slowly lowered into the water through the floating paint. As the object passes through the paint, the coating sticks and adheres to the surface. When lifted back out of the water, the object will be covered in the hydro dipping design.
Why Acrylic Paint Needs Modification
Standard acrylic craft paint is much thicker than specially formulated hydro dipping paints. Acrylic paint’s thickness makes it more difficult to get it to float and swirl on the water properly.
Without modification, if you try to hydro dip with regular acrylic paint, here is what will likely happen:
- The paint will sink and collect at the bottom of the tub rather than floating on the surface.
- The paint will not spread evenly and will leave thick globs and bare patches.
- The pattern will not marbleize or blend together well.
- The paint will slide off the object rather than adhering as it is dipped.
So while it is possible to hydro dip with acrylic paints, the paint needs to be thinned out so that it will behave more like an actual hydro dipping paint.
How to Thin Acrylic Paint for Hydro Dipping
There are a few different additives you can mix with acrylic paint to thin it out for hydro dipping use. Here are some of the most common options:
Adding Borax
Borax is one of the most popular and effective products used to thin acrylic paint for hydro dipping. Borax works to break down the binders in the acrylic paint, decreasing its viscosity.
To thin paint with borax, use approximately 1-2 teaspoons of borax per 1 cup of paint. Mix the borax into the paint thoroughly until it reaches a thinner, inky consistency.
The borax will allow the paint to float better on the water as well as increase the paint’s ability to spread evenly. Borax also helps intensify and blend colors.
Using a Pouring Medium
Pouring mediums are additives specifically designed to thin out acrylic paint and make it more suitable for fluid art techniques. Most brands of acrylic paint have specially formulated pouring mediums.
A pouring medium has less of a thinning effect compared to borax, but still decreases the viscosity of the paint. Using a pouring medium helps the acrylics fully immerse in the water and level out smoothly.
Use a pouring medium in approximately a 1:1 or 1:2 ratio with the acrylic paint.
Adding Water
For an easy solution, you can thin out acrylic paint with regular water. Use distilled water rather than tap water, as impurities in tap water can affect the drying and adhesion of the paint.
Add small amounts of water at a time, mixing thoroughly until the paint becomes thinner and begins to drip easily off a stir stick. Use roughly 1 part water to 2 parts paint, adjusting as needed.
Too much water can make the paint overly thin and transparent. The paint should still have enough pigmentation to create vibrant swirls.
Trying Alcohol Inks
Rather than attempting to thin heavy acrylic paints, an alternative is to use alcohol inks. Alcohol inks are very thin, dye-based inks that flow freely and contain alcohol as the carrier.
Alcohol inks are produced in a wide variety of bright, vivid colors perfect for hydro dipping. Alcohol inks need no preparation and can be dropped directly onto the water. The inks naturally spread into colorful patterns with bold color blending.
Alcohol inks allow you to achieve bright hydro dipping effects without needing to mix and prepare paints beforehand. They are beginner-friendly and a great option if you want to start hydro dipping quickly and easily.
Step-by-Step Guide to Hydro Dipping with Acrylics
Once you have your acrylic paints thinned out and ready to use, follow these steps for the hydro dipping process:
1. Prepare Your Work Area
Hydro dipping can get messy, so make sure your work surface is protected. Cover the area with plastic sheeting, tarps or newspaper. Wear an apron, old clothes and gloves to keep yourself protected as well.
Set up the hydro dipping tub or tank and fill it with enough distilled water to submerge the object you’ll be dipping fully. Have paper towels or rags on hand to quickly clean up any spills or splatters.
2. Prepare Your Object
Properly prep and clean the surface of the item you are hydro dipping. Remove any dirt, oils or coatings so the paint can properly adhere.
If needed, apply a primer coat first and let it fully dry. This helps the hydro dipping paint stick better.
Attach any hooks, wires or hangers to your object before starting. Trying to add attachments later can damage the dried hydro dipping design.
3. Thin and Prepare the Paint
Take your acrylic craft paint and thin it out using one of the methods above – borax, pouring medium, water or alcohol inks all work.
Make sure the paint has a thin, inky consistency so it will swirl easily across the water’s surface. Test a small amount on the water to ensure it spreads well before moving forward.
Set out a range of colors you want to use to create your unique hydro dipping patterns. Having 4-6 colors on hand works well. Arrange the cups of thinned paint near the dipping station.
4. Apply the Paint to the Water’s Surface
Once your paint is fully prepared, you can begin dropping colors onto the water. Start by dripping, pouring or spraying a base coat in a light color across the tub’s surface.
Next, begin layering on additional colors in a swirling, circular pattern. Alternate colors as you work to create interest and vibrancy. Apply the paint in a light, sweeping motion without disturbing the water too much.
Let the paint spread and marbleize on its own. Continue layering colors until you are satisfied with the design.
5. Dip the Object
When you are pleased with the paint pattern created, it is time to dip! Slowly lower your object straight down into the center of the design. Gradually submerge it fully under the water.
Leave the object fully dipped for 10-20 seconds to allow the paint to adhere fully. Then slowly lift it straight up and out of the tank.
As it emerges, you will see the paint begin to cling to the surface. Once fully removed, you have a hydro dipped object!
6. Dry and Finish the Piece
Allow your hydro dipped item to dry fully suspended or resting on drying racks. Do not touch or try to move the piece while wet or you may smear the still-tacky paint.
Once the painted coating is dry, you can finish the piece with any desired sealants or clear coats for added protection and sheen.
Enjoy your completed hydro dipped project! Acrylic paint allows you to hydro dip easily at home without specialized paints.
Tips for Successfully Hydro Dipping with Acrylics
Here are some key tips to follow when hydro dipping with thinned acrylic paint:
- Always use distilled or purified water to avoid contaminants.
- Work in a well ventilated area when using products containing alcohol or solvents.
- Carefully layer the paint for best swirling results. Quick, light motions work best.
- Test your paint consistency and application on cardboard before dipping the final object.
- Make sure paint is fully dry before sealing or touching the hydro dipped item.
- Clean the water surface and change the water regularly for best results.
Common Hydro Dipping Mistakes to Avoid
It can take some trial and error to master the acrylic hydro dipping process. Here are some common errors to avoid:
- Allowing the paint to become too thick and gloopy. This prevents even spreading on the water.
- Moving or disturbing the water’s surface too much when applying paint. This can ruin the swirl pattern.
- Dipping the object too quickly or slowly. The speed should be a gradual, steady motion.
- Moving or bumping the tank during the dipping process. This can mess up the paint design.
- Removing the object before the paint has time to adhere. Wait at least 10 seconds before lifting out.
- Letting paint dry on the water’s surface between dips. Always change water if it becomes dirty.
- Allowing dust, lint or debris into the paint or water. Cover the tank when not in use.
- Dripping too much paint onto the water’s surface. Start sparingly and build up.
- Not cleaning oil, grease or coatings off the dipping object. Paint won’t stick to dirty surfaces.
- Skipping primer on porous surfaces like wood or fabric. Primer gives the paint something to bind to.
- Letting a freshly dipped object touch anything while still wet. Keep it suspended until fully dry.
With practice and patience, you can master hydro dipping using thinned acrylic craft paints. Pay attention to the consistency and application of your paints as well as the dipping motion for best results.
Creative Acrylic Hydro Dipping Design Ideas
One of the great benefits of hydro dipping with acrylics is the ability to create vibrant original designs. Here are some fun pattern ideas to try on your hydro dipped projects:
Marbleized Looks
Use colors like black, white, grays and blues layered on top of each other to create natural-looking marble patterns. The swirling acrylics will resemble stone when dipped.
Artistic Abstracts
Let the paint swirl into abstract stained-glass style shapes and designs. Contrasting colors work well for this.
Faux Granite or Stone
Capture a granite or natural stone appearance. Use beiges, whites, blacks and grays applied in short bursts rather than swirls.
Wood Grain
Thin brown and black acrylics diluted with alcohol inks make a faux wood grain finish when dipped. Add cream or tan for contrast.
Metallic Shimmer
Incorporate gold, silver, copper and other metallic acrylic paints or alcohol inks for a shimmery, holographic effect.
Lava Lamp
For a colorful retro lava lamp look, mix bright neon acrylics into the swirling design. Yellows, pinks, oranges and greens work well.
Best Surfaces for Hydro Dipping with Acrylic Paint
Nearly any object can be hydro dipped, but some surfaces provide better results than others when using thinned acrylic paint. Ideal options include:
- Plastic – Plastics like PVC, ABS, polyresin or metalized plastic adhere very well to acrylic paint. Smooth plastic works best.
- Wood – Apply a primer first, but hydro dipping allows fun acrylic finishes on small wooden items. Avoid porous woods.
- Canvas – Stretch canvas makes a great painting surface for hydro dipping acrylics.
- Glass – Smooth glass, vases, ornaments and lamps accept hydro dip coatings nicely.
- Metal – Some metals can repel water-based acrylics, so clean and prime first for best adhesion.
- Hard surfaces – Ceramics, fiberglass and finished wood all make ideal hydro dipping candidates. Avoid porous materials.
Items with a smooth, non-absorbent surface allow the thinned acrylics to spread and cling fully. Avoid using hydro dipping acrylics on fabrics or unsealed porous materials which will absorb the paint unevenly.
Hydro Dipping Safety Tips
While hydro dipping with thinned acrylics is relatively safe, be sure to follow these precautions:
- Work in a well-ventilated area, especially when using alcohol inks or solvents to thin paints.
- Wear gloves, goggles and protective clothing to avoid splatters.
- Keep spray bottles, liquids and project surfaces away from any ignition source.
- Use eye protection and respiratory masks when appropriate.
- Store paints, thinners and mediums properly sealed in between use.
- Clean up spills immediately to avoid slips or falls.
- Dispose of waste properly. Allow paint-contaminated water to dry before disposal fully.
- Supervise children closely and keep small items that could pose a choking hazard away from small children.
Following basic safety practices will allow you to enjoy the creative process of hydro dipping with thinned acrylics.
FAQs About Hydro Dipping with Acrylic Craft Paint
Can I use acrylic paint from the craft store for hydro dipping?
Yes, most standard acrylic craft paints will work for hydro dipping, provided you thin them out properly with borax, water, pouring medium or alcohol inks. The thick paint needs to be diluted so it will spread on the water.
Does the brand of acrylic paint matter?
Liquitex, Golden, Craftsmart, Folkart and similar acrylic brands from art stores all work well for hydro dipping. Avoid super budget paints which may have poor pigmentation or flow properties.
How many acrylic colors should I use?
Plan on using 3-6 colors in your hydro dipping design. Too few colors will not blend well, while too many colors quickly turn to mud. Aim for contrasting colors that complement each other.
Can I do multiple dips with acrylic paint?
It’s best to limit your project to a single dip rather than re-dipping multiple times. The water can become contaminated and acrylic paint does not bond as well to itself when dry.
How durable is hydro dipped acrylic paint?
Thinned acrylic paint will not be as protective or durable as spray paint, but sealing it well with a clear topcoat spray will help protect the finished design. Handle gently as hydro dipped acrylic can chip if scraped or knocked hard.
Achieving Stunning Hydro Dipped Results with Acrylic Craft Paint
With proper thinning and application, acrylic craft paint can produce stunning hydro dipping effects. The key is ensuring the paint will float evenly across the water’s surface and adhere to the dipped object.
Thinning the acrylics with borax, water, alcohol inks or pouring mediums transforms them into viable hydro dipping paints. Carefully layer the colors and allow them to blend together before dipping your object to achieve beautiful marbled finishes.
With a bit of practice, hydro dipping with acrylics opens up limitless options for creating faux finishes. Let your creativity run wild and enjoy designing completely custom hydro dipped pieces!

